LiveBOM
This walk-through demonstrates how to use LiveBOM to ensure all parts in your design remain active and mapped throughout the design process in OrCAD X Capture 23.1. After you complete this topic, you will be able to:
- Import the design into LiveBOM
- Match components with part numbers
To follow along, continue with the design from the last topic or use the provided design files. If the design files were not downloaded in the beginning of the Capture Walk-Through, the design files for this lesson can be found under the Materials tab.
 Open in New Window
Activating LiveBOM
Step 1: Open the provided or continued design in OrCAD X Capture CIS.
Note: Be sure to open OrCAD X Capture CIS with a license of OrCAD X Professional to use the functionality included in this lesson.

Step 2: In the Project Manager, right-click the .dsn file and select Add to Workspace.
Note: This will add the design to your local workspace.
Step 3: Select Tools > Live BOM from the menu to activate LiveBOM.
Note: If you receive an error message that the design must be re-saved in the current version before LiveBOM can open, click OK, save the design, and select Tools > Live BOM from the menu again.
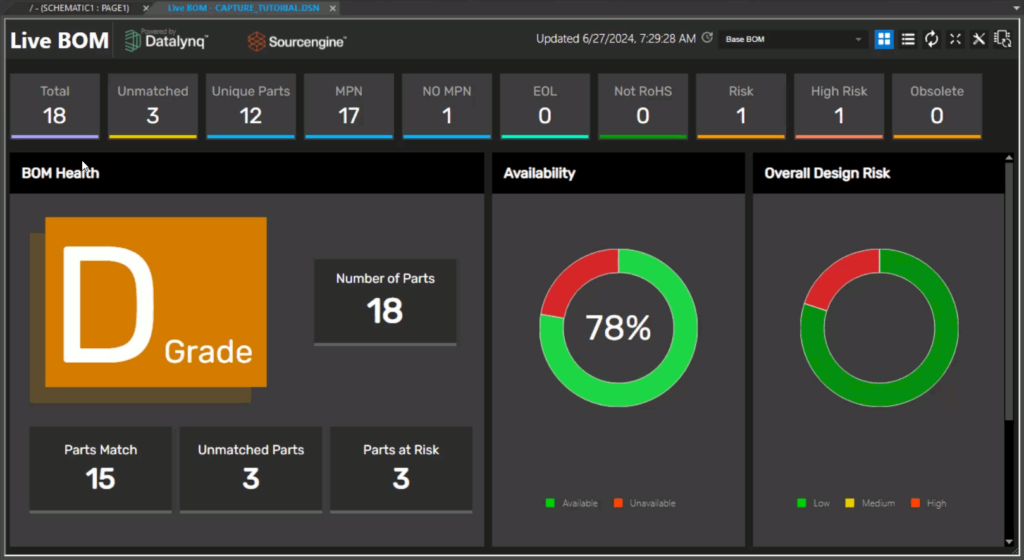
Step 4: View the LiveBOM interface. At the top of the window, there are several categories for parts including:
- Total: The complete list of parts.
- Unmatched: Lists all parts with no matching manufacturer part number (MPN).
- Unique Parts: Lists all unique part numbers used in the design.
- MPN: Lists all parts with a manufacturer part number.
- No MPN: Lists parts with no matching MPN.
- EOL: Lists parts at the end of their active life.
- Not RoHS: Lists parts that are not RoHS-compliant.
- Risk: Lists parts that are considered at risk.
- High Risk: Lists parts that are considered at high risk.
- Obsolete: Lists parts marked as obsolete.
Selecting a category will turn its filter on or off.
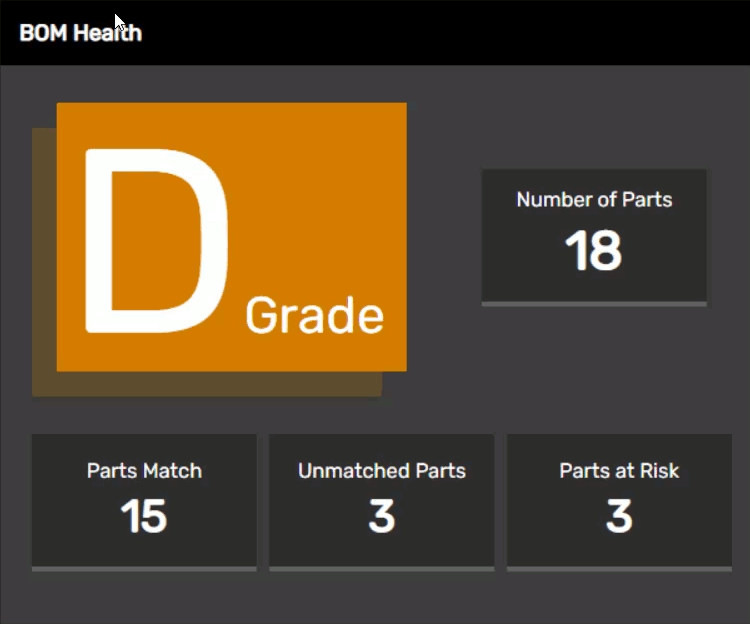
Step 5: View the BOM Health panel. This panel shows a letter grade for the design based on the number of parts matched, their availability and their risk. The numbers of matched, unmatched, and at-risk parts are also shown. Currently, the design has a grade of D, as three parts are unmatched and three are at risk.
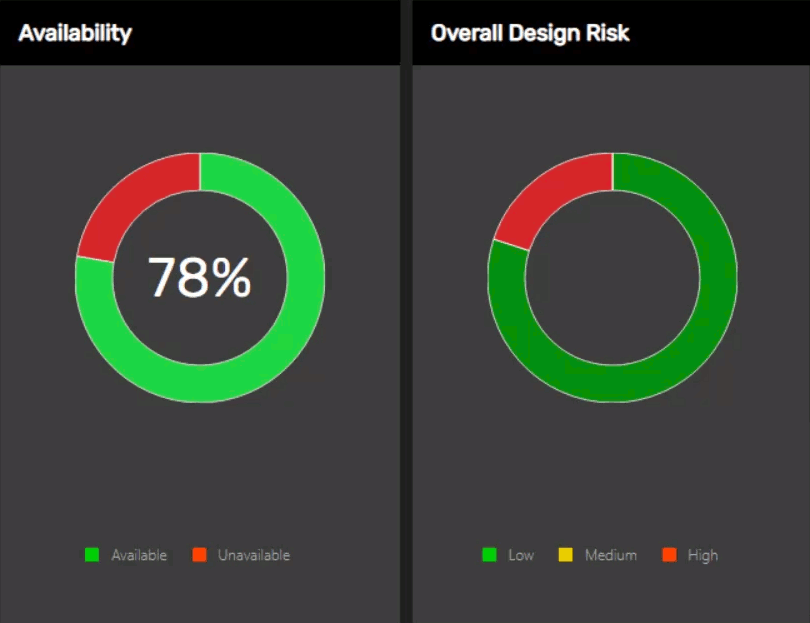
Step 6: View the pie charts on the right side of the window for Availability and Overall Design Risk. The charts are mostly green, indicating low risk.

Step 7: Scroll down to view the tables for High-Risk Parts, End of Life Parts, and Inventory Risk parts. The 10uF capacitors in this design are flagged as high-risk.
Replacing Risk Parts
Note: All at-risk parts can be viewed in the Risk Category.
Step 8: Select Risk from the top to view the list of at-risk parts.
Note: The number of risk parts is one, even though there are three parts total, because there is one unique part in this list.
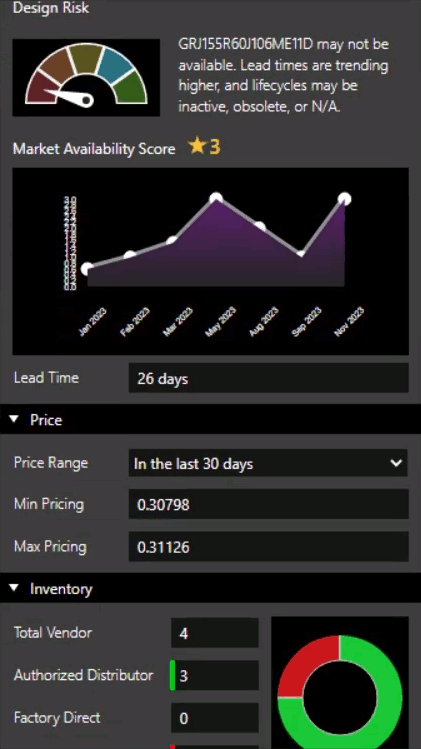
Step 9: Select the row for C1. Under Supply Risk in the Properties panel, the part is listed as “May not be available.” The part is also listed as “NRFND,” or “Not Recommended for New Designs.”
Note: For selected components, LiveBOM also shows:
- General part information including manufacturer, manufacturer part number, a description, and the category. If available, a link to the datasheet is provided.
- REACH/RoHS Compliance
- Status
- A plot of the market availability score over time
- A minimum and maximum price for over a set time period
- Number of vendors with inventory
- A plot of the vendors with inventory over time
- Component-specific properties
Step 10: In the Alternate Parts list, select an equivalent capacitor that is active with low risk.
Step 11: The properties panel shows a higher availability score and more distributors carrying the part.
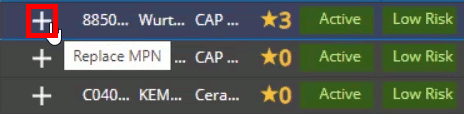
Step 12: Select the plus sign for Replace MPN to replace the part number. The MPN columns are populated with the part information.
Step 13: Repeat steps 9-12 for capacitors C3 and C9.
All high-risk parts have been replaced.
Matching Unmatched Parts
Step 14: Select the Unmatched category from the top of the window to view the unmatched parts. These are IC1, JP1, and Y1.
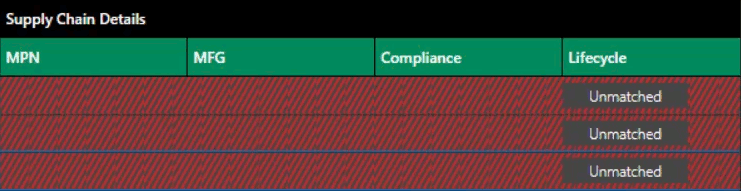
Note: The Supply Chain Details section of the table is labeled “Unmatched” for each part.
Step 15: Select the row for Y1. The term “8MHz” is searched automatically.
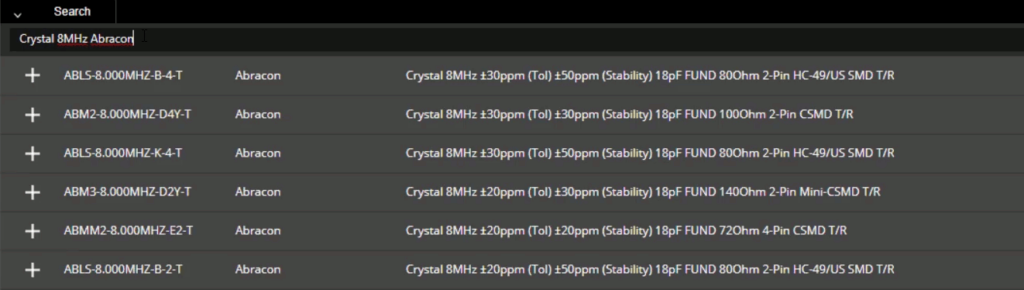
Step 16: Enter Crystal 8MHz Abracon into the Search field and press Enter. All 8MHz Abracon crystals are listed.
Step 17: Select a four-pin crystal from the list and select Replace MPN to replace the part.
Note: The XTEND-DIGI-MODEM is a specialty part that is not listed in LiveBOM, so all parts that can be matched have been matched.
The PIC32MX440F512H is a programmable part that is not listed in LiveBOM.
Updating the Schematic
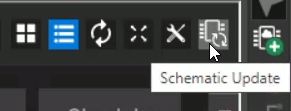
Step 18: Select Schematic Update in the upper-right corner of LiveBOM.
Note: This will update schematic part numbers in the schematic.
Step 19: Close the LiveBOM tab.
Step 20: Select Capture_Tutorial.dsn in the Project Manager and select File > Save from the menu.
Step 21: Right-click Capture_Tutorial.dsn and select Edit Object Properties.
Step 22: View the Property Editor tab. The part numbers have been updated.