Smart PDF Generation
This walk-through demonstrates how to create a Smart PDF of your schematic design that you can view from a PDF reader. The Smart PDF includes a hierarchy that you can navigate through without losing your design IP. After you complete the topic, you will be able to:
- Configure the first-time setup for a Smart PDF
- Generate a Smart PDF
To follow along, continue working with the design completed in PSpice Walk-through 6 or open the provided board file in the folder directory, PSpice Walk-through 7_Smart PDF.
If materials were not downloaded in the beginning of the walk-through, they can be accessed through the Materials tab above for this lesson.
 Open in New Window
Step 1: Select File > Export > PDF.

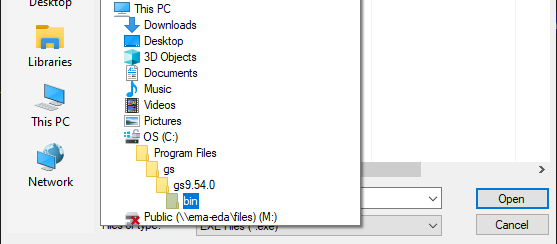
Note: If this is your first time generating a smart PDF, you may need to download Ghostscript. You will see this red text. Click on the link and download Ghost script.
Step 2: With Ghostscript installed, set the Converter Path to the location of the gswin64c.exe file.
Step 3: Browse for the Output Directory to set the location to save the PDF.
Step 4: Leave the default settings for PDF Generation and click OK.
Note: View part information by clicking on the part in the PDF. Click on a reference designator in the bookmark, the PDF will zoom to that part. The same can be done for pins and nets.
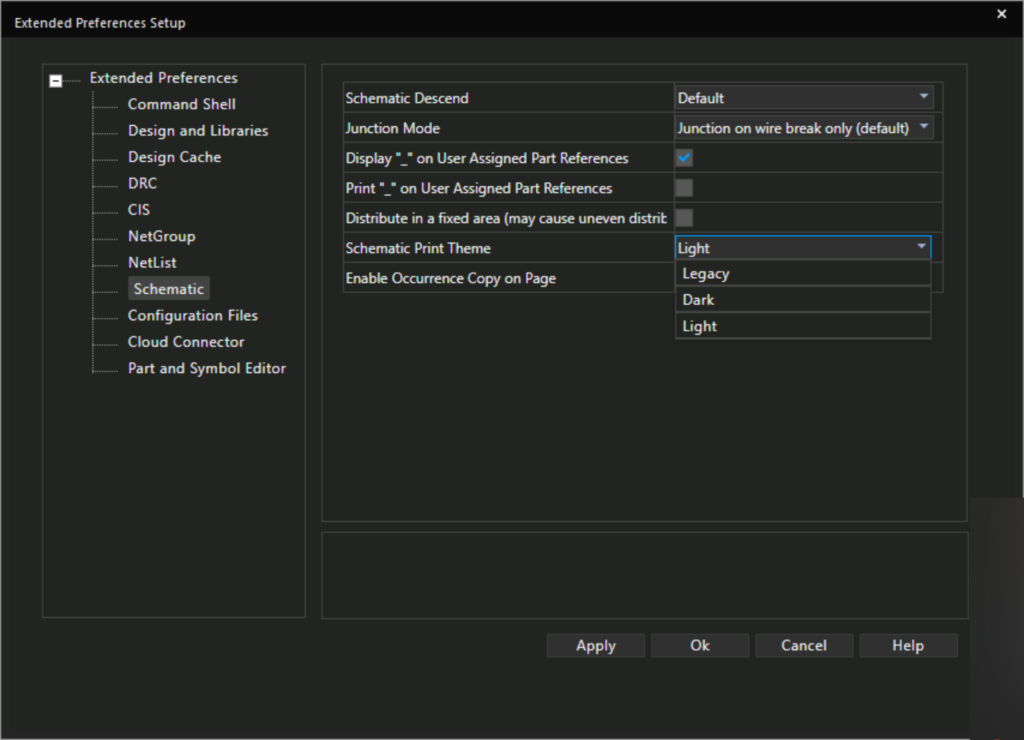
By default, the schematic canvas will print in light mode despite your canvas settings. The PDF can be changed to print in dark mode or legacy mode by selecting Options > Extended Preferences from the menu. Select Schematic and change the schematic print theme to the desired settings.