Lesson 10: Bill of Materials
This walk-through demonstrates how to create a Bill of Materials (BOM) for project parts in OrCAD Capture version 22.1 (2022). After you complete this topic, you will be able to:
- Create a custom BOM
- Open the BOM in Excel
To follow along, continue with the design from the last topic or use the provided design files. If the design files were not downloaded in the beginning of the Capture Walk-Through, the design files for this lesson can be found under the Materials tab.
 Open in New Window
Adding Manufacturer Properties
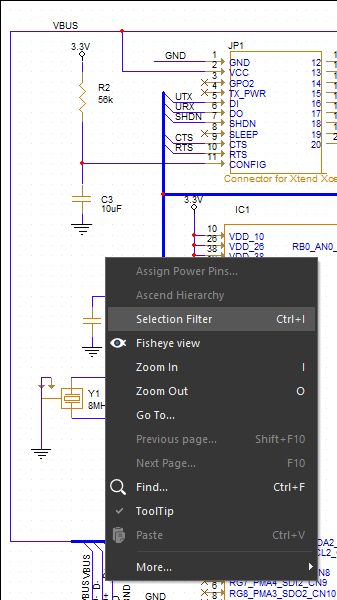
Step 1: In the schematic, right-click and select Selection Filter or press CTRL-I on the keyboard.
Step 2: Select Clear All.
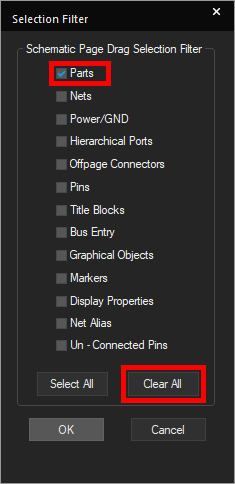
Step 3: Check the box for Parts and click OK.
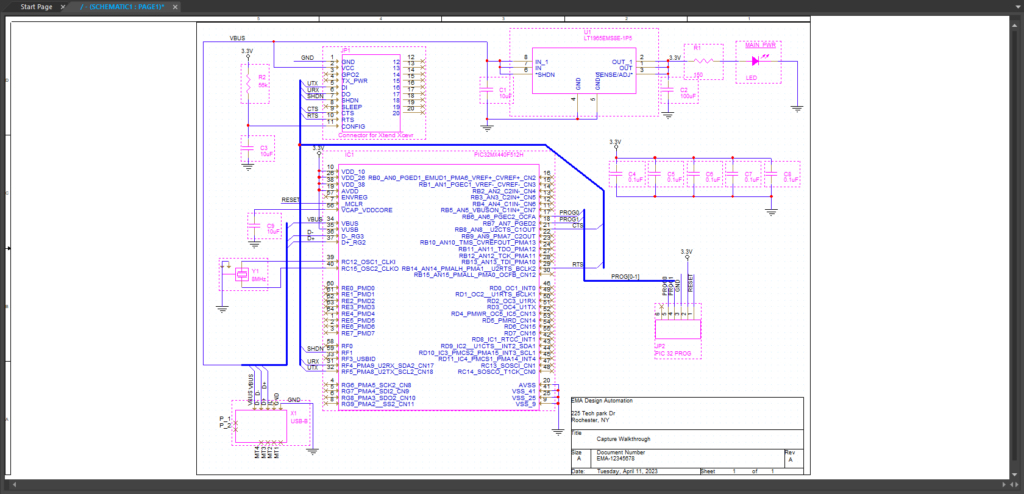
Step 4: Click and drag to select the entire schematic. Only the parts will be selected.
Step 5: Right-click any of the selected components and select Edit Properties to open the Property Editor tab.
Step 6: In the cell for C1 in the Manufacturer Name row, enter Murata.
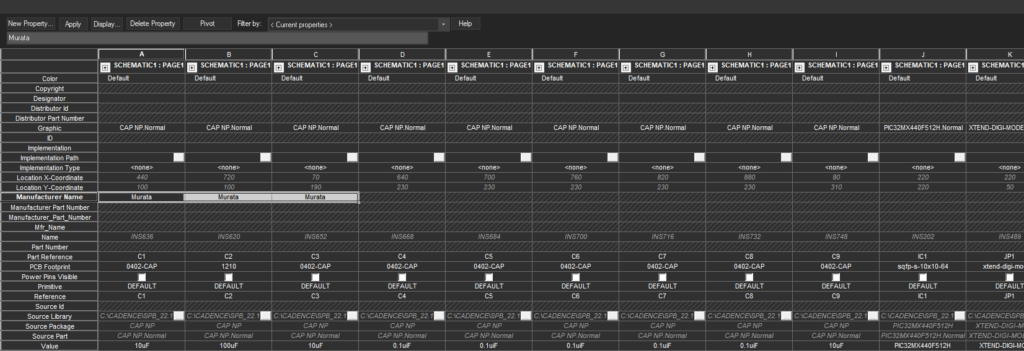
Step 7: Click and drag the corner of the cell to extend this manufacturer name to C2 and C3.
Step 8: In the cell for C4 in the Manufacturer Name row, enter Samsung.
Step 9: Click and drag the corner of the cell to extend the name to C5 through C8.
Step 10: In the cell for C4 in the Manufacturer Part Number row, enter CL05F104ZO5NNNC.
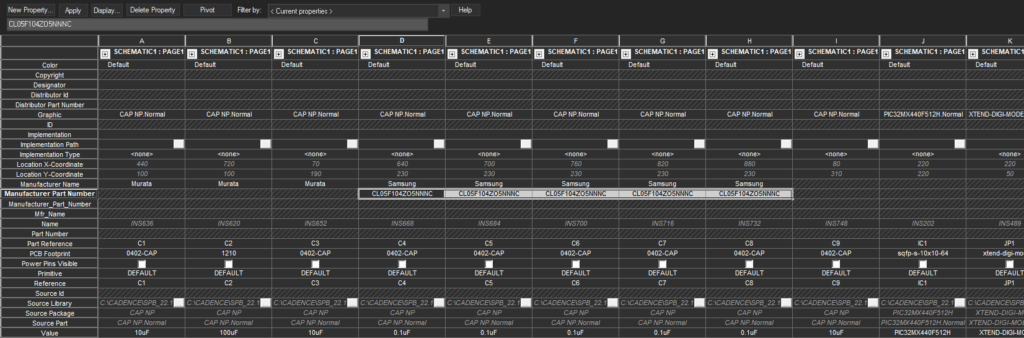
Step 11: Click and drag the corner of the cell to extend the name to C5 through C8.
Step 12: Open the provided file, Capture_Tutorial_Manufacturer.csv, in a spreadsheet viewer such as Microsoft Excel or LibreOffice Calc.

Step 13: Hold Shift and select the entire table. Press CTRL-C on the keyboard to copy.
Step 14: Back in Capture, click and drag to select all Manufacturer Name and Manufacturer Part Number cells in the Property Editor window.
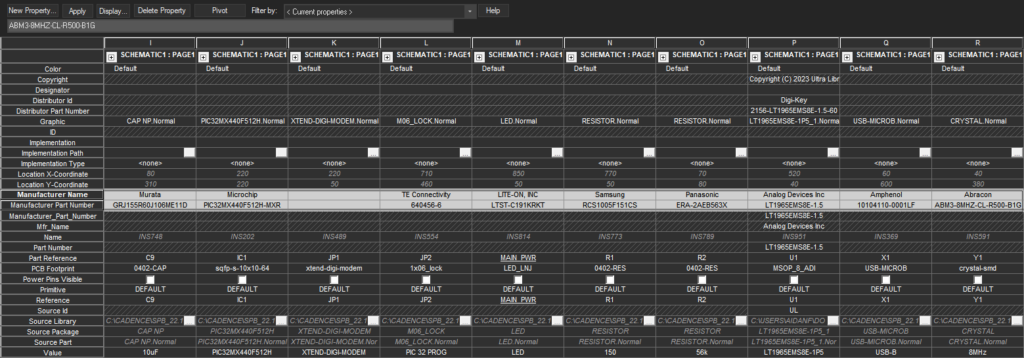
Step 15: Press CTRL-V on the keyboard to paste.
Adding Vendor Properties
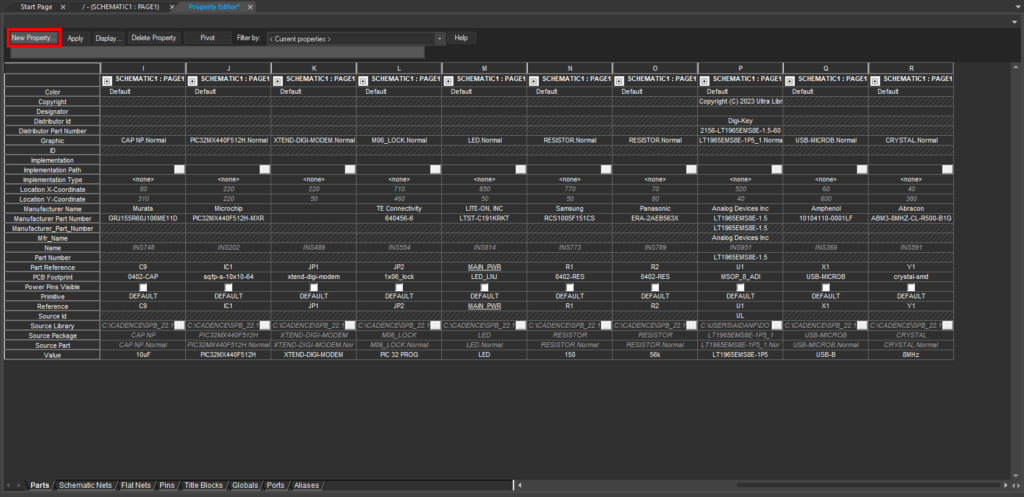
Step 16: Select the New Property button.
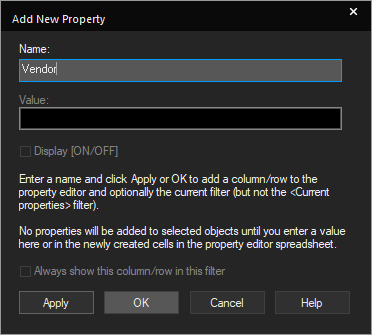
Step 17: Enter the name Vendor and click OK to create the property row.
Step 18: Select the new row. Right-click and select Edit.
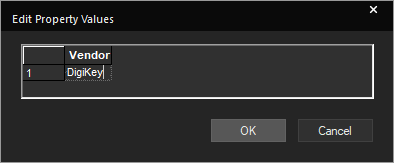
Step 19: Enter DigiKey for the vendor value. Click OK.
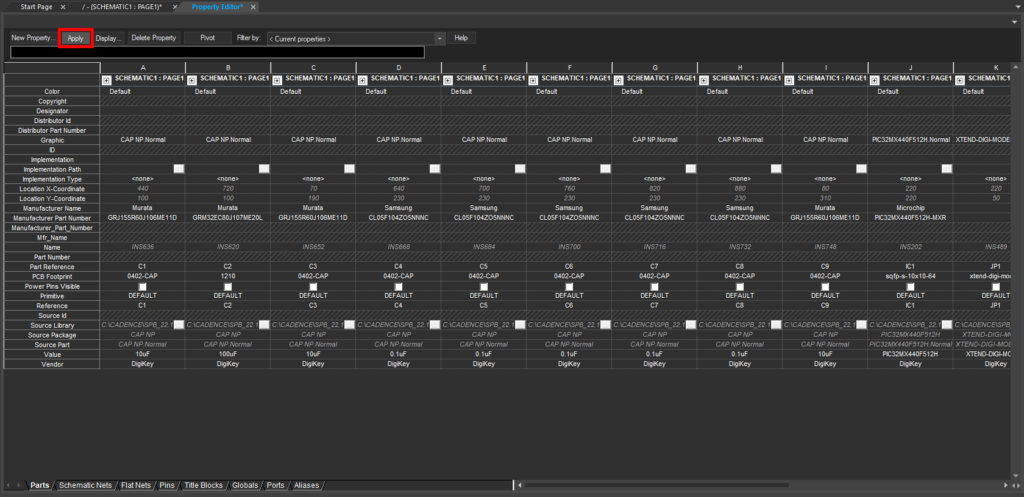
Step 20: Select Apply to apply the changes. Close the Property Editor tab.
Creating the BOM
Step 21: Select capture_tutorial.dsn in the project hierarchy.
Step 22: Select Tools > Bill of Materials from the menu.
Step 23: Under Line Item Definition, copy the following string into the Header field.
Item\tQuantity\tReference\tPart\tVendor\tManufacturer\tManufacturer Part Number
Note: \t indicates a tab. The BOM is a CSV file separated by tabs.
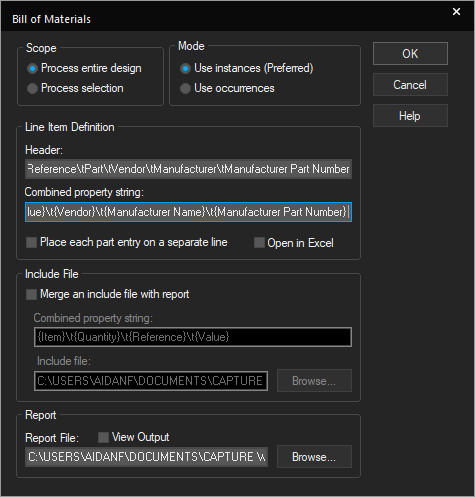
Step 24: Copy the following string into the Combined Property field.
{Item}\t{Quantity}\t{Reference}\t{Value}\t{Vendor}\t{Manufacturer Name}\t{Manufacturer Part Number}
Note: Make sure the text precisely matches the property fields added- including spaces and case.
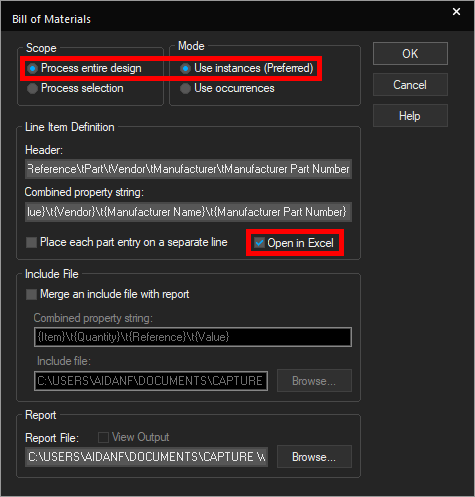
Step 25: Check the option for Open in Excel.
Step 26: Ensure Scope is set to Process Entire Design and Mode is set to Use Instances.
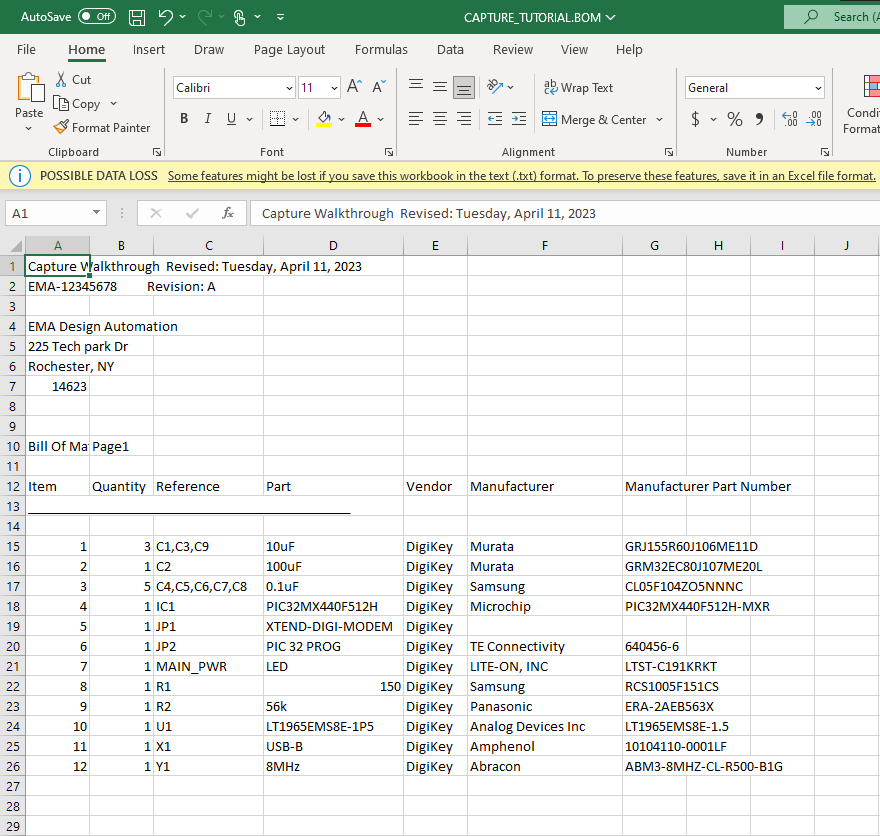
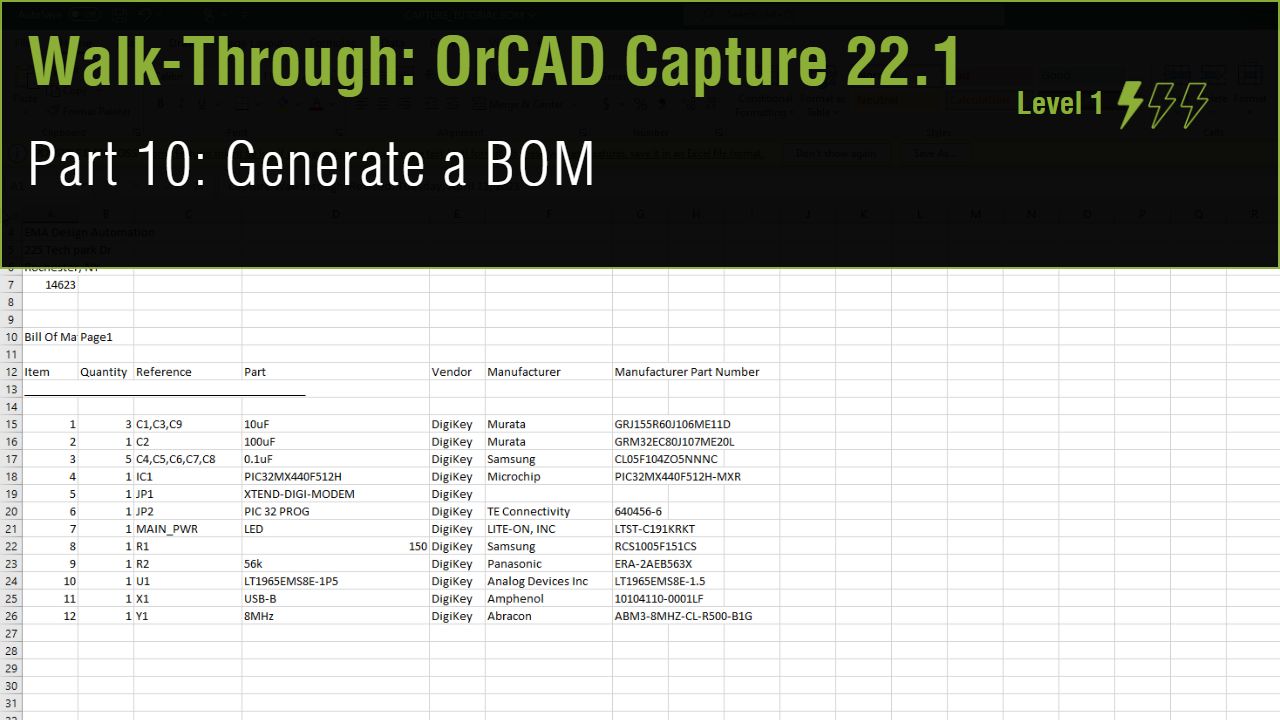
Step 27: Click OK. The Bill of Materials is generated and opens in Microsoft Excel.
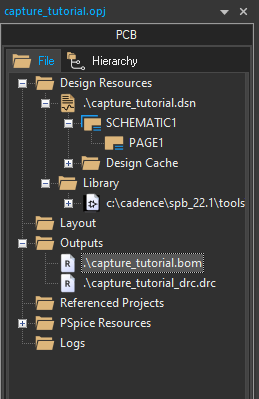
Note: You can also view the bill of materials by double-clicking the report in the project directory outputs.