Capture Walk-through 3: Placing Parts
This walk-through demonstrates several techniques you can use to search for parts and place them on your schematic. After you complete this topic, you will be able to:
- Add a library to your Capture project
- Place a title block, components, ground and power on a schematic page
- Search for parts in the default Capture libraries
- Place a part from the Unified search
To follow the instructions presented in this tutorial, continue using the design you completed in Capture Walk-through 2 or use the included design file, CAPTURE TUTORIAL 3_PLACING PARTS.DSN. under ‘materials’ tab.
 Open in New Window
Use the provided smart PDF, capturetutorial.pdf for assistance with part placement.
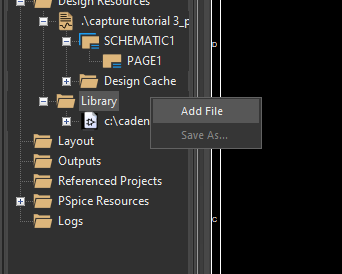
- In the Project Hierarchy, right click on Library and select Add File.
- Select CAPTURE TUTORIAL2.OLB found in the default path: C:\Cadence\SPB_17.4\tools\capture\library.
Note: The CAPTURE TUTORIAL2.OLB library includes all the custom parts for this design and was provided in the design files. Including the library in the default library path was completed in the Capture Walk-through: Getting Started video.
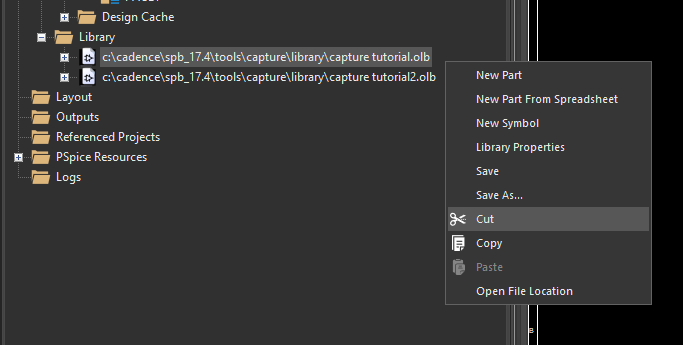
- Right click on the CAPTURE TUTORIAL.OLB library and select Cut (DELETE).

- Select Options > Design Template from the menu.
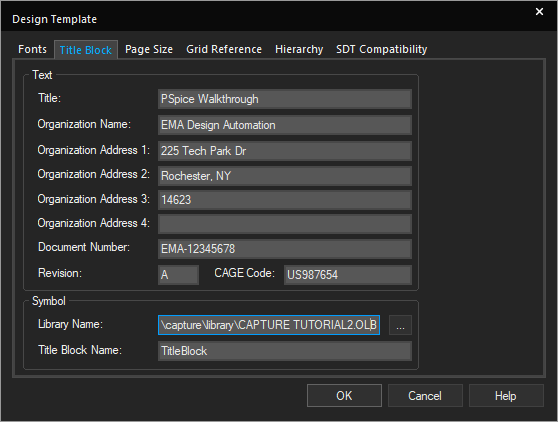
- Select the Title Block tab. Click the Library Name Ellipsis and set the path to the CAPTURE TUTORIAL2.OLB. (C:\Cadence\SPB_17.4\tools\capture\library)
- Click OK.
- Select Place > Title Block from the menu.
- Select Add Library and browse to the location of CAPTURE TUTORIAL2.OLB. Click Open.
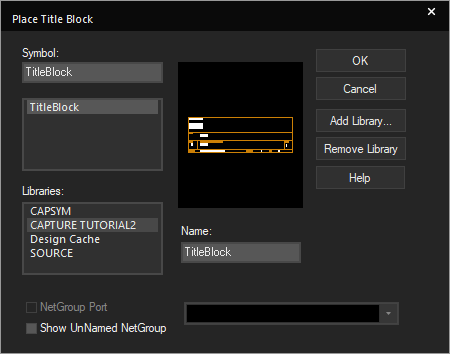
- Select the CAPTURE TUTORIAL 2 Library and TitleBlock. Click OK.
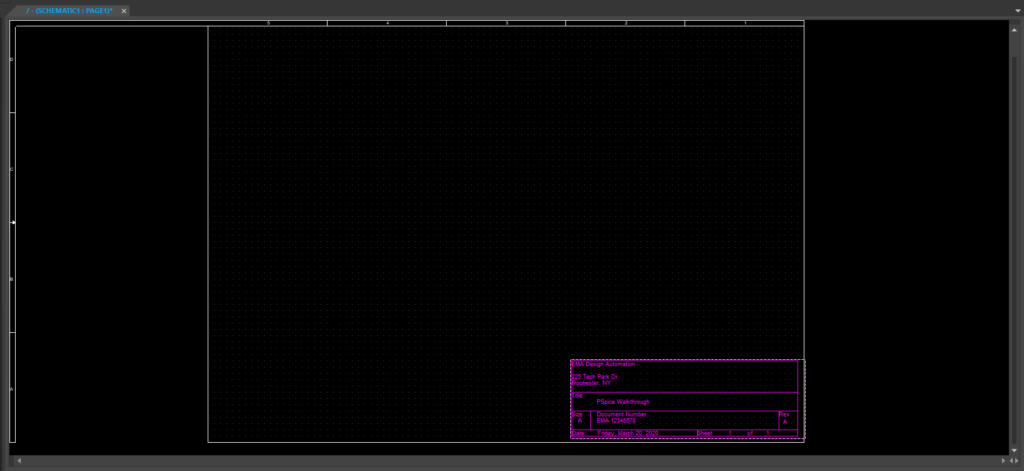
- Click to place the Title block in the lower right corner of the schematic.
- Right click and select End Mode (ESC).
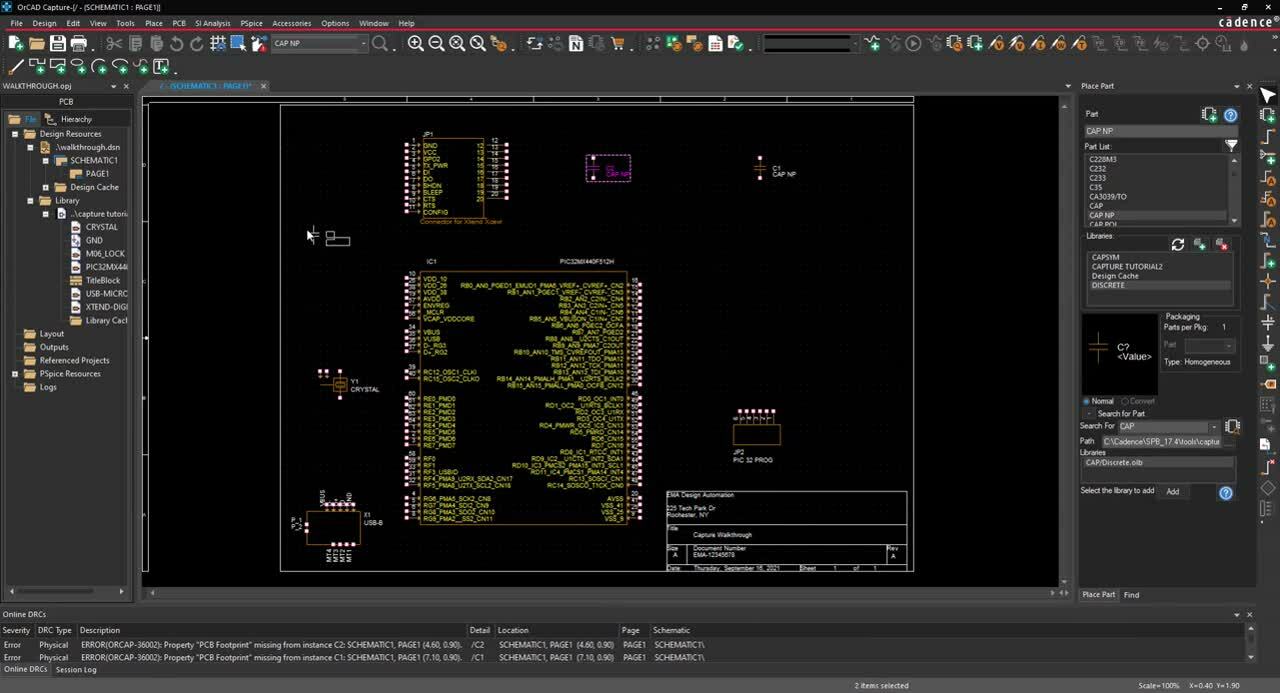
- Select Place > Part from the menu (P).
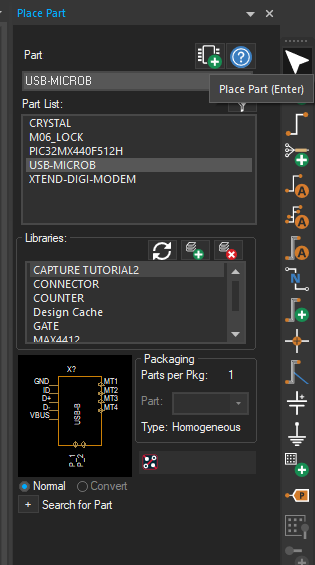
- Select CAPTURE TUTORIAL2 from the Libraries list and select a part.
- Click the Place Part icon or double click on the part.
- Click to place on the schematic.
- Right Click and select End Mode (ESC).
Note: To rotate a part during placement use R on the keyboard or right click and select rotate. You can do the same once the part is placed.
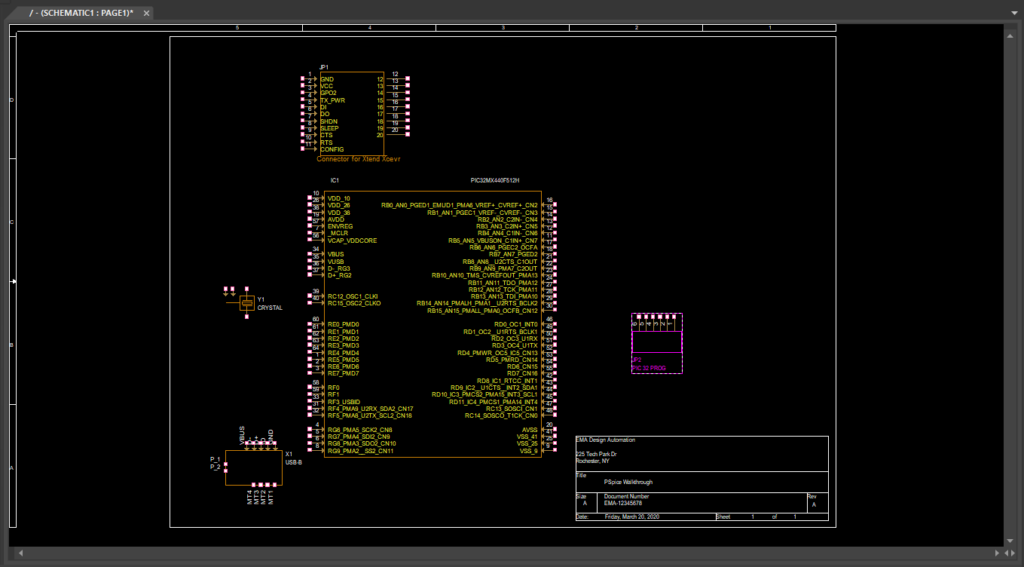
- Place all the parts in the CAPTURE TUTORIAL2 library, referencing the provided smart PDF, CaptureTutorial.PDF.
- In the Parts Window, click the + sign to expand Search for Part.
- Search for CAP.
- Verify search path is set to the default Capture libraries: Cadence > SPB_17.4 > tools > capture > library
- Click the Search part icon (Enter).
- Select the discrete library: CAP/Discrete.olb
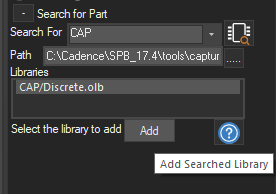
- Click Add.
Note: This has been added the library and the library can now be searched in the parts window.
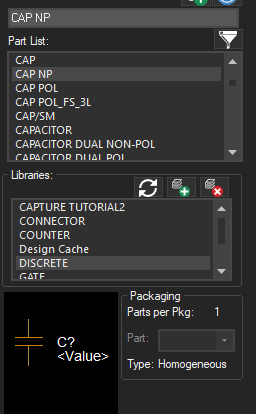
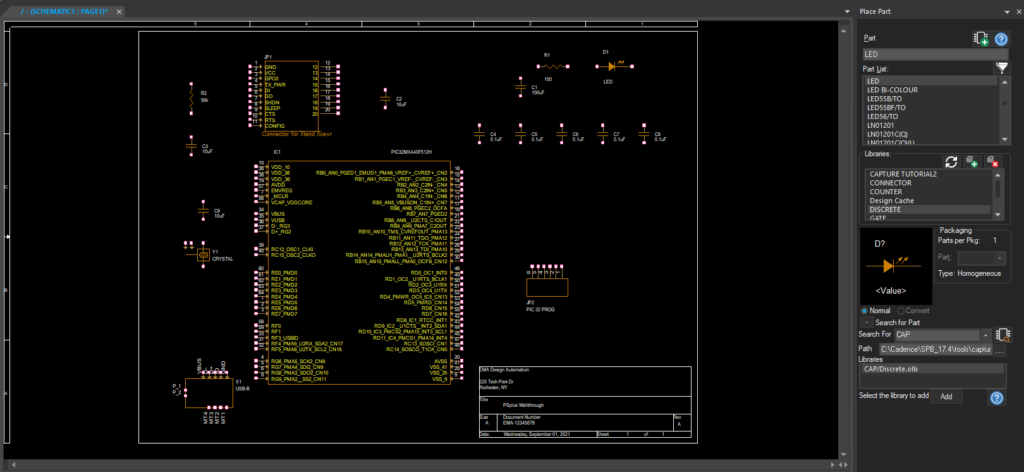
- Select CAP NP. Double click to place or click the Place Part icon.
- Click to place the capacitors in the schematic according to the provided capture tutorial.pdf.
- Right click and End Mode (ESC).
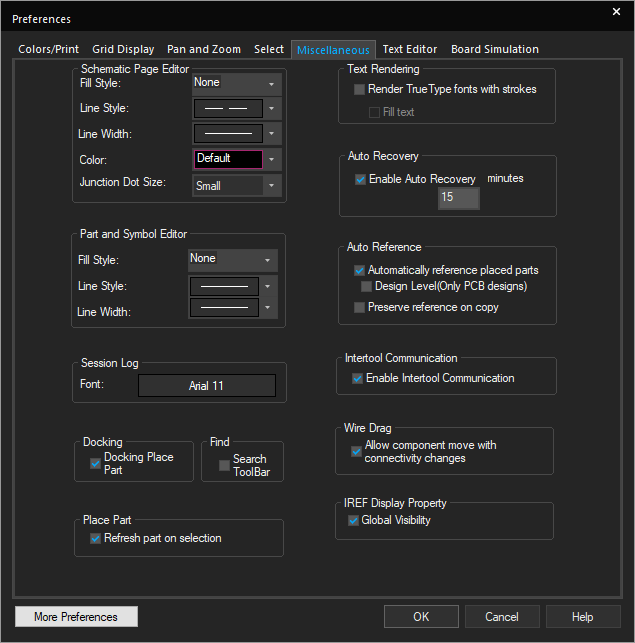
Note: The reference designators are automatically annotated. If you do not want the parts automatically annotated, select Options > Preferences > Miscellaneous from the menu. De-select Auto Reference. Any parts with question marks in the part reference can be annotated at the end of the design.
- In the Parts Window, search for Resistor.
- Double click RESISTOR/DISCRETE to place.
- Click to place on the schematic according to the provided capture tutorial.pdf
- Right Click and select End Mode (ESC).
- In the Parts Window, search for LED.
- Double click LED/DISCRETE to place.
- Click to place in the schematic.
- Right click and select End Mode (ESC).
- Select Place > Ground from the menu (G).
Note: If you do not see the CAPTURE TUTORIAL2 library available, Click Add Library and Select CAPTURE TUTORIAL2.OLB.
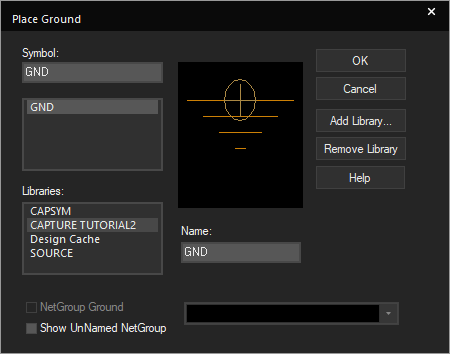
- Select GND and click OK.
- Click to place on the schematic.
- Right click and select End Mode (ESC).
- Select Place > Power from the menu (F).
- Select Add Library and select capsym.olb. Click Open.
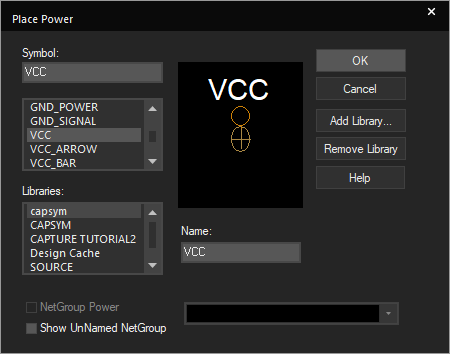
- Select VCC and click OK.
- Click to place on the schematic.
- Right click and select End Mode (ESC).
Note: To add multiple libraries click the Add Library button. Select all of the default libraries and Open. This will allow you to search all of the libraries in the place part window. Click the X button to delete a library from the parts window.
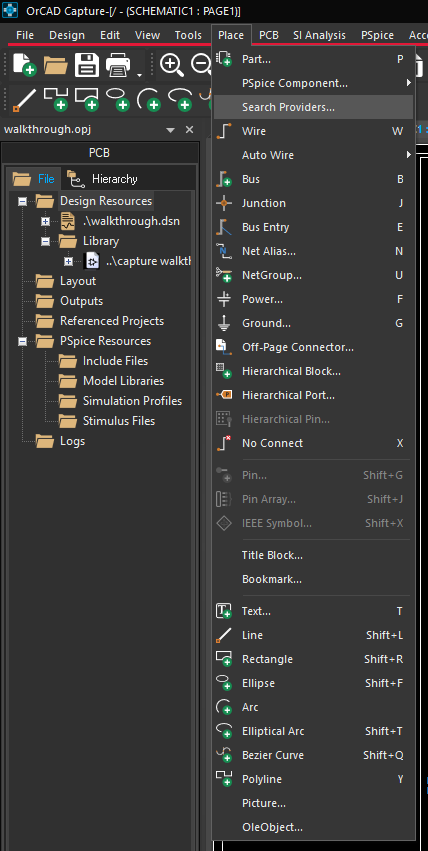
- Select Place > Search Providers from the menu.
Note: This activates the unified search, which allows you to search Ultra Librarian and Samacsys parts directly in OrCAD Capture.
- Login by entering your Cadence and Ultra Librarian credentials. Click OK.
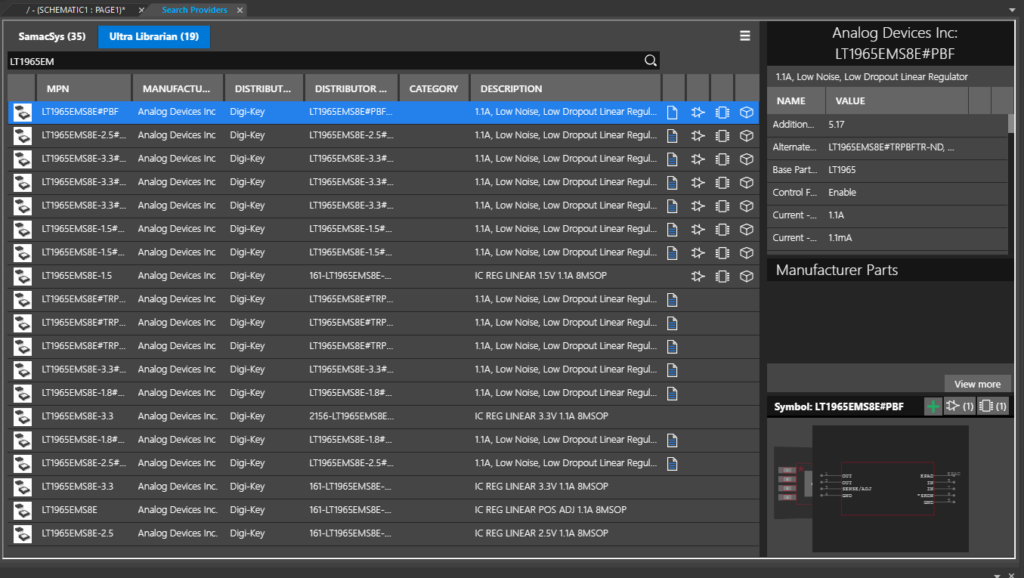
- Search for LT1965EM.
Note: The unified search results show you the manufacturer, part number, description, and availability of the symbol, footprint, and 3D model. A part can only be placed in your design when both the symbol and footprint are available.
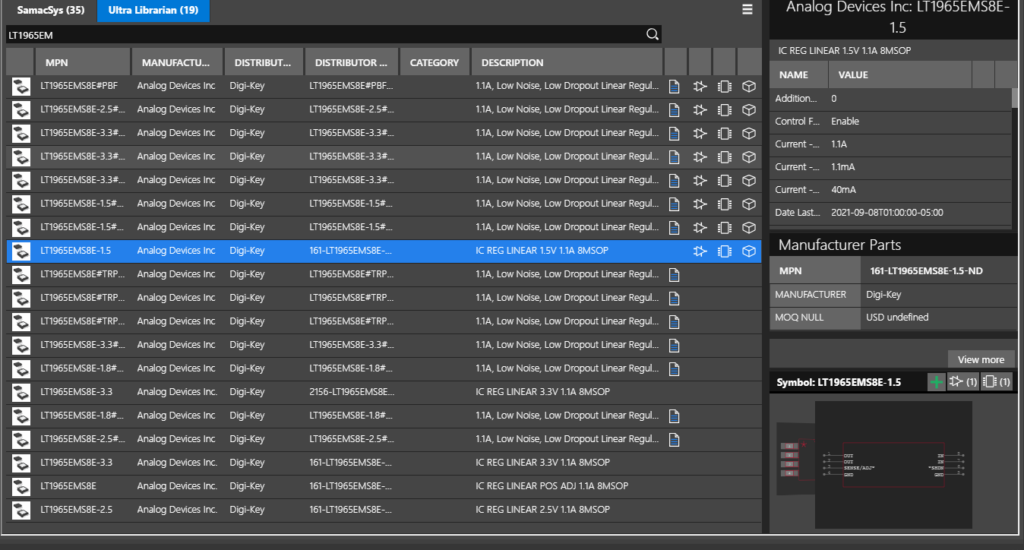
- Select part LT1965EMS8E-1.5PBF to view additional information. Right click and select Place Part.
- Click to place the part in the schematic. Right click and select End Mode (ESC).
- Select the newly placed part. Right click and select Edit Part.
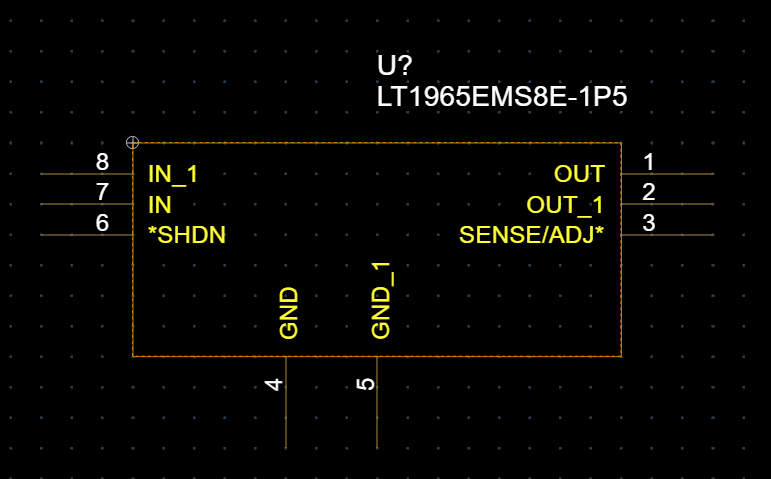
- Rearrange the pins to match the configuration above. Click and drag to move the pins.
- Save and Close the part.