Lesson 1: Starting a Schematic
This walk-through introduces you to OrCAD X Capture 25.1. OrCAD X Capture allows you to efficiently create and manage your schematic designs with easy and intuitive schematic entry, rule definition, instant design feedback, and direct integration to simulation and PCB Layout. This lesson will give an overview of OrCAD X Capture and how to configure your design settings. After you complete this topic, you will be able to:
- Open OrCAD X Capture 25.1
- Create a new schematic project
- Configure design, template, and title block preferences
- Configure settings and options
- Configure real-time design rule checks
 Open in New Window
Creating a New Project
Step 1: Open the Start menu and select Cadence OrCAD X and Allegro X 25.1 > Capture CIS 25.1.
Step 2: Capture opens to the Start page. Select File > New > Project from the menu or select New Project from the Start Page.
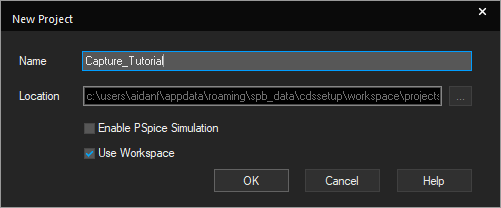
Step 3: Enter the name Capture_Tutorial for the project.
Step 4: Uncheck Use Workspace to save the project locally.
Note: With OrCAD X you have the ability to manage libraries and files in the cloud with Workspaces. If you would like to use the cloud workspaces, check the option to save the project in a Cloud workspace. For step-by-step instructions on how to configure and use cloud workspaces, view Bonus lesson x in this OrCAD X Capture Walk-Through.
Step 5: Select the ellipsis to open the file browser. Browse to a location to save the project and click Select Folder.
Step 6: Click OK to create the project.
Configuring Design Preferences
Step 7: Select Options > Preferences from the menu.
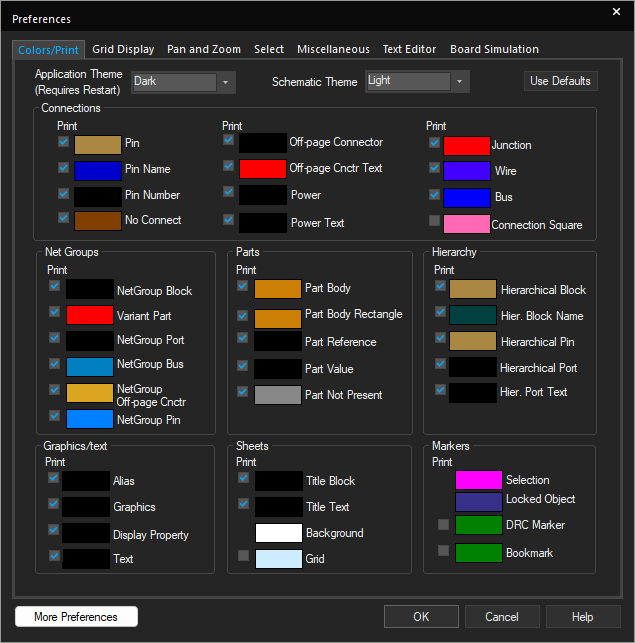
Step 8: View the options available. Here you can modify settings for:
- Colors
- Grid
- Pan and zoom
- Text
- Other miscellaneous settings
Step 9: Select the Color Tab. Here you have the ability to configure a light or dark color scheme for the application and canvas. Select Light for the Schematic Theme and Dark for the Application Theme.
Note: Changes to the application theme will be applied after restarting Capture.
Step 10: Select the Miscellaneous tab.
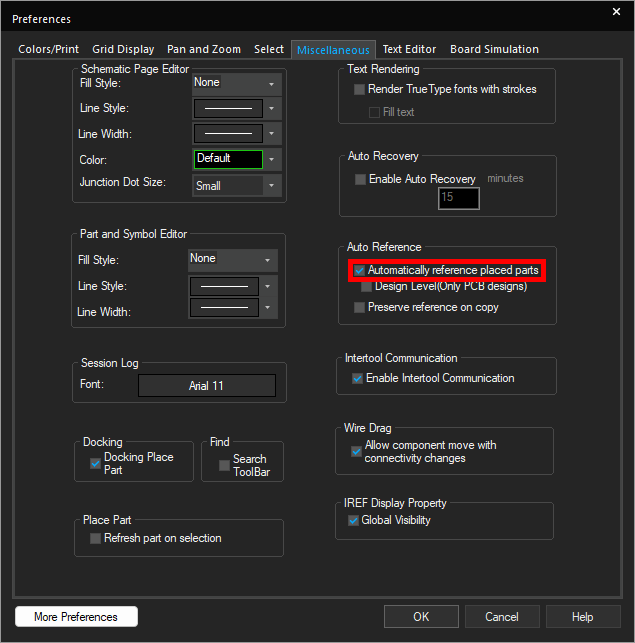
Step 11: Confirm that Automatically Reference Placed Parts under Auto Reference is checked. Configuring this setting will automatically annotate parts placed in the schematic.
Step 12: Click OK to close the Preferences window.
Configuring Title Block Information
Step 13: Select Options > Design Template from the menu to open the Design Template window. In the Design Template window, you can configure:
- Page size
- Grid reference
- Title block information
Step 14: Select the Title Block tab.
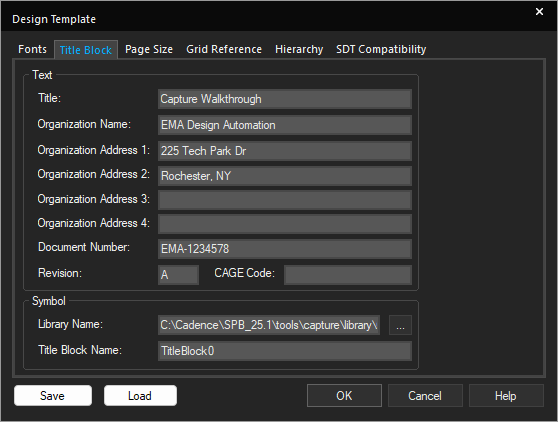
Step 15: Populate the fields under Text as per your company’s standard.
Note: Adding this information here will automatically populate the title blocks on any new pages. The design template, including the title block information, can be saved and loaded with the Save and Load buttons at the bottom of the window.
Step 16: Select the ellipsis for Library Name under Symbol.
Step 17: Browse to the default library location, C:\Cadence\SPB_25.1\tools\capture\library. Select capsym.OLB and click Open.
Step 18: Enter TitleBlock0 for the title block name.
Step 19: Click OK to close the Design Template window.
Configuring Online Design Rule Checks
Note: Rules can be checked in real-time when creating the schematic, allowing engineers to correct issues as they design and save time. The following steps can be used to configure real-time or online design rule checks. A complete design rule check will be performed in lesson 10 of this OrCAD X Capture Walk-through.
Step 20: Select capture_tutorial.dsn in the project hierarchy.
Step 21: Select PCB > Design Rules Check from the menu.
Step 22: Select On from the Online DRC drop-down menu.
Step 23: Select the Rules Setup tab to configure Online DRC rules.
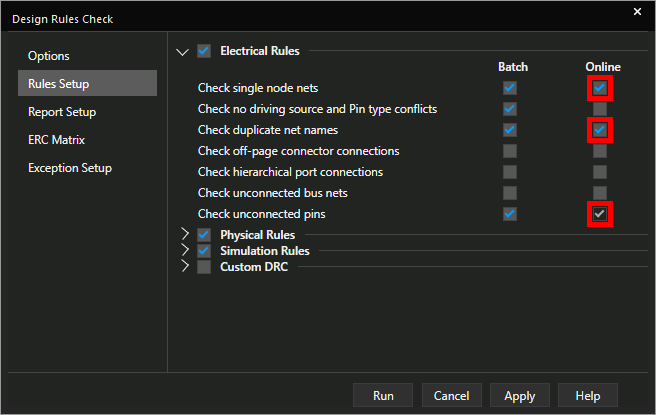
Step 24: Check the options under Online for:
- Check Single Node Nets
- Check Duplicate Net Names
- Check Unconnected Pins
Step 25: Click Apply and close the window.
The preferences and settings have now been configured for the schematic design. In the next lesson, we will discuss options for library management.
