High-speed signals require length tuning to satisfy match group delay constraints and differential pair phase requirements. Quickly and accurately add delay tuning in OrCAD X Presto with eighteen different types of tuning patterns that can be adjusted by specifying the pattern, centering, and corner type.
This quick how-to will provide step-by-step instructions on how to add delay tuning and phase tuning in OrCAD X Presto.
How-To Video
 Open in New Window
Configuring Length Tuning
Step 1: Open the desired design in OrCAD X Presto.
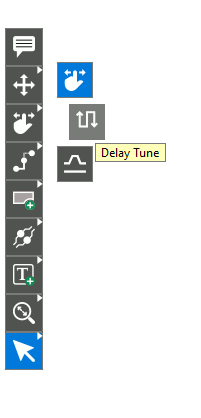
Step 2: Right-click Slide in the toolbar and select Delay Tune to activate delay tuning.
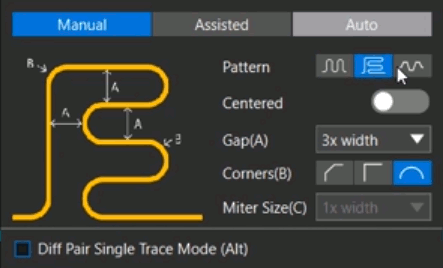
Step 3: In the Delay Tune widget, select the Trombone pattern. The graphical display included in the widget updates with the delay tuning pattern as well as dimensions and information for you to quickly configure the desired options.
Step 4: Click the toggle for Centered. This creates symmetrical tuning on each side of the trace to be tuned.
Step 5: Click the toggle again to turn Centered off.
Step 6: Select the Corner Type to be Arc.
Note: The corners can also be drawn at 45° or 90° angles.
Step 7: Select the Sawtooth pattern. Notice the visual graphic is updated with the correct pattern.
Step 8: Select the Accordion. Set the following options:
- Gap: 3x Width
- Corners: Arc
- Centering: Off
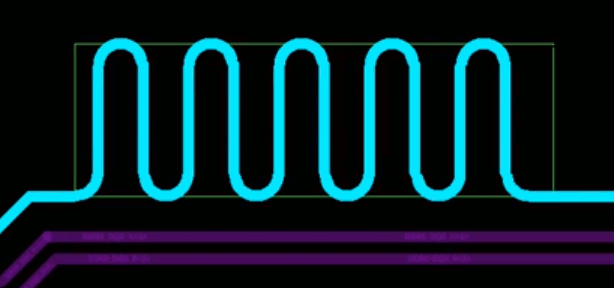
Add Delay Tuning in OrCAD X Presto
Step 9: With the Delay Tune mode active, click a trace to start delay tuning.
Step 10: Move your mouse to create the desired delay tune. Click again to add the tuning.
Configuring Phase Tuning
Note: Phase tuning can be added to differential pairs to satisfy relative propagation delay constraints.
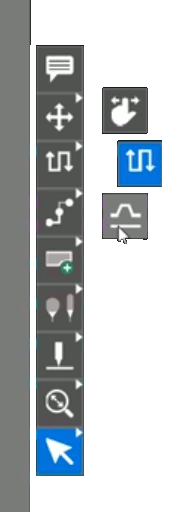
Step 11: Right-click Delay Tune in the toolbar and select Phase Tune.
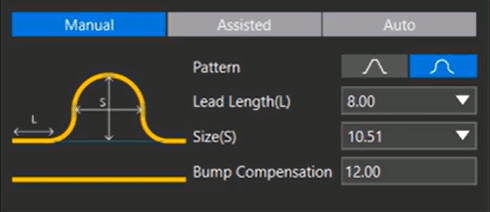
Step 12: Set the Bump Pattern as Arc. The Phase Tune widget updates with the selected configuration.
Note: A Line pattern is also available to draw the phase tuning with corners.
Step 13: Configure the following settings for phase tuning parameters.
- Lead Length: 8.00
- Size: 10.51
- Bump Compensation: 12.00
Add Phase Tuning in OrCAD X Presto

Step 14: Click the desired net to add a bump.
Step 15: Continue to click the net as desired to add the required phase tuning.
Wrap Up & Next Steps
Quickly add delay tuning and phase tuning to meet your design and performance requirements in OrCAD X Presto. Test out this feature and more with a free trial of OrCAD X Presto. For more how-tos and step-by-step walk-throughs, visit EMA Academy.
