With multiple design revisions, ensuring all the files required for manufacturing are accurate and up to date can be difficult. If the wrong version is sent to manufacturing and produced, it can result in wasted time, scrapped boards, and additional costs. Easily export a manufacturing package in OrCAD X Presto, automatically generating and zipping all the required documentation to guarantee error-free file submission and accurate first-pass manufacturing success.
This how-to will provide step-by-step instructions on how to export a manufacturing package in OrCAD X Presto.
To follow along, download the provided files above the table of contents.
How-To Video
 Open in New Window
Configure a Manufacturing Package
Step 1: Select Manufacturing > Export to Manufacturing from the menu. The Export window opens allowing you to configure the settings and files required for the manufacturing package.
Step 2: Select the check mark for Fabrication_IPC2581 to deselect the export.
Step 3: Select the box next to Fabrication_Gerber to select the option for export.
Step 4: Select the box next to Fabrication Drill Views to include the Drill views in the artwork.
Note: Artwork Films can be configured by selecting Configure Artwork Films. For help configuring artwork films, view our how to.
Under the check boxes, the other files included in the export are listed. Select the minus sign to remove the file for export.
Step 5: Select IPC-D-356 Netlist from the list of included files in the Fabrication_Gerber output.

Step 6: View the configurable settings for the IPC-D-356 Netlist and add any required information such as board title, identification number. and revision.
Note: These settings will change based on the documentation selected.
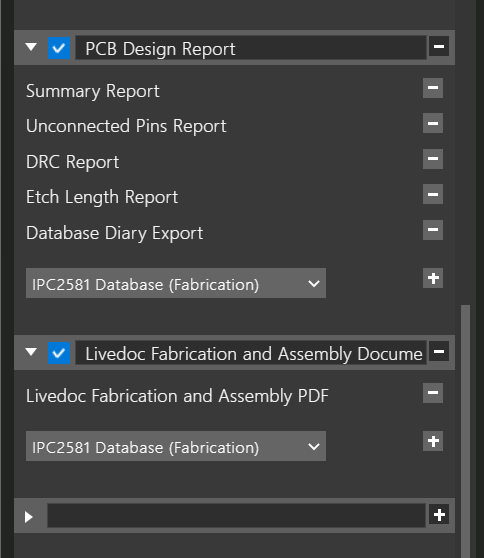
Step 7: Scroll down in the export window and select the box next to PCB Design Report and Livedoc Fabrication and Assembly Documentation to include these in the export.
Adding Manufacturing Documentation
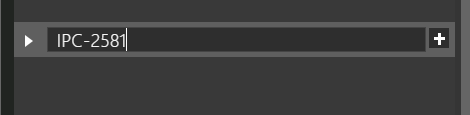
Step 8: In the blank text box, add IPC-2581 and click the +.
Step 9: IPC2581 Database (Fabrication) is listed as an option to include in the export. Select the +.
Note: Select the arrow next to IPC2581 Database (Fabrication) to view other file options to include in the IPC-2581 export.
Step 10: IPC2581 Database (Assembly) is listed as an option to include in the export. Select the +.
Export a Manufacturing Package in OrCAD

Step 11: Select the box to Create Archive. This will zip each export defined individually.
Step 12: Select Export. A status bar displays with the progress of the export.
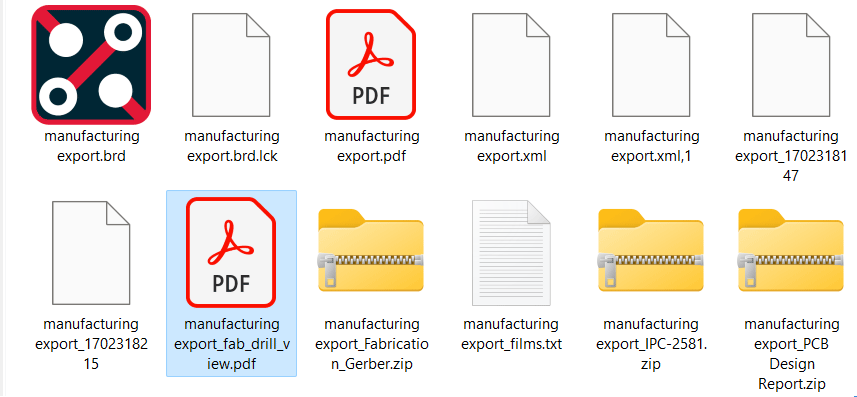
Step 13: When the export is finished, browse to the location of the board file. The export has been completed successfully and all documentation has been generated and packaged with a single click.
Wrap Up & Next Steps
Quickly generate and package all the required manufacturing documentation for your PCBs using export to manufacturing to save time and minimize errors with OrCAD X Presto. Test out this feature and more with a free trial of OrCAD X Presto. For more how-tos and step-by-step walk-throughs visit EMA Academy.

