With hundreds of new components introduced to the market every day, it’s only a matter of time before a new part must be added to your component database for use in your PCB designs. Components can be added to a database manually, but this is often time-consuming and prone to human error. Component Information Portal (CIP) provides an efficient method to add parts to your component database by integrating to multiple distributors, including DigiKey and Newark, for automatic population of parametric information and easy management of data.
This quick how-to will provide step-by-step instructions on how to add parts to your component database with CIP.
How-To Video
 Open in New Window
Opening CIP
Step 1: Open OrCAD X Capture CIS.
Step 2: Select CIP > Open CIP from the menu.
Step 3: Log in with your username and password. The CIP tab opens to the Database Search panel.
Add Parts to Your Component Database from Scratch
Step 4: For specialty or custom components not readily available from distributors, blank components can be created and populated in CIP. To create a component, select the desired type under Components in the CIP sidebar menu. For this example, expand Components and select Capacitors in the CIP sidebar menu.
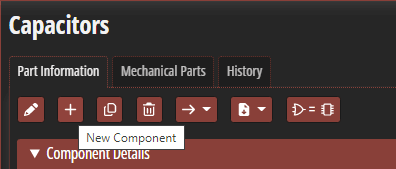
Step 5: Select New Component to create a new capacitor.
Step 6: The Component Details table opens to define the part attributes. For this component, we will map a standard 0603 footprint that is included in the default libraries. Enter SMC0603 for the PCB footprint.
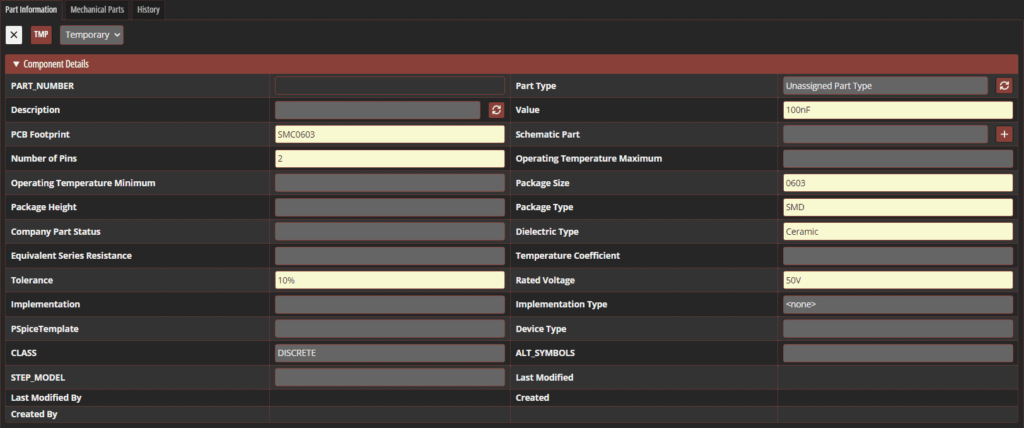
Step 7: Enter the following parameter values:
- Value: 100nF
- Number of Pins: 2
- Package Size: 0603
- Package Type: SMD
- Dielectric Type: Ceramic
- Tolerance: 10%
- Rated Voltage: 50V
- PCB Footprint: SMC0603
Step 8: Select Add for Schematic Part. The Add window opens to configure a schematic symbol.
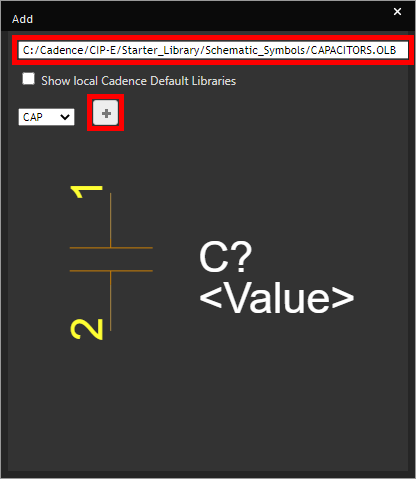
Step 9: In the Add window, select C:/Cadence/CIP-E/Started_Library/Schematic_Symbols/CAPACITORS.OLB from the dropdown to select the capacitor symbol.
Step 10: Click Add to add the symbol. The window closes automatically.

Step 11: Select Autofill for the Description to automatically enter a description based on the defined parameters.
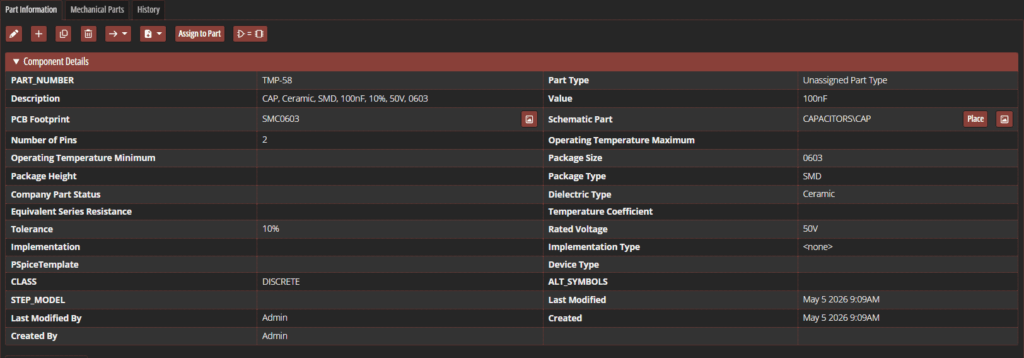
Step 12: Click TMP to create the temporary part. The part is added to the database and a detail table opens, showing the assigned properties.
Step 13: From here, manufacturer and distributor information can also be added. Scroll to the bottom to see the Add Manufacturer Part table.
Step 14: Enter KYOCERA AVX for the manufacturer name and KGM15BR71H104KT for the part number.

Step 15: Select Add Manufacturer to add the manufacturer information.
Running a Distributor Search
Note: Components can be loaded into the CIP database from multiple distributors, including DigiKey and Newark. This reduces part creation time and likelihood of human error with all part numbers and parametric data automatically populated when adding parts to your component database.
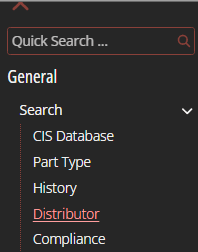
Step 16: To run a distributor search, expand and select Search > Distributor in the CIP sidebar menu.
Step 17: The Distributor Search panel opens, showing all available distributors. Check the options for Arrow, DigiKey, Future, and Newark to perform a complete search.
Step 18: Select Manufacturer Part Number from the Search Type dropdown.

Step 19: Enter PCM1808 into the Search Text field and click Search.

Step 20: A list of parts from multiple distributors is shown. Select an entry from Digikey to view more details.
Step 21: The Part Detail tab opens, showing all the relevant part information. To view a component preview, enter your Ultra Librarian username and password and click Log In to Ultra Librarian.
Note: Access to Ultra Librarian parts through CIP is free with the creation of an account. If you do not have an Ultra Librarian account, you can create one here.
Step 22: Click Preview to view the part preview.
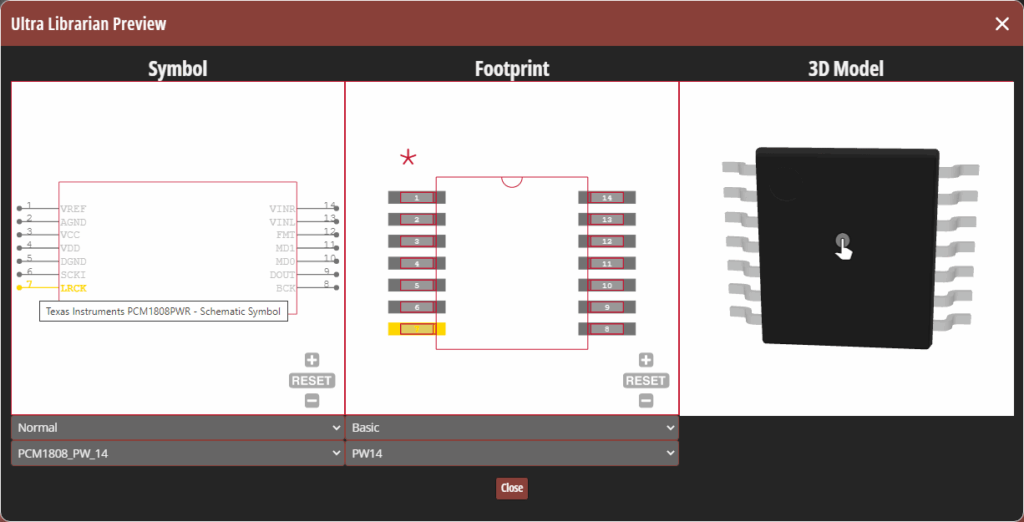
Step 23: View the Ultra Librarian preview. The schematic symbol, PCB footprint, and 3D model are shown. Hover over a pin in the schematic symbol to highlight the corresponding pin in the footprint.
Step 24: Click and drag the 3D model to pan the view. Close the preview window.
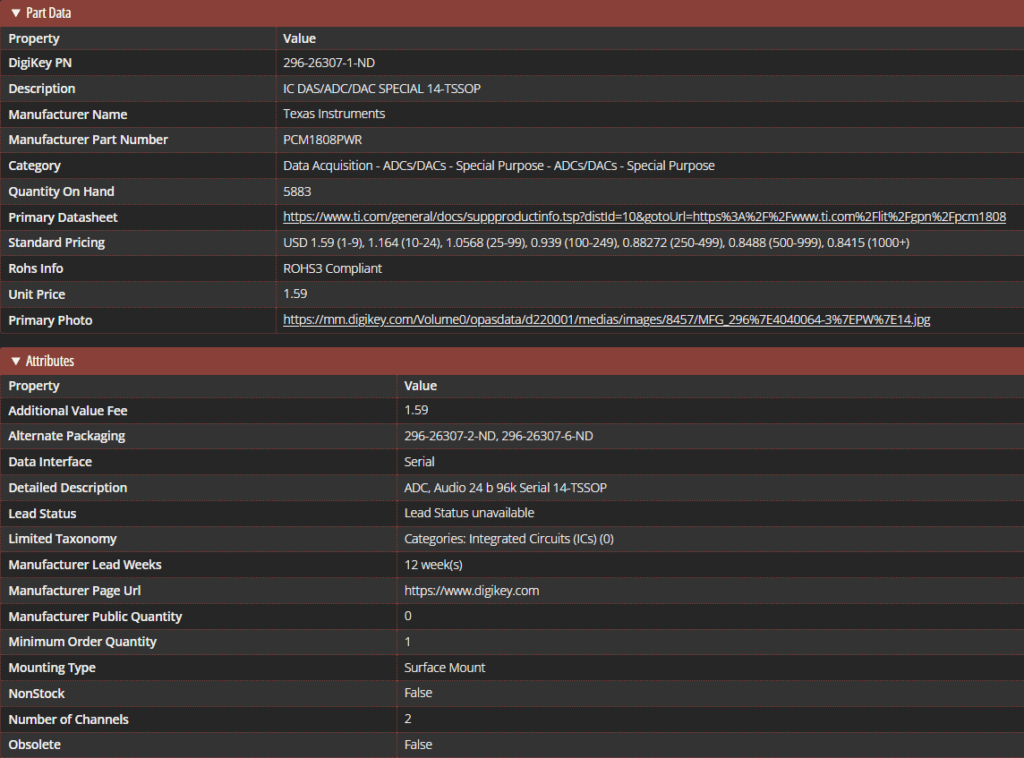
Step 25: View the part attributes in the table. The part is listed as active and readily available.
Add Parts to Your Component Database from Distributors
Step 26: To add the part to your CIS database, select the appropriate view from the Component View dropdown. For this example, select ICs.
Step 27: Set the Action to Create TMP Part to create a temporary part (pending approval).
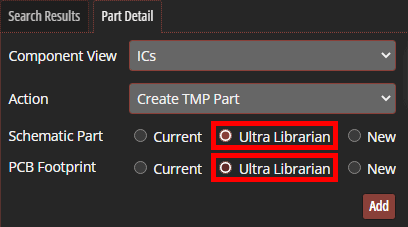
Step 28: If available the corresponding footprints and symbols can be selected from your existing library. For this example, we will use the pre-verified footprints available through Ultra Librarian to save time with model creation and validation. Select Ultra Librarian for the Schematic Part to assign the part symbol from Ultra Librarian.
Step 29: Select Ultra Librarian for the PCB footprint to map the footprint from Ultra Librarian.
Step 30: Scroll down to view the Part Data. The required attributes have been mapped automatically.
Step 31: Scroll back up and click Add to add the part.

Step 32: The part has been added to the database as a temporary part for the librarian or administrator to review and approve. A table opens for the new temporary part, showing the assigned properties. Select the Footprint Preview button to open a preview of the footprint.
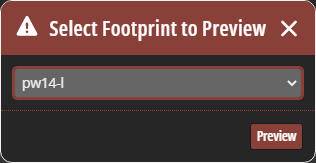
Step 33: The Footprint Preview window opens. Since the downloaded part has multiple footprints, you can select the footprint to preview. Select pw14-l from the dropdown and click Preview.
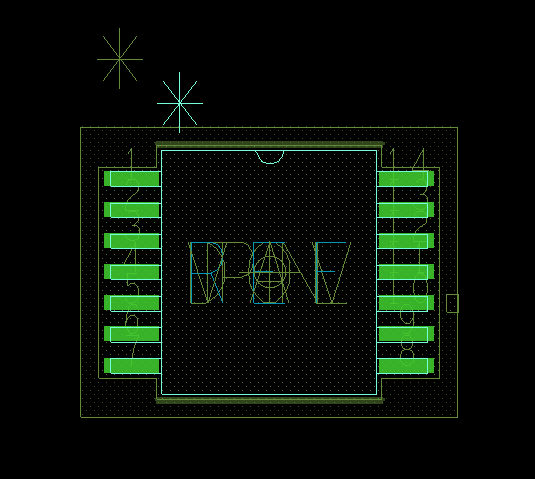
Step 34: Allegro X opens to show the preview of the TSSOP14 footprint. View the footprint and close the window.
Step 35: To view the schematic symbol, select the Symbol Preview button in the Schematic Part cell.
Step 36: View the symbol in the Preview window. The symbol is identical to what was shown in the Ultra Librarian preview. Close the window.
Wrap Up & Next Steps
Quickly and easily create and add parts to your component database to promote reuse and ensure accuracy with CIP. Get more step-by-step instructions for CIP at EMA Academy.

