In the PCB design process, it is important to have safeguards in place to prevent design data loss and protect intellectual property, such as the ability to back up a database. This is especially important for expansive component databases containing the verified part data and models that are critical for schematic and PCB creation. The Component Information Portal (CIP) provides an efficient method for creating and managing your component database as well as the ability to back up a database. To ensure data integrity and prevent mistakes, your component database should be backed up when:
- Upgrading versions of CIP
- Migrating your CIP database
This quick how-to will provide step-by-step instructions on how to back up a database from OrCAD CIP with Microsoft SQL Server Management Studio.
How-To Video
 Open in New Window
Activating SQL Server Management Studio
Step 1: Open Microsoft SQL Server Management Studio.
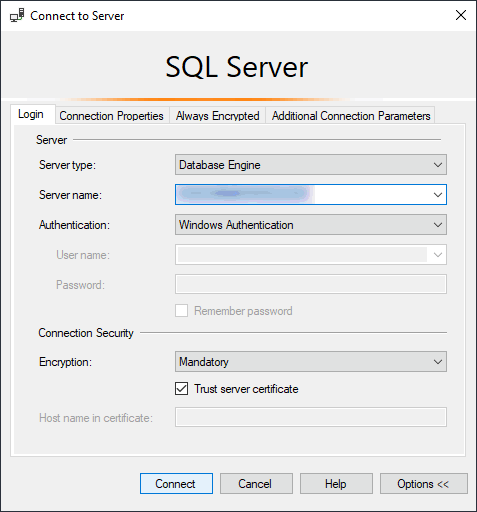
Step 2: In the Connect to Server window, enter your server name and username/password as required.
Step 3: Click Connect.
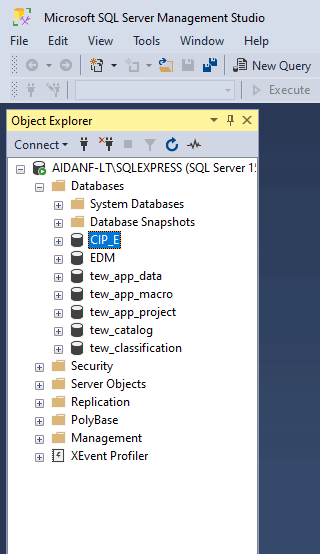
Step 4: If the server connects successfully, a folder tree is listed in the Object Explorer panel. Expand Databases and select CIP_E.
Back Up a Database
Step 5: Right-click CIP_E and select Tasks > Back Up.
Step 6: The Back Up Database window opens. Set the Backup Type to Full.
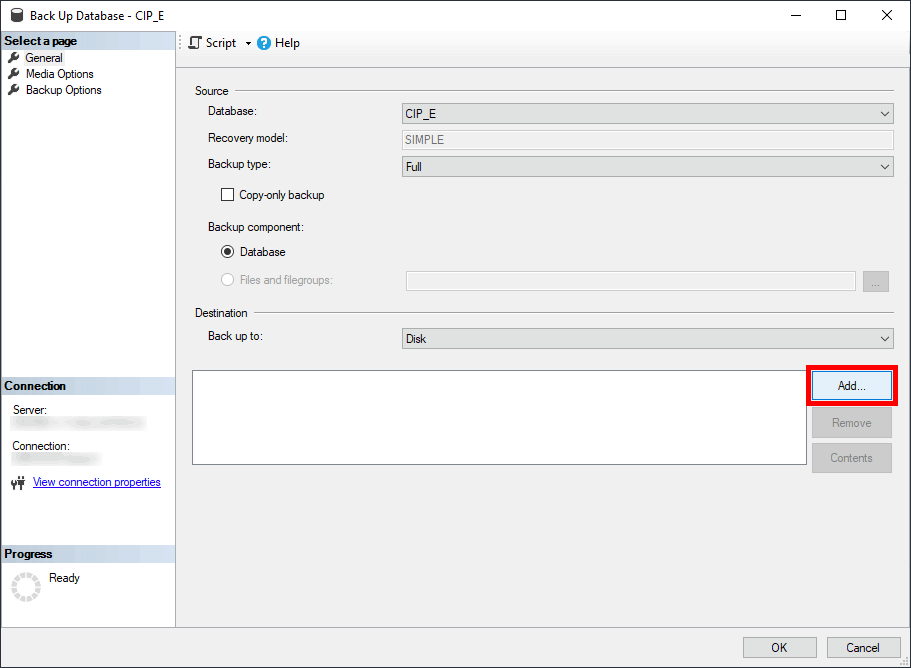
Step 7: Under Destination, select Remove to remove the default backup destination. Select Add to define a new destination.
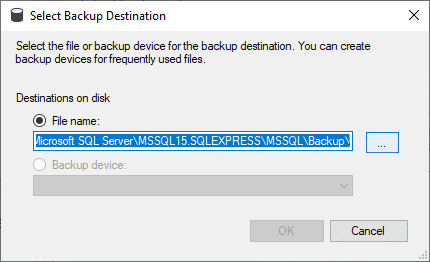
Step 8: In the Select Backup Destination window, select the ellipsis for File Name.
Step 9: Browse to the desired location to save the backup file. Enter a name for the file and click OK.
Step 10: Click OK in the Select Backup Destination window.
Step 11: Select Media Options under Select a Page.
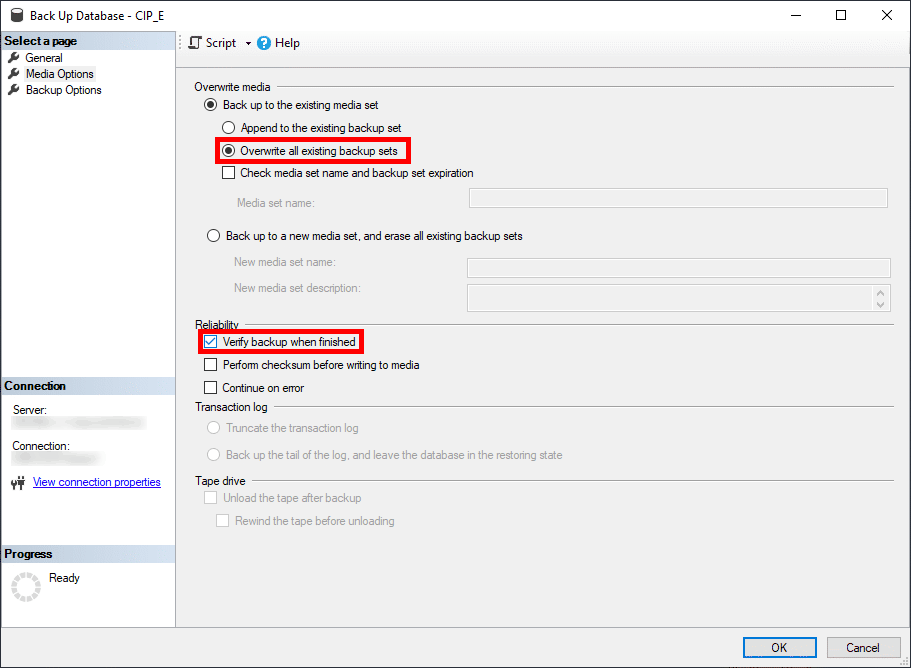
Step 12: Select the option for Overwrite All Existing Backup Sets.
Step 13: Check Verify Backup when Finished to verify the backup file.
Step 14: Click OK to generate the backup file.
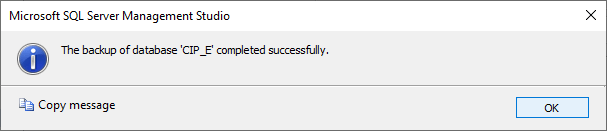
Step 15: When the backup finishes, a prompt appears that the backup was completed successfully. Click OK.
Restoring a Backup
Step 16: Right-click CIP_E in the Object Explorer and select Tasks > Restore > Database.
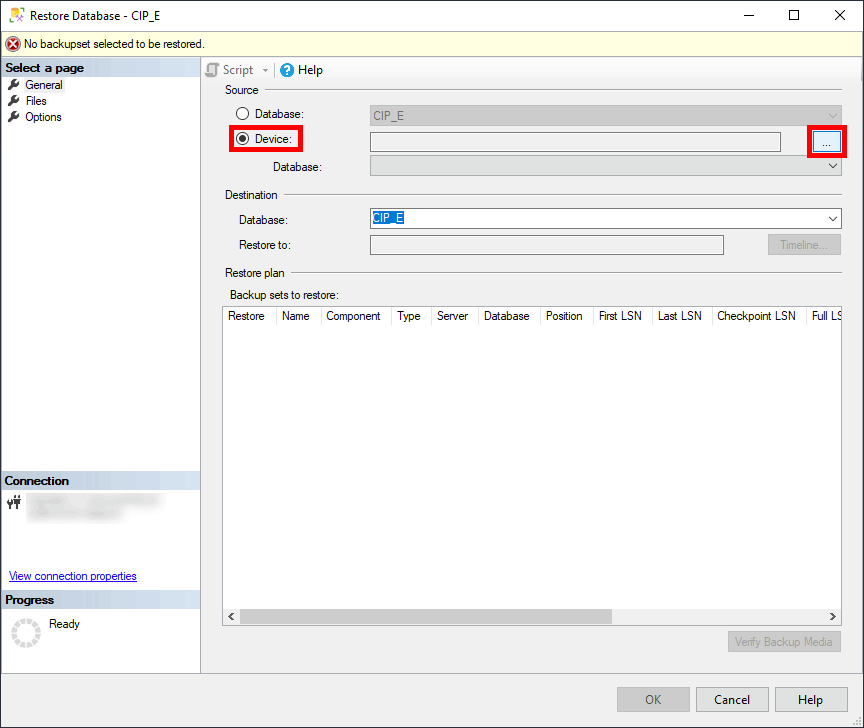
Step 17: The Restore Database window opens. Select Device and click the ellipsis to browse for a device.
Step 18: Click Add in the Select Backup Devices window.
Step 19: Browse to and select the backup file. Click OK.
Step 20: Click OK in the Select Backup Devices window.
Step 21: In the Restore Database window, ensure that CIP_E is selected as the database under Destination.
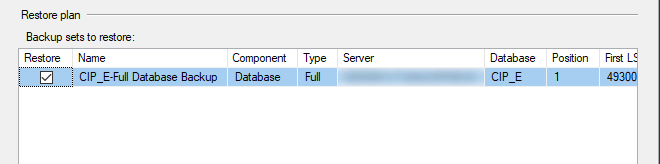
Step 22: Check Restore on the entry in the Restore Plan table.
Step 23: Select Options under Select a Page.
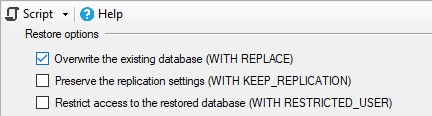
Step 24: Check the option to Overwrite the Existing Database.
Step 25: Click OK to start restoring.
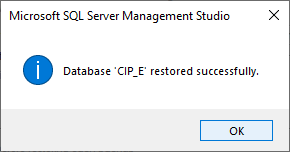
Step 26: A prompt appears that the database was restored successfully. Click OK.
Wrap Up & Next Steps
Quickly back up a database and export your component information as a safeguard against design data loss when updating your part database. Get access to additional free how-tos, courses, and walk-throughs at EMA Academy.

