Creating a PCB design often comes with monotonous, repetitive tasks. To expedite the PCB layout process, common tasks and commands can be assigned to shortcut keys, minimizing mouse clicks and saving time. In OrCAD X Presto, easily assign permanent shortcut keys and configure custom shortcut menus, accessed from the right mouse button to accelerate the PCB design process.
This quick how-to will provide step-by-step instructions on how to define shortcut keys and configure custom shortcut menus in OrCAD X Presto.
To learn how to assign shortcut keys in OrCAD X PCB Designer, see our how-to here.
How-To Video
 Open in New Window
Activating Shortcut Configuration
Step 1: Open the desired design in OrCAD X Presto.
Step 2: Shortcuts are configured from the Preferences window. To activate this window, select Edit > Preferences from the menu.
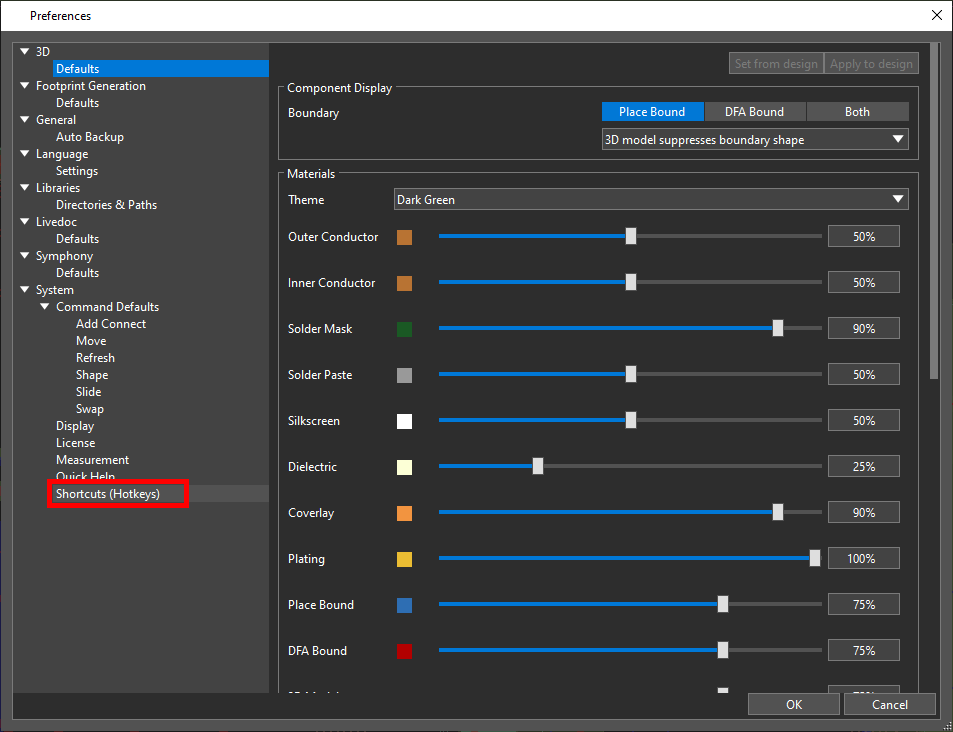
Step 3: The Preferences window opens, showing all configurable options in OrCAD X Presto. Select System > Shortcuts (Hotkeys) from the table on the left side of the window.

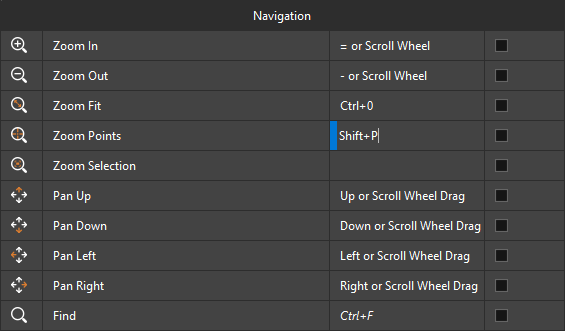
Step 4: A list of shortcuts opens to the User Interface table. The commands shown here are commonly-used functions for navigating and revising any part of the design, not specific to any mode.
Configure Custom Shortcut Keys in OrCAD X Presto
Step 5: Double-click the cell under Shortcut for Zoom Points to assign a shortcut key.
Step 6: Press Shift-P on the keyboard. The Shift+P key combination is assigned to the Zoom Points command.
Note: Many commands have shortcut keys pre-defined. If the keystroke is italicized, the shortcut cannot be changed.
Step 7: Click OK to save the changes and close the window.
Testing a Shortcut Key
Step 8: Press Shift-P in the Presto canvas. The Zoom Points command is activated.
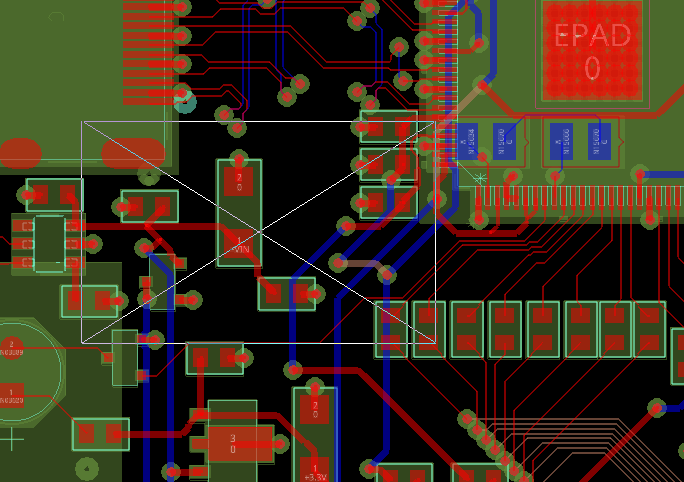
Step 9: Click and drag to use the Zoom Points tool to pan the view to the selected area of the board. The tool was activated through the keyboard shortcut.
Step 10: Press CTRL-0 on the keyboard to run the pre-defined Zoom Fit command to restore the view.
Configure Custom Shortcut Menus
Step 11: Select Edit > Preferences from the menu to reopen the Preferences window. The window opens to the Shortcuts panel.
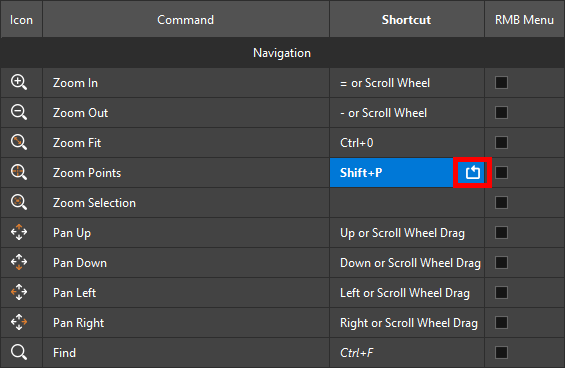
Step 12: Hover over the assigned shortcut key cell for Zoom Points. An arrow symbol appears. Click the symbol to clear the shortcut.
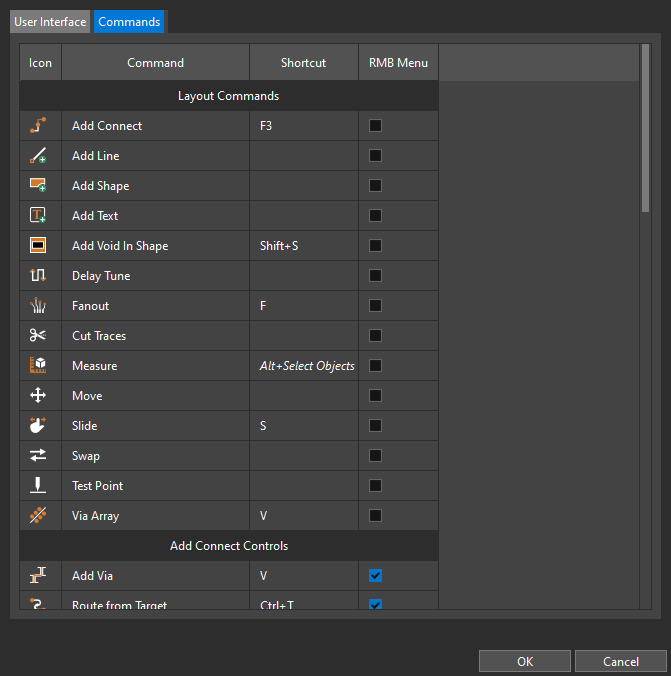
Step 13: Select the Commands tab at the top of the panel. The Commands table opens, showing shortcuts for PCB-specific functions.
Step 14: Scroll to the Move Controls section of the table.
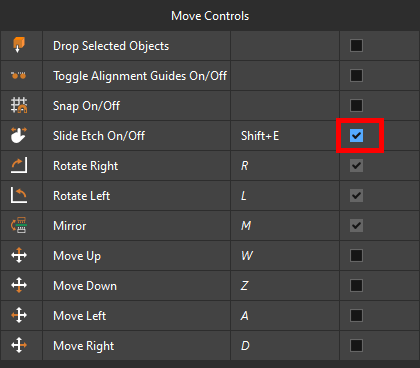
Step 15: Check the option under RMB Menu for Slide Etch On/Off to add the Slide Etch command to the Move menu.
Note: If this checkbox is grayed out, the option cannot be added to the RMB menu.
Step 16: Click OK to save the settings and close the window.
Viewing the Customized Menu
Step 17: Select the Move mode from the toolbar.
Step 18: Select a component to attach it to your cursor. By default, the Slide Etch command is active and the traces that connect to the component move with it.
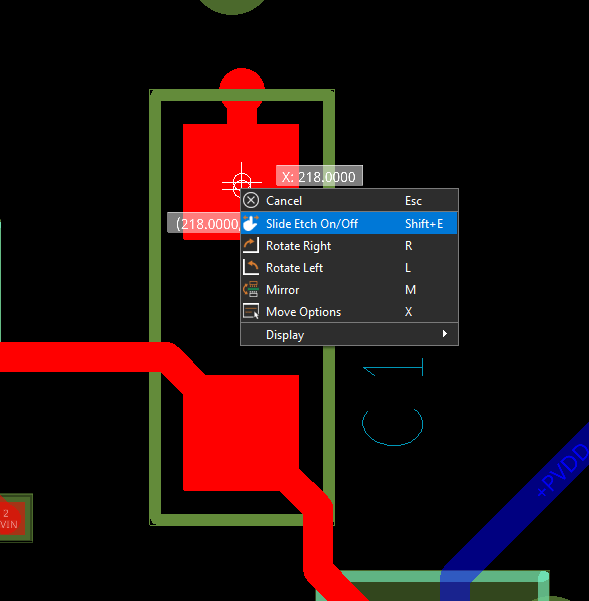
Step 19: Right-click to open the menu. The Slide Etch On/Off option is visible as specified in the Preferences window.
Step 20: Select the option. The trace is detached from the component.
Step 21: Choose the Select mode from the toolbar to cancel the Move mode. The component is returned to its original location.
Restoring the Menu
Step 22: Select Edit > Preferences from the menu.
Step 23: Select the Commands tab in the Shortcuts panel.
Step 24: Uncheck the option for Slide Etch On/Off to restore the RMB menu to its default settings.
Note: Any shortcut key can be assigned to any command with no fixed shortcut key. If a key is used already, a warning message appears and the key cannot be assigned.
Wrap Up & Next Steps
Configure custom shortcut menus and keys to reduce the time spent on PCB design tasks and quickly access the required commands to complete your PCB design in OrCAD X Presto. Test this feature and more with a free trial of OrCAD. Get more how-tos for OrCAD at EMA Academy.

