For efficient PCB design, you need to be able to find and modify part parameters and design objects quickly. Easily find the exact set of objects you want to work on and modify part parameters with the Search panel in OrCAD X Presto. This Search panel can be used to quickly modify:
- Trace Line Width
- Component Footprint
- Layer
- Net Voltages
- Location and Rotation of Objects
- Net Names
- Padstacks for Pins and Vias
This quick how-to will provide step-by-step instructions on how to modify part parameters with the Search panel by editing object properties in OrCAD X Presto.
How-To Video
 Open in New Window
Activating the Search Panel
Step 1: Open the desired design in OrCAD X Presto.
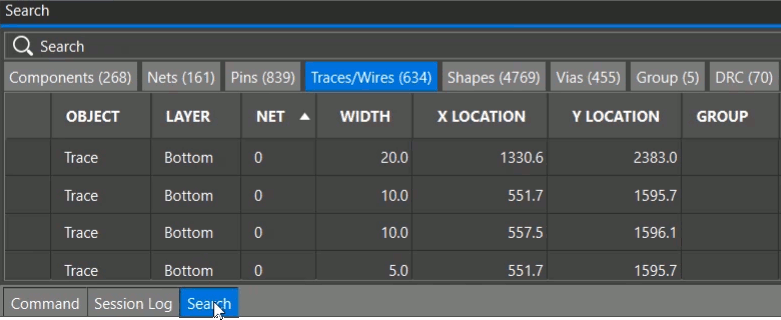
Step 2: Select Search at the bottom of the window to activate the Search panel.
Note: If the Search button is not visible, select View > Panels > Search from the menu. If desired, click and drag the panel header to dock the panel to another side of the main window.
Filtering Design Objects by Text
Note: For this example, we will find any VDD nets on the Top layer and modify the line width to be 20 mils.
Step 3: Select the Filter icon in the Net column header to filter the nets.
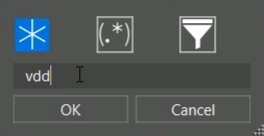
Step 4: Enter VDD into the text field and click OK. All traces and trace segments with nets that start with VDD are listed.
Filtering Design Objects with an Explicit Filter
Step 5: Select the Filter icon in the Layer column header.
Step 6: Select the Filter List mode.
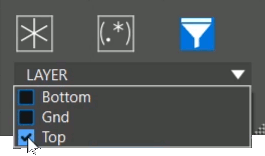
Step 7: In the LAYER drop-down menu, check Top to filter components in the top layer.
Step 8: Click OK. All VDD traces on the top layer are listed.
Filtering Design Objects by Numerical Properties
Step 9: Select the Filter icon in the Width column header.
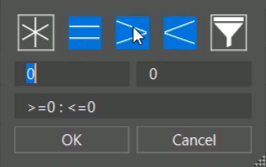
Step 10: View the filtering options. For numerical values, you can choose to filter values that are:
- Equal to the desired value
- Greater than the desired value
- Less than the desired value
- Any combination of the operators
Step 11: Click Cancel to close the widget without applying a filter.
Modify Part Parameters with the Search Panel
Note: Certain cells become editable, similar to a spreadsheet, within the search panel for efficient modification.
Step 11: Click and drag all cells in the Width column.
Step 12: Right-click a cell and select Edit.
Step 13: The cell becomes editable. Enter 20 and press Enter to change the width for all trace segments.
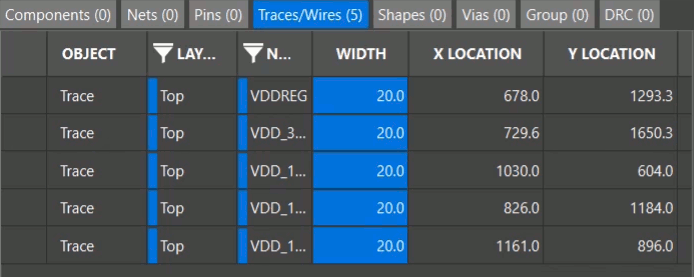
Step 14: View the results table. All selected traces now have a width of 20 mils.
Step 15: Zoom into one of the modified traces or double-click a line item in the search panel to be brought to the location on the PCB.
Step 16: Select a trace and view the properties in the Properties panel. The Properties panel shows a width of 20.
Wrap Up & Next Steps
Quickly modify part parameters with the Search panel in OrCAD X Presto to accelerate your PCB layouts. Test out this feature and more with a free trial of OrCAD X Presto. For more how-tos and step-by-step walk-throughs, visit EMA Academy.
