

To ensure your PCB design doesn’t contain obsolete or unavailable components, it’s important to synchronize component information between the schematic and your component database; however, for large designs this can be a time-consuming process. Component Information Portal (CIP) allows you to quickly and easily synchronize your schematic with the database to keep all parts up to date.
This quick how-to will provide step-by-step instructions on how to synchronize component information between the schematic and your database in CIP.
To follow along, download the provided files above the table of contents.
How-To Video
 Open in New Window
Checking Component Properties
Step 1: Open the provided design in OrCAD X Capture CIS.
Step 2: To check the component properties before syncing, right-click the design file in the Project Manager and select Edit Object Properties.
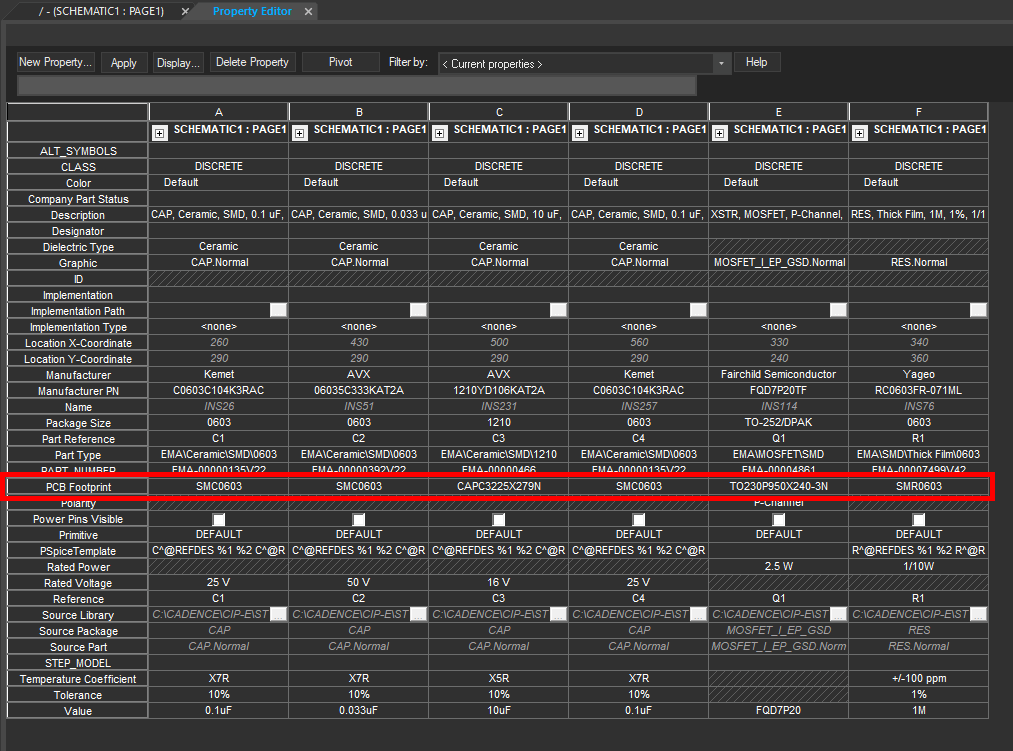
Step 3: The Property Editor table window opens, showing all imported properties from each component. View the PCB Footprint property- each 0603 capacitor has the same footprint of SMC0603, a standard footprint included with OrCAD X. Since these components are placed from CIP, all properties are imported from the database.
Note: The parts used in this how-to come from the starter CIP library. To learn how to import the starter library, see our how-to here.
Step 4: Close the Property Editor tab.
Activating Design Parts Sync
Step 5: Select the design file in the Project Manager.
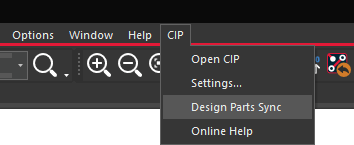
Step 6: Select CIP > Design Parts Sync from the menu.
Step 7: If prompted, log into CIP with your username and password.
Syncing the Design Parts
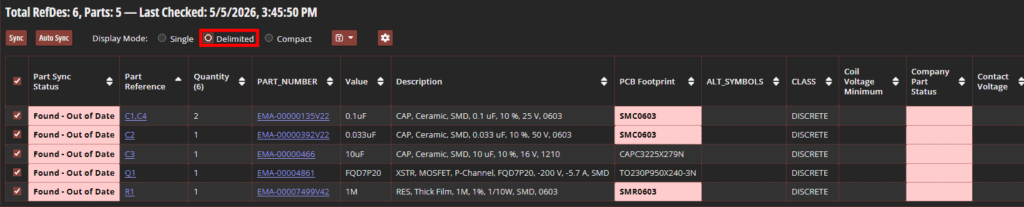
Step 8: The Design Parts Sync table opens, showing that all parts in the design are out of date, with status cells highlighted in red. Select Delimited to group components with the same part number.
Step 9: Select Sync to update the listed parts.
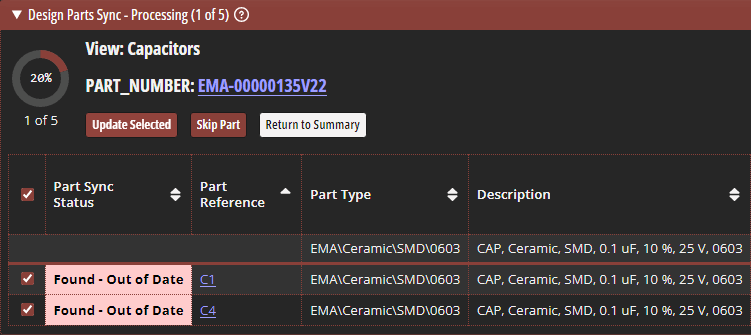
Step 10: The table is reduced to show the first part number to sync, used for capacitors C1 and C4. Any values to be updated are highlighted in red. A progress wheel at the top of the panel shows the number of parts remaining to check.
Select Update Selected to update the capacitors.
Note: Select Skip Part to skip a part and Return to Summary to return to the summary table.
Step 11: The table is refreshed to show a different part number and another out-of-date part. Choose Update Selected.
Step 12: Continue selecting Update Selected to update all parts in the design.
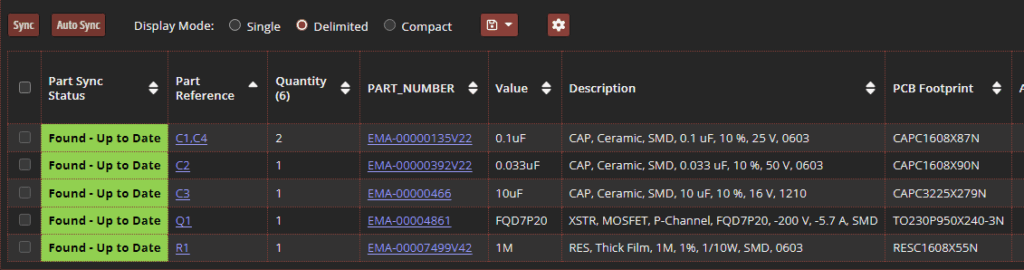
Step 13: View the Design Parts Sync table. The status cells are highlighted in green and indicate that the parts are up to date.
Step 14: Close the Design Parts Sync tab.
Verifying the Sync
Step 15: To verify the synced parts, right-click the design file in the Project Hierarchy and select Edit Object Properties to open the Property Editor table.
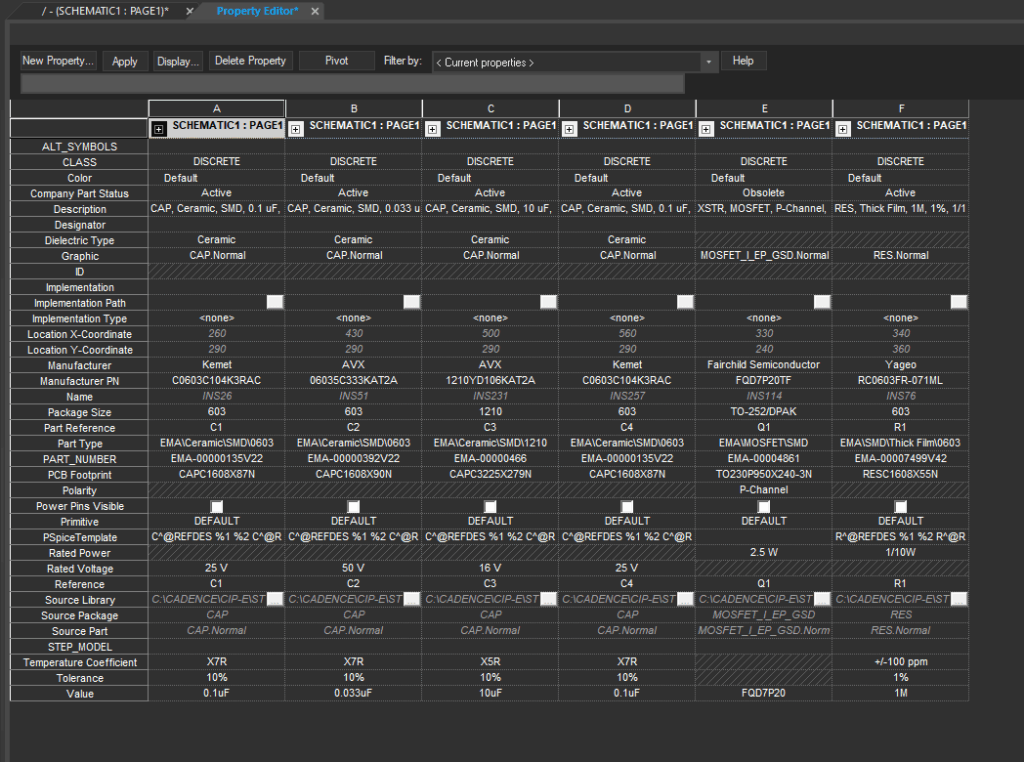
Step 16: View the PCB footprint cells. The PCB footprints have been updated to match the parts in the database.
Wrap Up & Next Steps
Easily synchronize component information between the schematic and your component database to keep parts up to date with design sync in CIP. Get more step-by-step instructions for CIP at EMA Academy.

