When creating a new revision for a design, it is always easier to start with the existing framework rather than redesign the entire device. With PCB design software updating constantly, it’s important to keep designs up to date to ensure that they retain their compatibility when project revisions occur. OrCAD X allows you to quickly and easily update padstacks and footprints in OrCAD to keep legacy designs up to date and reuse known-good models.
This quick how-to will provide step-by-step instructions on how to update padstacks and footprints in OrCAD X to work in version X 23.1 or later with DB Doctor.
To follow along, download the provided files above the table of contents.
How-To Video
 Open in New Window
Identifying When to Update Padstacks and Footprints in OrCAD X
Step 1: Open OrCAD X PCB Designer 23.1 or later.
Step 2: Select File > Open from the menu.
Step 3: The file browser opens. Select Symbol Drawing (*.dra) from the Files of Type dropdown.
Step 4: Browse to and select the desired drawing file saved in version 16.6 or earlier. Click Open.
Note: The provided drawing file was saved in version 16.6 of OrCAD PCB Designer.
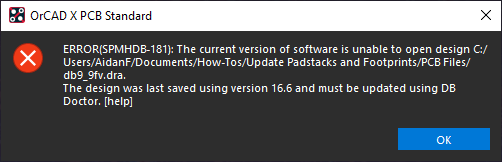
Step 5: An error message appears, indicating that PCB Designer 23.1 is unable to open the file saved with version 16.6. Click OK to clear the message.
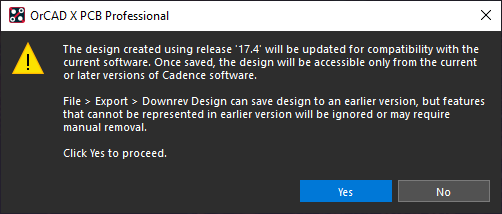
Note: If you receive a warning message with a yellow triangle that the design will be updated for compatibility with the current software, the design will open without issues. Click Yes to proceed and open the file.
Update Padstacks and Footprints in OrCAD X
Step 6: Open the Windows Start menu.
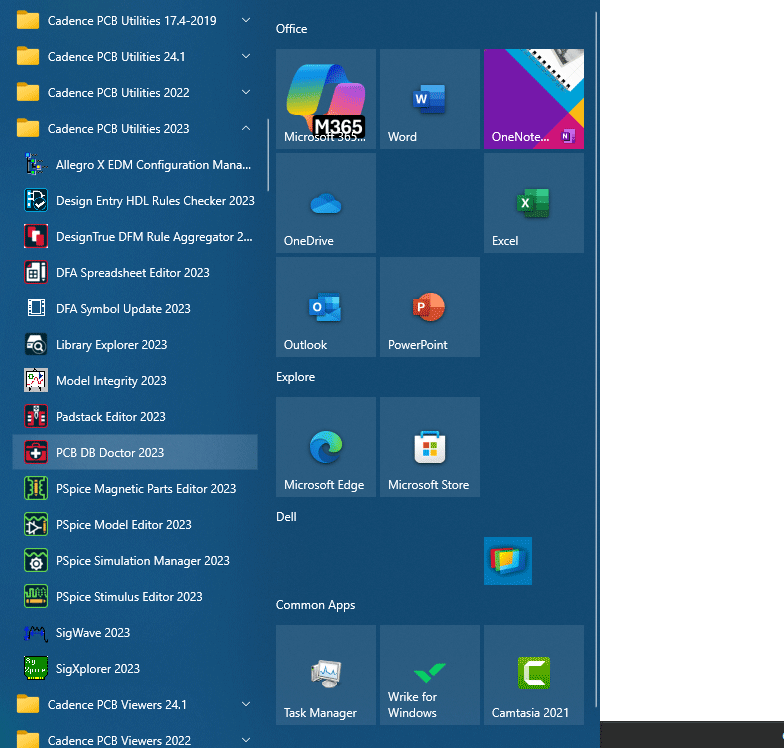
Step 7: Expand Cadence PCB Utilities 2023 and select PCB DB Doctor 2023 to launch DB Doctor.
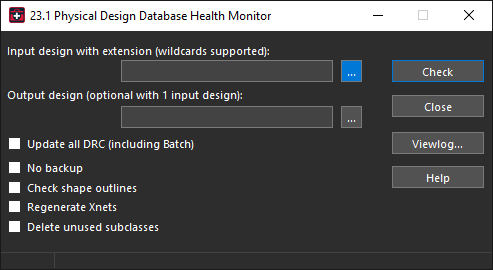
Step 8: The DB Doctor window opens. Here you can define the input file to be updated and the output file to be saved. The window also has options for updating DRCs, checking shape outlines, regenerating Xnets, and more.
Select the ellipsis for the Input Design field.
Step 9: The file browser opens. Select Symbol Drawing (*.dra) from the Files of Type dropdown.
Note: If updating a padstack or symbol, select the appropriate file extension from the dropdown.
Step 10: Select the desired file and click Open.
Step 11: Select the ellipsis for Output Design.
Step 12: In the file browser, select Symbol Drawing (*.dra) form the Files of Type dropdown. Enter the original file name with _23 at the end to indicate the updated drawing and click Save.
Step 13: Select Check in the DB Doctor window to run the conversion.

Note: When the conversion finishes, a message appears at the bottom of the DB Doctor window indicating that the conversion is completed.
Step 14: Select Viewlog to view the conversion log.
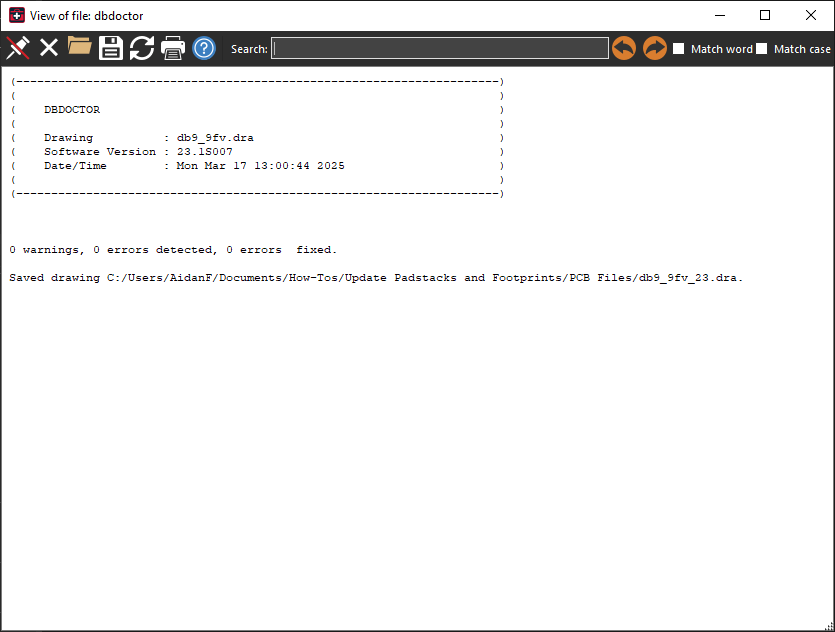
Step 15: The log window opens, showing the original drawing name, number of warnings and errors, and saved drawing location. View and close the window.
Step 16: Click Close to close DB Doctor.
Opening the File
Step 17: Back in OrCAD X PCB Designer, select File > Open again to open the file browser.
Step 18: Select Symbol Drawing from the Files of Type dropdown. Select the newly-created file and click Open.

Step 19: View the PCB canvas. The file has opened successfully and can be edited as normal.
Wrap Up & Next Steps
Quickly and easily update padstacks and footprints in OrCAD to be compatible with newer versions using DB Doctor to reuse component models and known-good IP. Test out this feature and more with a free trial of OrCAD X. Get more how-tos for OrCAD X at EMA Academy.

