Configuring and Exporting Manufacturing Data
This lesson will demonstrate how to configure and export manufacturing data created in the previous lesson.
To follow along, continue with the design from the previous lesson or download the starting materials from the Materials tab of this lesson.
 Open in New Window
Configuring Artwork Films
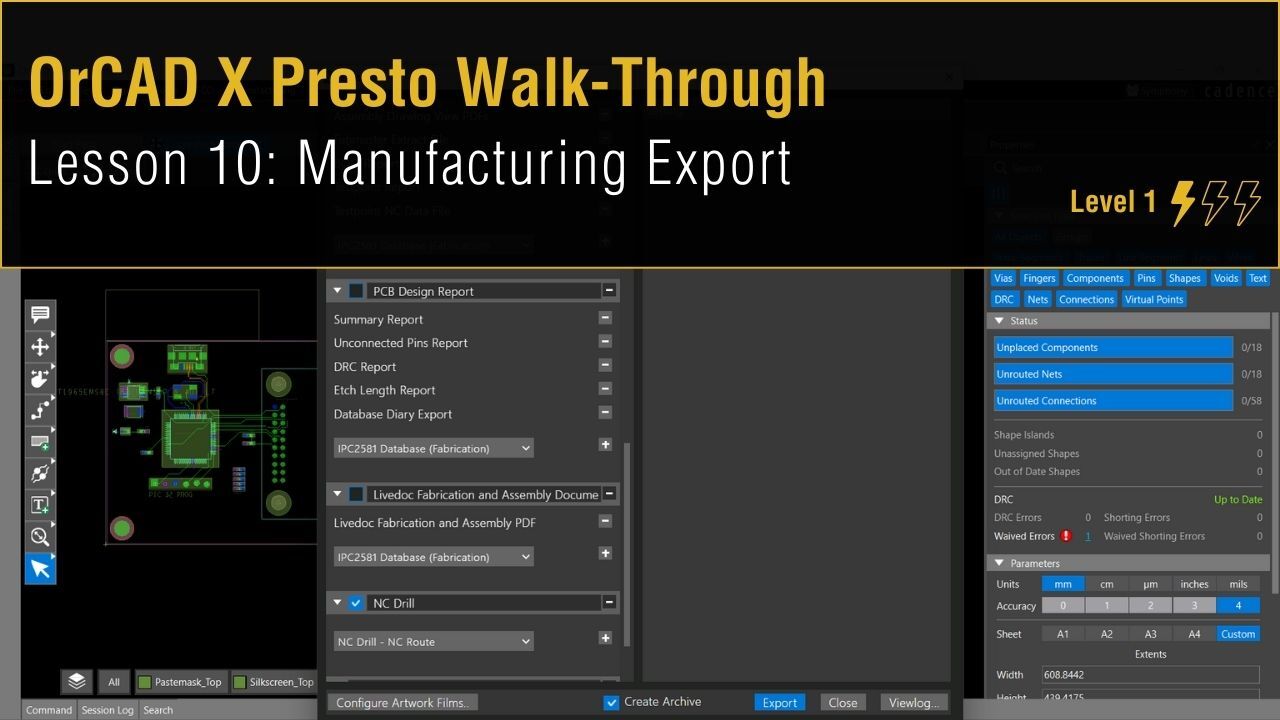
Step 1: Select Manufacturing > Export to Manufacturing from the menu to open the Exports window.
Export to Manufacturing lets you easily configure the documents required for manufacturing and exports all documentation with a single click. Documentation can be zipped according to the defined configuration to reduce errors and improve communication with stakeholders.
Step 2: Select Configure Artwork Films at the bottom of the window.
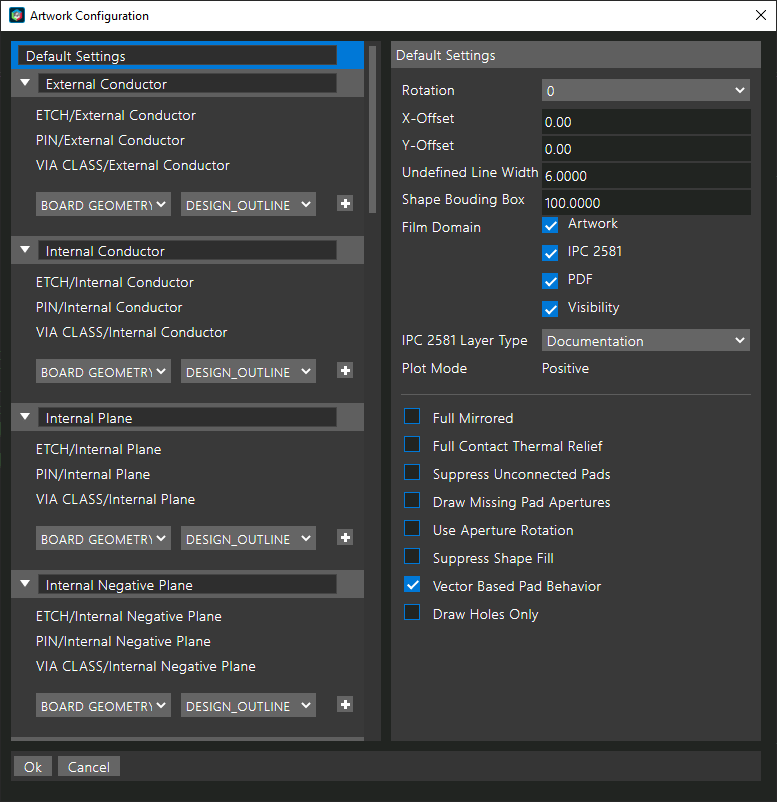
Step 3: View the artwork settings. Ensure they are set as shown and click OK. Here, you can configure layer definitions for artwork films and configure film options such as undefined line width.
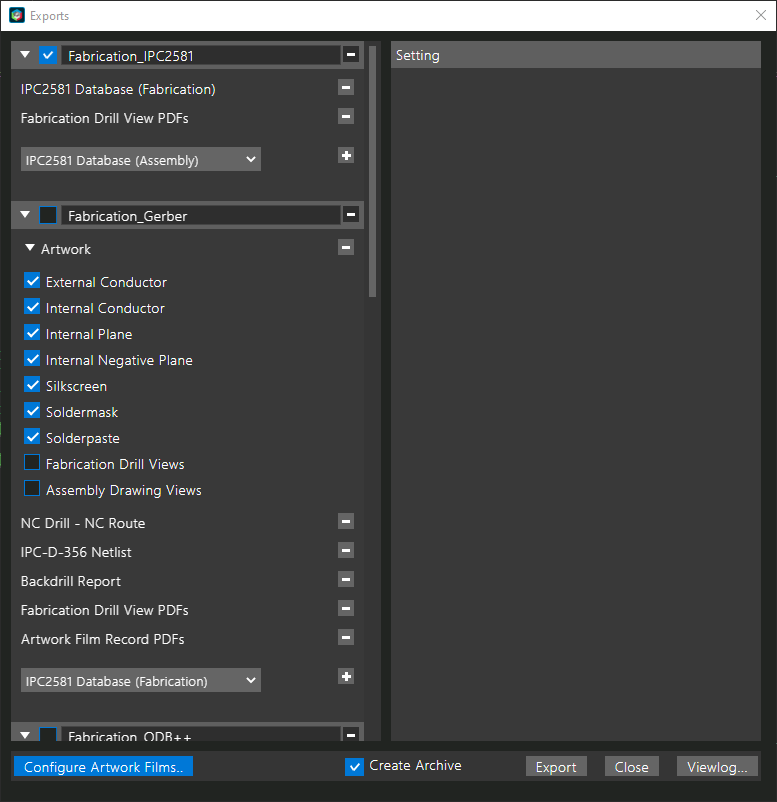
Step 4: Back in the Exports window, uncheck Fabrication_IPC2581 to remove it from the list of materials to export.
Step 5: Expand and check Fabrication Gerber to add it to the list of materials to export.
Note: In the Manufacturing Export window, selecting the minus sign will remove the entry from the list. Selecting the arrow will expand the entry.
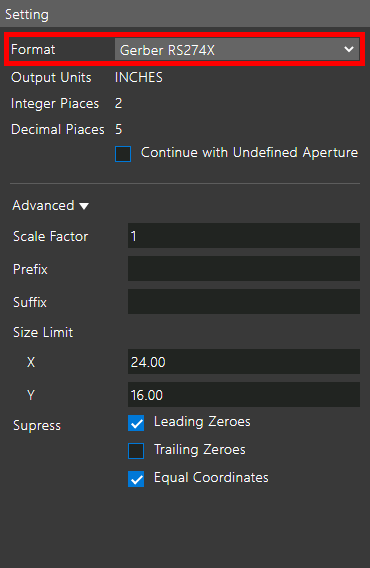
Step 6: Under Setting, ensure that Gerber RS274X is selected in the Format drop-down menu.
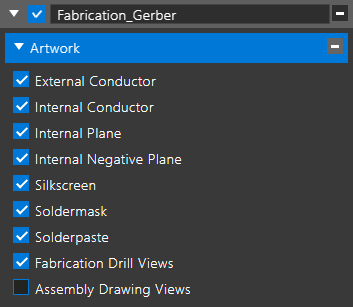
Step 7: Under Artwork, ensure that all options except Assembly Drawing Views are checked.
Configuring Fabrication Settings
Step 8: Select NC Drill – NC Route from the fabrication list.
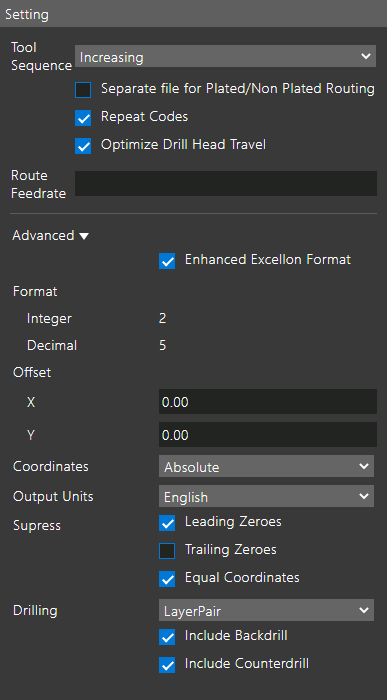
Step 9: The Settings window opens for NC Drill/NC Route. Ensure the settings match the settings shown above.
Step 10: Select IPC-D-356 Netlist from the fabrication list.
Step 11: Enter Presto Tutorial for the Board Title.
Step 12: Enter EMA-1234 for the Identification Number.
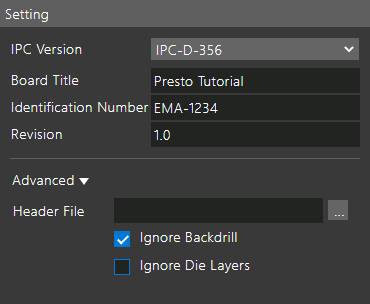
Step 13: Enter 1.0 for the Revision.
Configuring Assembly Settings
Step 14: Expand and check Assembly to add it to the list of materials to export.
Step 15: Click the minus sign for IPC2581 Database (Assembly) to remove it from the parameter list.
Step 16: Select Artwork. Leave the default settings.
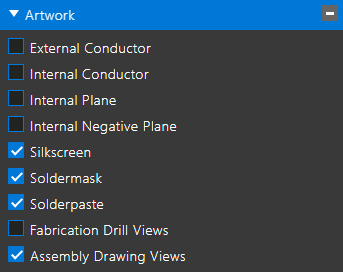
Step 17: Under Artwork, ensure the options for Silkscreen, Soldermask, Solderpaste, and Assembly Drawing Views are checked.
Exporting Design Documentation
Step 18: Check the option for PCB Design Report to export a design report including any unconnected pins and remaining DRCs.
Step 19: Check the option for Livedoc Fabrication and Assembly Documentation to export the documentation generated in LiveDoc.
Creating an Export Category
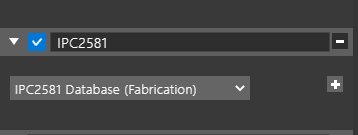
Step 20: Scroll to the bottom of the list to the blank text field for a new category. Enter IPC2581 for the name.
Step 21: Click the plus sign to create the new category.
Step 22: Select IPC2581 Database (Fabrication) from the dropdown below the category name and click the plus sign.
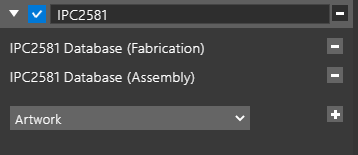
Step 23: Select IPC2581 Database (Assembly) from the dropdown and click the plus sign. The IPC2581 parameters have been added.
Exporting the Report
Step 24: Check the option for Create Archive to consolidate the exported files into zipped folders.
Step 25: Click Export.
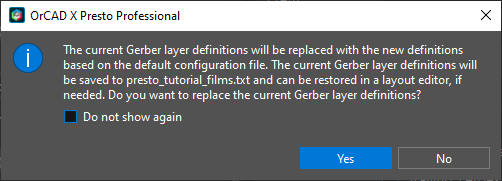
Step 26: A prompt will appear that the current Gerber layer definitions will be replaced. Click Yes to proceed.
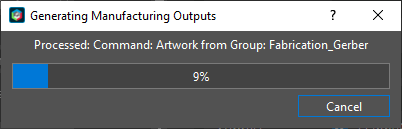
Note: While the data is being created, a progress bar is shown. When the export finishes, your PDF reader may open with the error that the specified file cannot be found. Click OK and close the PDF reader.
Viewing the Generated Data

Step 27: Open File Explorer and browse to the working directory. Open the allegro folder. Five new Zipped files are included in the folder:
- presto_tutorial_Assembly.zip: Includes the artwork for assembly and related drawing views.
- presto_tutorial_Fabrication_Gerber.zip: Includes the Gerber artwork and a drill view for fabrication.
- presto_tutorial_IPC2581.zip: Includes all IPC2581 assembly and fabrication data.
- presto_tutorial_Livedoc Fabrication and Documentation: Includes the exported PDF from LiveDoc.
- presto_tutorial_PCB Design Report: Includes all generated design reports in plain text.
Step 28: Click Close to close the Export window.