Creating a PCB design often comes with monotonous, repetitive tasks. For example, the time spent changing grid sizes, creating differential pairs, and changing via patterns during routing can accumulate and slow down the design process. While shortcut keys can help expedite the design process, this can be taken a step further with scripting. OrCAD PCB Designer, allows you to quickly perform routines or tasks containing multiple mouse clicks by pressing a single key with scripting to expedite the design process.
This quick how-to will provide step-by-step instructions on how to automatically script design tasks and replay the script to accelerate the design process in OrCAD PCB Designer.
To follow along, download the provided materials above the table of contents.
How-To Video
Recording the Screen
Step 1: Open the provided design in OrCAD PCB Designer.
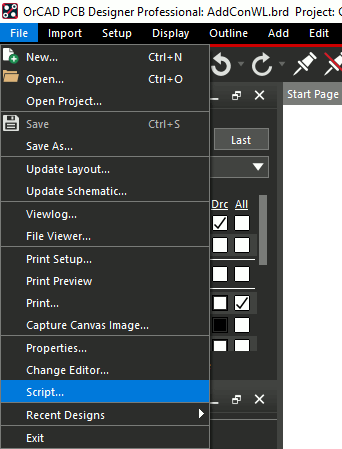
Step 2: Select File > Script from the menu.
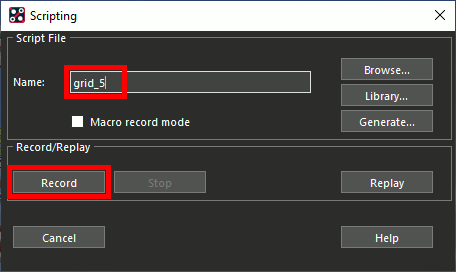
Step 3: Enter grid_5 for the script name.
Step 4: Click Record to start recording.
Note: This allows the steps or commands to be recorded, automatically generating and saving the corresponding script as the script file: grid_5.scr.
Step 5: Select Setup > Grids from the menu.
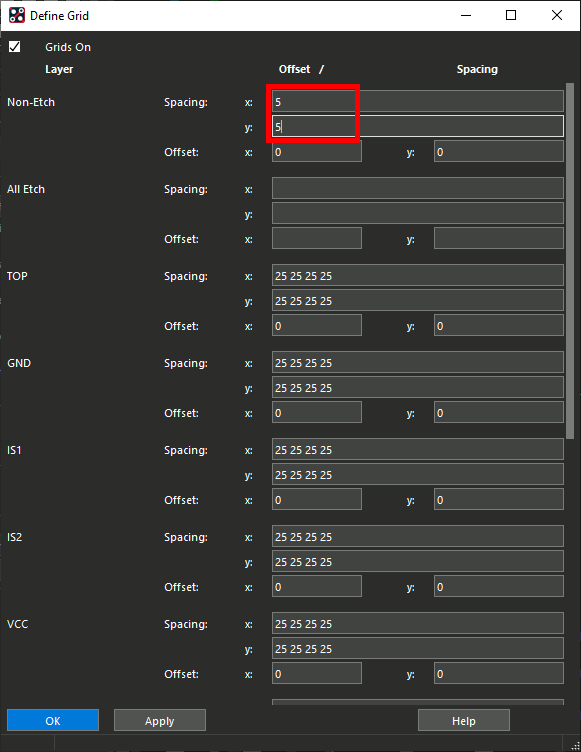
Step 6: Change the x and y spacing for Non-Etch to 5. Click OK.
Step 7: Select File > Script from the menu. Click Stop to stop recording. Close the Scripting window.
Running the Script
Step 8: Select Setup > Grids from the menu.
Step 9: Change the non-etch grid spacing back to 25 and click OK.
Step 10: Select File > Script from the menu.
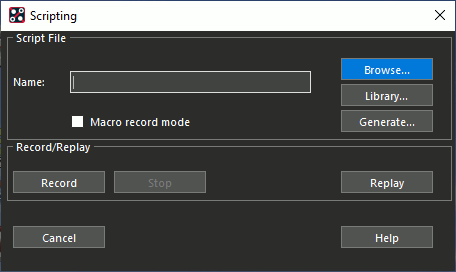
Step 11: In the Scripting window, select Browse.
Step 12: Browse to the saved grid_5.scr. Select the file and click Open.
Step 13: Select Replay to run the script.
Note: The script has been run and the grid spacing has been changed to 5 mils.
Running the Script with Commands
Note: The script can be run in the command line window to accelerate the design process even further.
Step 14: Select Setup > Grids from the menu. Change the non-etch grid spacing back to 25 and click OK.
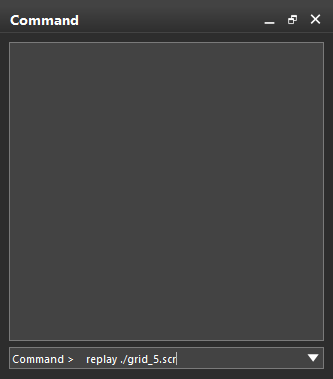
Step 15: In the Command window, enter replay ./grid_5.scr and press Enter. The grid spacing has been changed to 5 mils.
Note: If the Command window is not visible, select Display > Windows > Command from the menu.
Setting a Script Shortcut
Step 16: Select Setup > Grids from the menu. Change the non-etch grid spacing back to 25 and click OK.
Step 17: In the Command window, enter alias grid5 replay ./grid_5.scr.
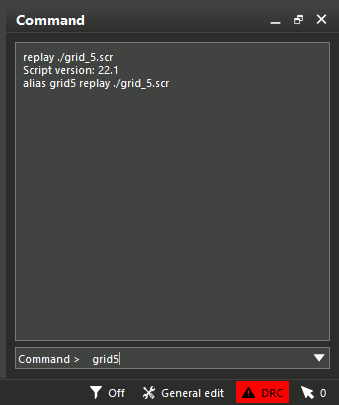
Step 18: Enter grid5 into the Command window and press Enter. The grid spacing has been changed to 5 mils again.
Note: Pop-ups and flashes may be visible on screen as the script is running through the commands required for the task. When a script is replayed, the corresponding commands run by the script are printed in the command window.
Running an Invisible Script
Note: In some instances, it may be desirable to run a script without the required windows appearing.
Step 19: Select Setup > Grids from the menu. Change the non-etch grid spacing back to 25 and click OK.
Step 20: Open File Explorer and navigate to the working directory.
Step 21: Right-click the grid_5.scr file and select Open With.
Step 22: Select a text editor such as Notepad from the application list and click OK.
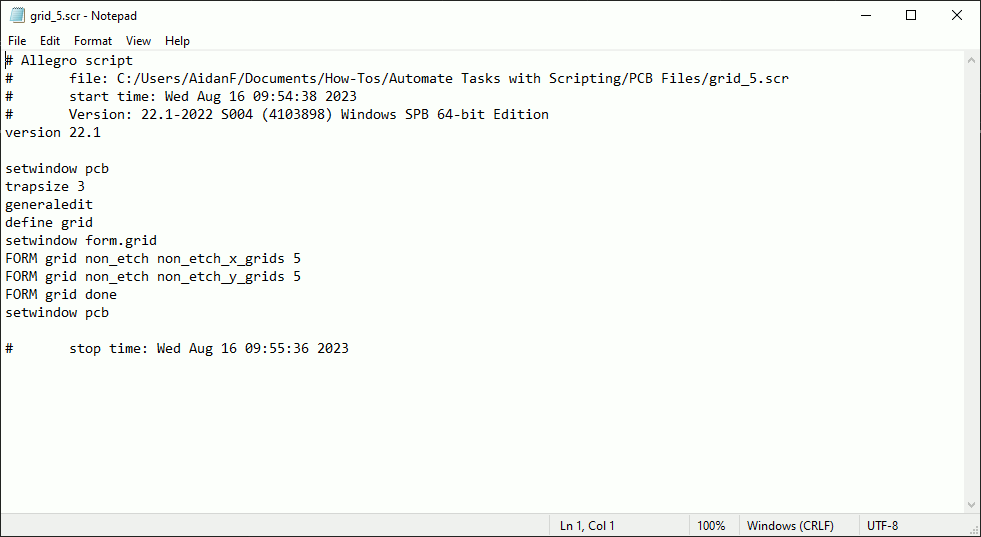
Step 23: View the recorded script.
Note: Comments are indicated with the number sign, #. The file path, version of PCB Designer, and start and stop time are indicated in the header and footer of the script.
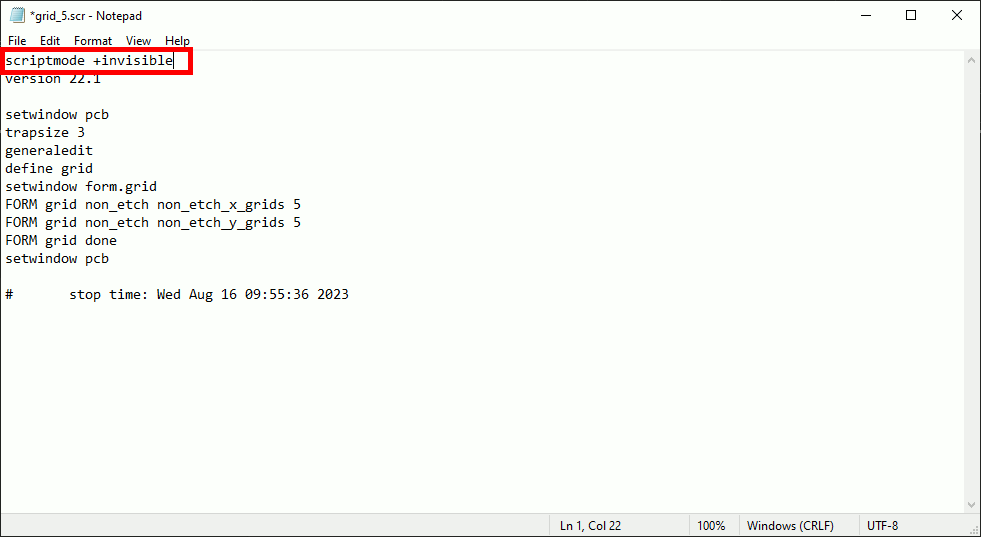
Step 24: Replace the comments above the version number with scriptmode +invisible.
Note: This will run the script without opening any windows.
Step 25: Save and close the text file.
Step 26: Back in PCB Designer, enter grid5 into the Command window and press Enter. The grid spacing has been changed to 5 mils, and the grid window was not opened.
Wrap Up & Next Steps
Quickly reduce monotonous and repetitive tasks to single keystrokes without a knowledge of software languages with automatic scripting in OrCAD PCB Designer. To learn more about scripting and how SKILL can expedite the design process, view our how-to here. To test out this feature and more get a free trial of OrCAD.

