Readability on a PCB is crucial for assembly, testing, and troubleshooting; however, manually moving and rotating text for every component on a PCB is tedious, especially on large boards with thousands of small parts. Save time preparing for manufacturing and efficiently adjust component labels by automatically arranging silkscreen or assembly text with the Label Tune in Allegro Productivity Toolbox. Quickly adjust text to improve readability with:
- Automatic rotation of text labels
- Automatic centering of text labels inside a component outline
- Automatic fit operation by increasing text size
- Automatic mirroring of text labels based on placement side
This how-to will provide step-by-step instructions on how to use the Label Tune feature with OrCAD PCB Designer Professional and Allegro Productivity Toolbox to automatically adjust component labels.
To follow along, download the provided design above the table of contents.
How-To Video
Configuring Label Tune
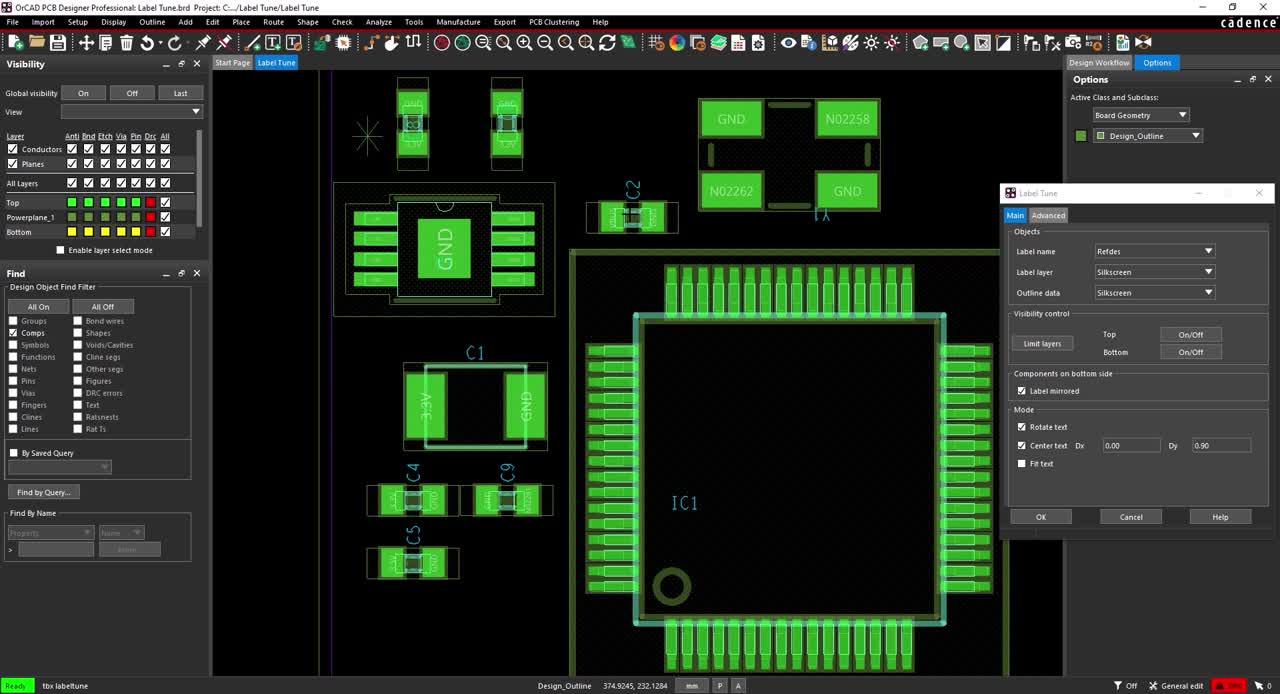
Step 1: Open the provided design, Label Tune.brd, in OrCAD PCB Designer Professional with the Allegro Productivity Toolbox option selected.

Step 2: Select Manufacture > Label Tune from the menu to open the Label Tune window.
Step 3: Under the Label Layer drop-down menu, select Silkscreen.
Note: This specifies the label layer to process.
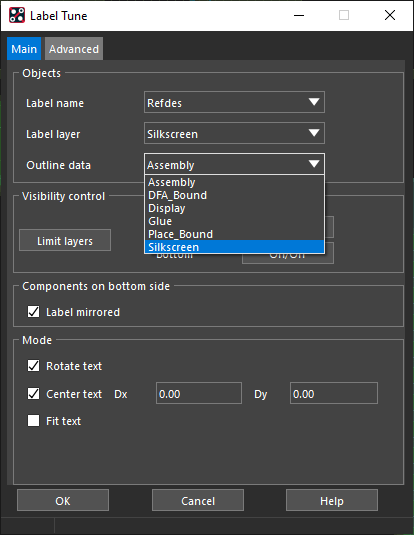
Step 4: Under the Outline Data drop-down menu, select Silkscreen.
Note: This specifies the component outline to be used during calculations.
Step 5: Under Mode, ensure Rotate Text and Center Text are selected.
Adjusting Reference Designators
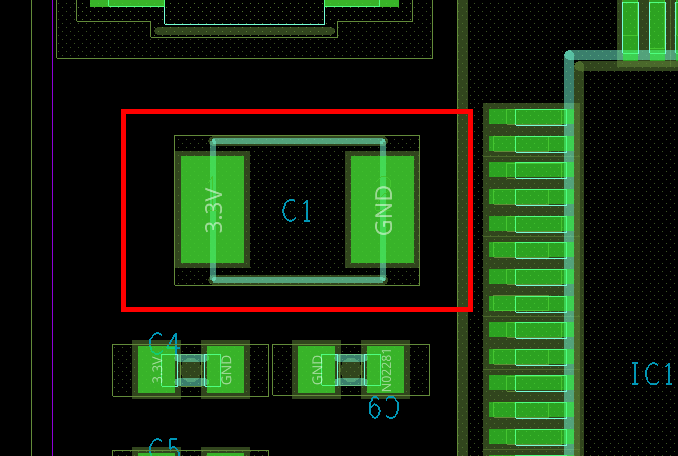
Step 6: Select capacitor C1.
Note: The label has been centered but will still be blocked by the part when it is soldered.
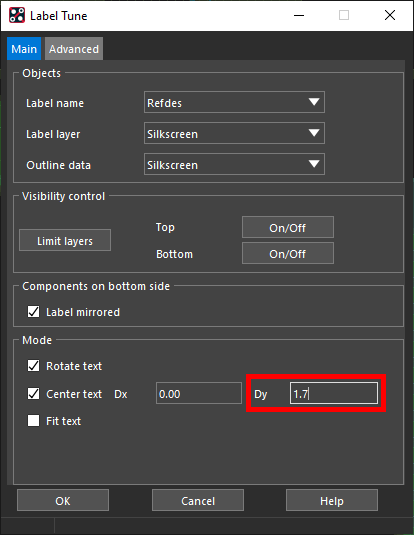
Step 7: In the Dy field under Center Text, enter 1.7.
Note: This will move the text 1.7mm above center in the Y-direction.
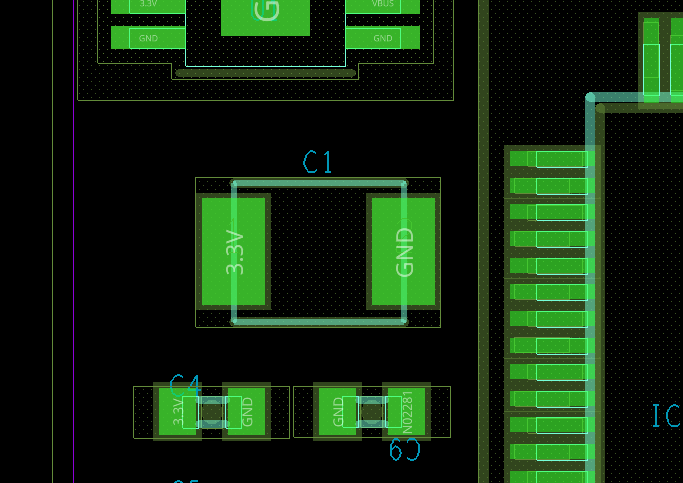
Step 8: Select C1 again to move the text above the component.
Optimizing RefDes Silkscreen
Step 9: Label tune can be used to adjust the text for multiple components as well. Set the Dy field to 0.9.
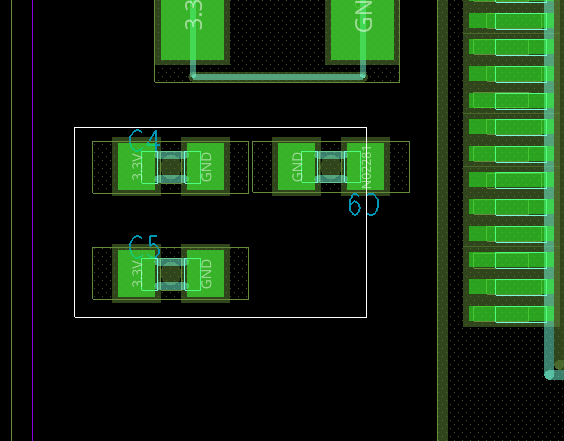
Step 10: Click and drag to select capacitors C4, C5, and C9. The labels have been moved to above the part and rotated 90 degrees.
Note: Rotation parameters can be specified in the Advanced tab of the Label Tune window.
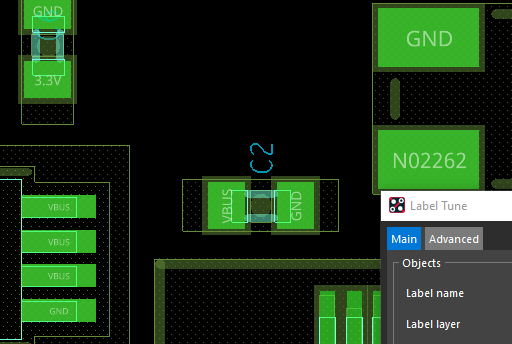
Step 11: Select capacitor C2 to similarly adjust the label.
Step 12: Set the Dy field to 0 and the Dx field to -0.9 to move the text 0.9mm to the left of center.
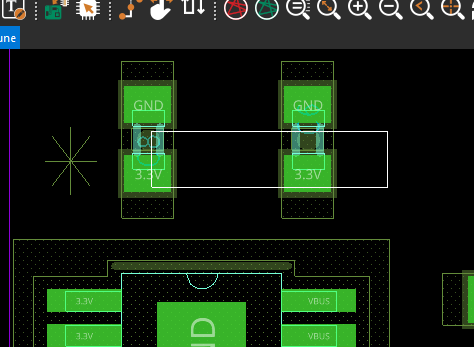
Step 13: Click and drag to select capacitors C8 and C6 to adjust the text.
Step 14: Set Dx to 0 and Dy to -2.4.
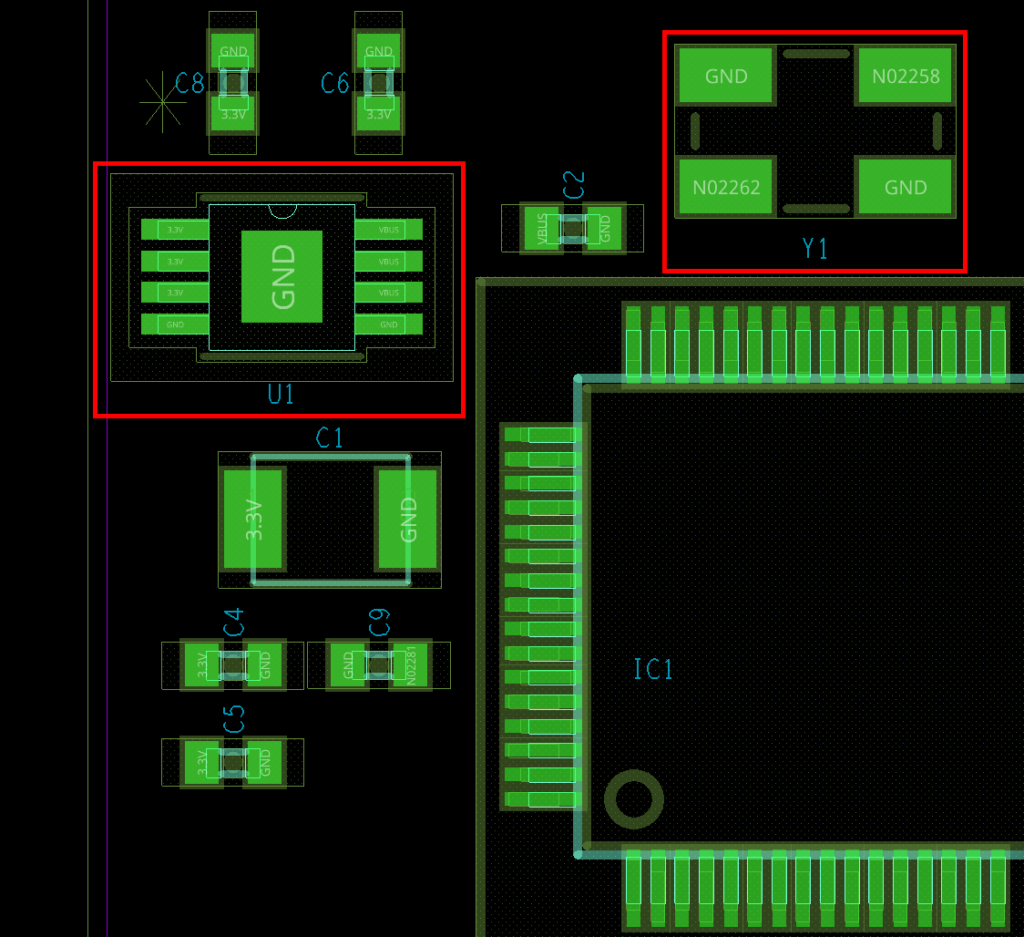
Step 15: Select IC U1 and crystal Y1 to adjust the text.
Wrap Up & Next Steps
Quickly adjust text for documentation and fabrication with Label Tune in the Allegro Productivity Toolbox. To learn more about how the features of Allegro Productivity Toolbox can expedite your PCB designs, view our latest webinar.

