

Component databases are continuously evolving as new components are introduced to the market and existing parts become obsolete or unavailable. To prevent design delays while new components are being created, validated, and approved, organizations can leverage temporary parts within their design process.
Component Information Portal (CIP) enables engineers to continue designing with temporary components while formal part creation and approval workflows are completed. Once approved, component data can be synchronized between the database and schematic, ensuring accurate and up-to-date information throughout the design. This approach helps maintain design momentum, reduces administrative bottlenecks, and streamlines the overall product development process.
This quick how-to will provide step-by-step instructions on how to design with temporary parts using CIP.
How-To Video
 Open in New Window
Configuring and Enabling Email Alerts
Email notifications can be configured to notify users of when temporary parts are approved and added to the main part database.
Step 1: With a design open in OrCAD X, select CIP > Open CIP from the menu.
Step 2: Enter your username and password.
Note: Configurations and settings are only editable by users with Administrative privileges.
Step 3: Select Admin > Configuration > Email Notifications from the CIP sidebar menu.
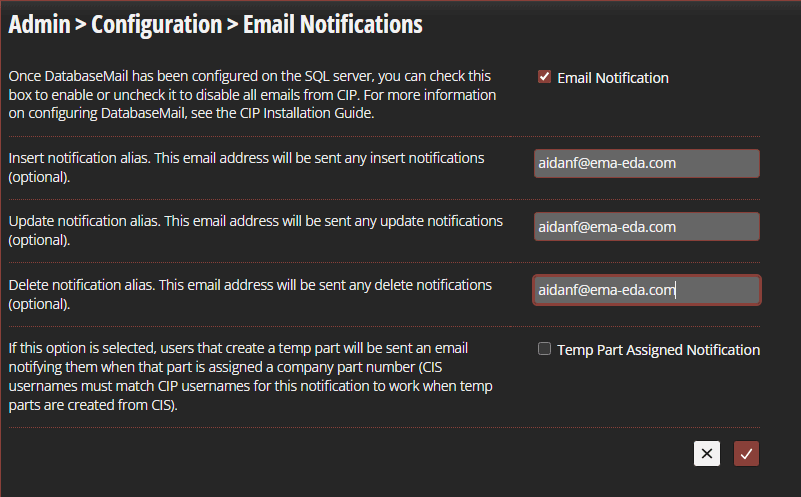
Step 4: The Email Notifications panel opens. Check the option for Email Notification to enable email alerts.
Note: If this option is disabled, run the following SQL command in Microsoft SQL Server Management Studio. To learn more about using Microsoft SQL Server Management Studio for CIP operations, see our how-to here.
EXECUTE msdb.dbo.sysmail_add_profile_sp
	@profile_name = "CIP-E",
	@description = '[profile description]';

EXECUTE msdb.dbo.sysmail_add_account_sp
	@account_name = '[account name]',
	@email_address = '[sending email address]',
	@enable_ssl = 1;

EXECUTE msdb.dbo.sysmail_add_profileaccount_sp
	@account_name = '[account name]',
	@profile_name = "CIP-E",
	@sequence_number = 1;
Step 5: Enter notification emails for insertion, update, and deletion events. These addresses will be sent the appropriate notifications.

Step 6: Check the option for Temp Part Assigned Notification to notify creators of temporary parts when the parts are approved.
Step 7: Select Save Changes to save the changes.
Researching Parts in CIP
Step 8: Select Search > Distributor from the sidebar menu.
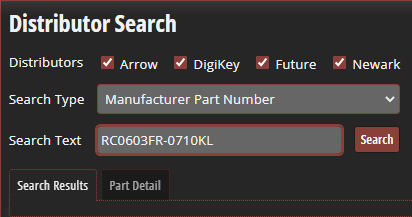
Step 9: The Distributor Search panel opens. Check all distributors for a complete search.
Step 10: Set the Search Type to Manufacturer Part Number.
Step 11: Enter RC0603FR-0710KL into the Search field.
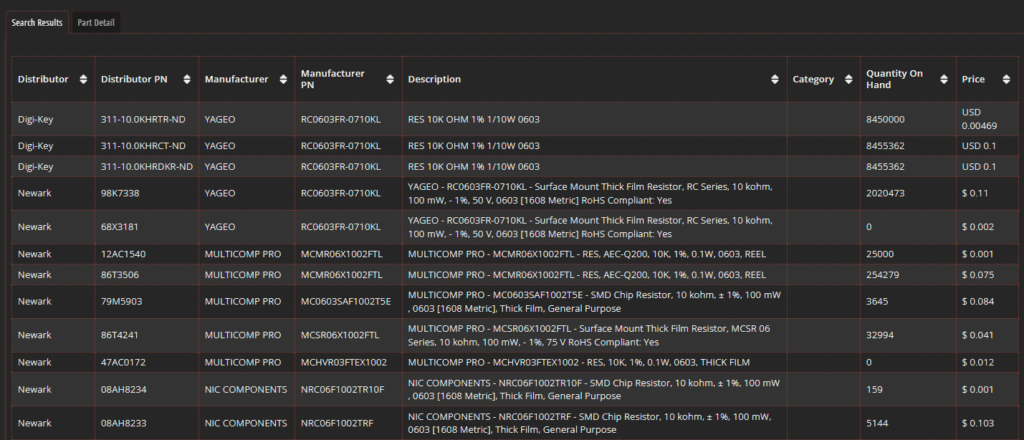
Step 12: Click Search. Matching results from all available distributors are shown in the table below.
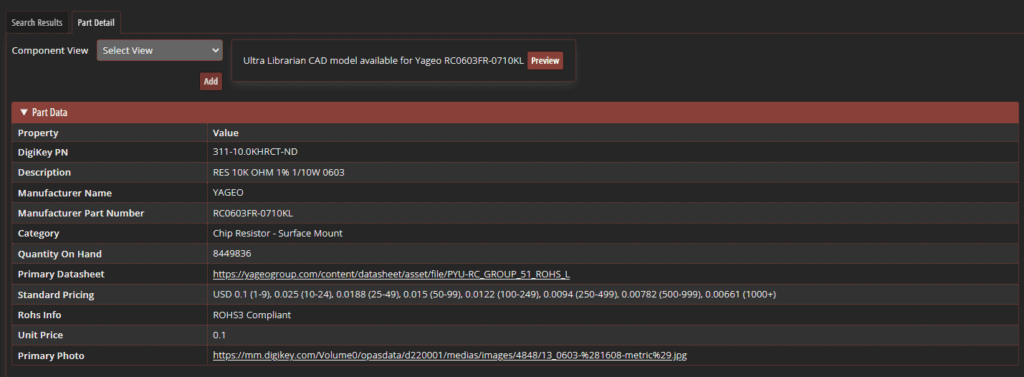
Step 13: Select a listing. The Part Detail tab opens, showing all relevant part information.
Step 14: To view a component preview, enter your Ultra Librarian username and password and click Log In to Ultra Librarian.
Note: Access to Ultra Librarian parts through CIP is free with the creation of an account. If you do not have an Ultra Librarian account, you can create one here.
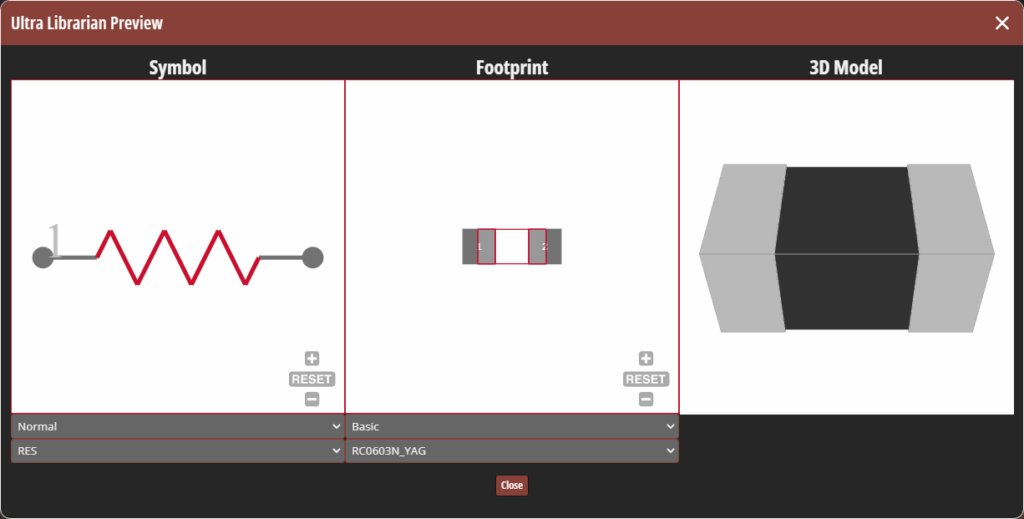
Step 15: View the Ultra Librarian preview. The schematic symbol, PCB footprint, and 3D model are shown. Hover over a pin in the schematic symbol to highlight the corresponding pin in the footprint.
Step 16: Click and drag the 3D model to pan the view. Close the preview window.
Creating a Temporary Part
Step 17: To add the part to your CIS database, select the appropriate view from the Component View dropdown. For this example, select Resistors.
Step 18: Set the Action to Create TMP Part to create a temporary part.
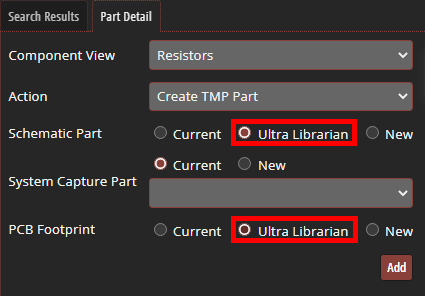
Step 19: If available the corresponding footprints and symbols can be selected from your existing library. For this example, we will use the pre-verified footprints available through Ultra Librarian to save time with model creation and validation. Select Ultra Librarian for the Schematic Part and PCB Footprint to assign the part symbol and PCB footprint from Ultra Librarian.
Step 20: Scroll down to view the Part Data. The required attributes have been mapped automatically.
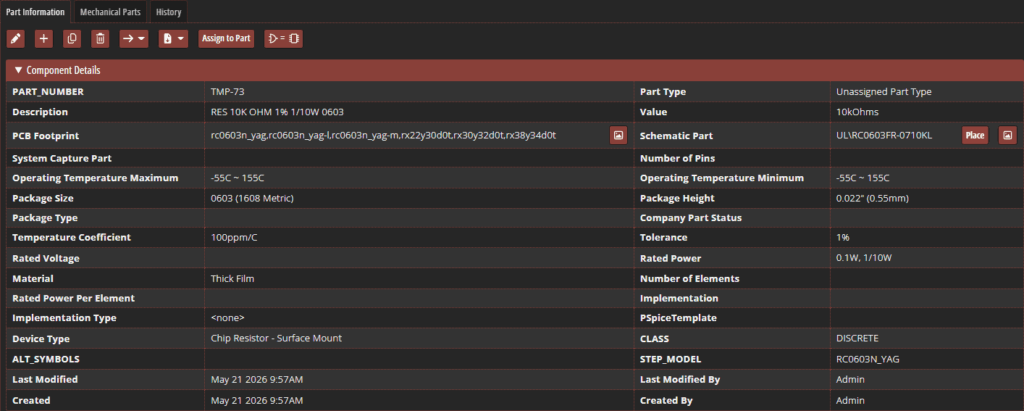
The part has been added to the database as a temporary part for the librarian or administrator to review and approve. A table opens for the new temporary part, showing the assigned properties.
To learn more about adding components to your CIP database, see our how-to here.
Design with Temporary Parts
Step 22: To place the part in your schematic, select Place in the Schematic Part cell.
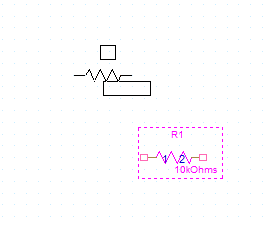
Step 23: The part is attached to your cursor. Click to place the part in the schematic canvas. Right-click and select End Mode when finished.
Step 24: The part placed in the schematic can be synced with the CIS database to ensure it stays up to date. Select CIP > Design Parts Sync from the menu.

Step 25: The Design Parts Sync table opens, showing that the resistor is up to date. Close the Design Parts Sync tab. At this point, you can continue with the temporary part while the component is reviewed and approved by the administrator or librarian.
Viewing Temporary Parts (Admin or Librarian)
Temporary parts are typically approved by an administrator or librarian. These features may not be available with the configured user roles and permissions. Find out more information about configuring user roles and permissions here.
Step 26: To view the list of temporary parts, select the CIP tab again.
Step 27: Select Temporary Parts under General.

Step 28: View the list. The resistor has been added and the TMP number is automatically incremented.
Reviewing and Approving Temporary Parts (Admin or Librarian)
Step 29: Select the link for the part in the list to approve it and create a full part number.
Step 30: Select Edit Component from the top of the table.
Step 31: Select the Autofill button for the part number to automatically assign a resistor part number.

Step 32: Select the Autofill button for the Part Type.
Step 33: Click Update Component. The part has been approved and added to the database.
Updating and Syncing the Part
At this point, the user is notified that the part has been approved through email and can synchronize the schematic and part database to automatically push any changes.
Step 34: Select the tab for the schematic design to reopen the schematic canvas.
Step 35: Select CIP > Design Parts Sync from the menu.
Note: If this option is grayed out, select the design file in the Project Manager first.

Step 36: View the Design Parts Sync table. The table now shows that a temp conversion is required as the part number has changed.
Step 37: Select Sync to sync the part in the schematic with the part defined in CIP.
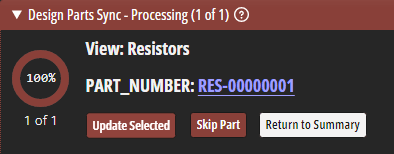
Step 38: Select Update Selected to push the update.

Step 39: View the table again. The table now shows that the part is up to date.
Wrap Up & Next Steps
Design with temporary parts to streamline product development and keep your design on track while components are created, verified, and approved with CIP. Get more step-by-step instructions for CIP
at EMA Academy.

