There are many stakeholders in a design project and clear communication is key to project success. While PDFs and images can be used to review design information, typically they do not provide dynamic interaction and intelligent design data. With the OrCAD Capture Free Viewer, you can efficiently review detailed information in the schematic design without tying up a license.
This quick how-to will provide step-by-step instructions on how to efficiently review schematics with the OrCAD Capture Free Viewer.
To follow along, download the provide design files above the table of contents.
How-To Video
Opening the Viewer
Step 1: Open File Explorer.
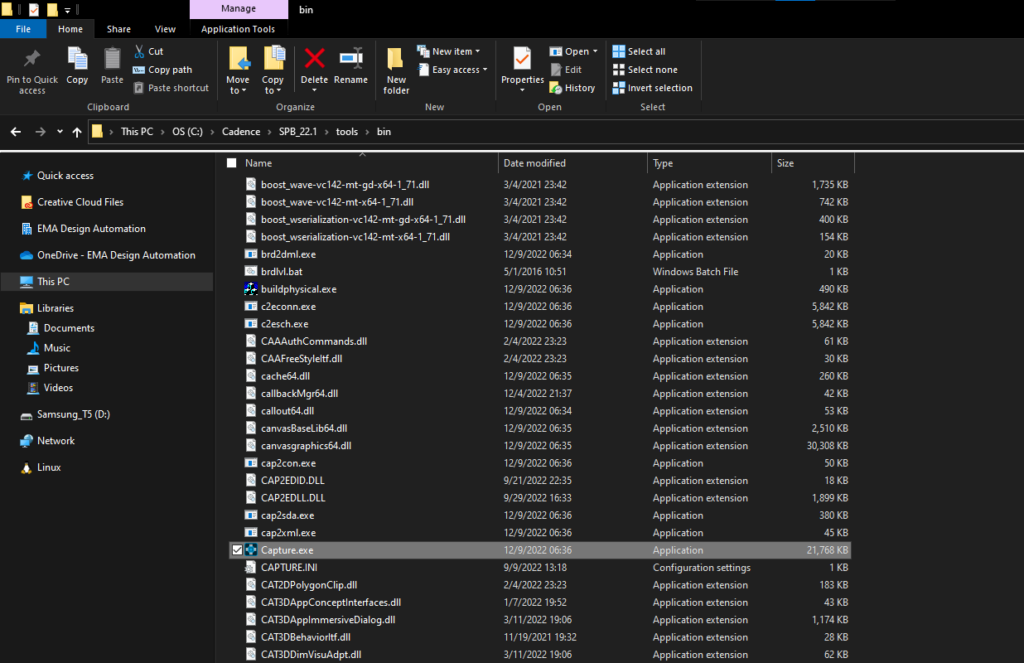
Step 2: Browse to C:\Cadence\SPB_22.1\tools\bin.
Step 3: Select Capture.exe.
Note: If OrCAD Capture is not installed, you can get the OrCAD Capture Free Viewer here.
Step 4: Right-click and select Send To > Desktop (create shortcut) to create a shortcut.
Step 5: In the desktop, right-click the created icon and select Properties.

Step 6: In the Target file path, add the flag -viewer to the end of the file path. Click OK.
Step 7: Double-click the shortcut to start Capture Free Viewer.
Viewing a Project
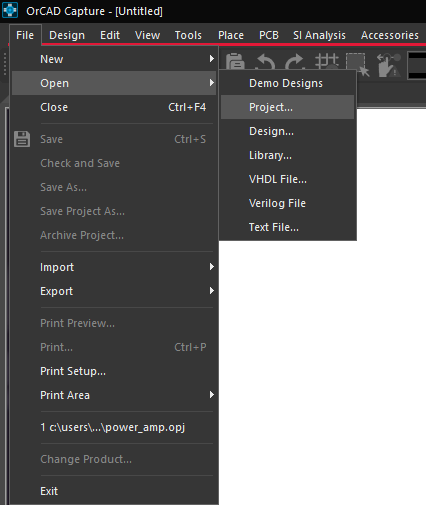
Step 8: To view a project, select File > Open > Project from the menu.
Step 9: Browse to the desired design, select it, and click Open.
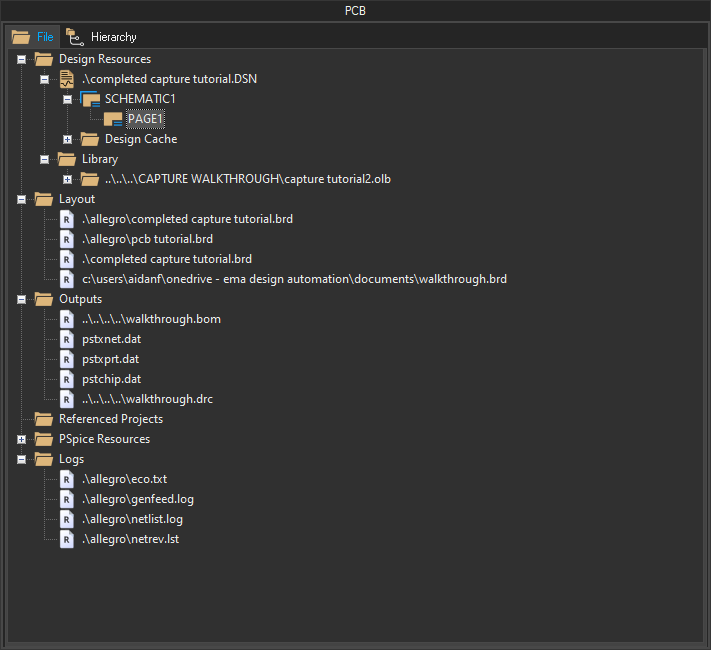
Step 10: The design hierarchy opens in the Project Manager. Double-click the desired page to open it in the schematic canvas.
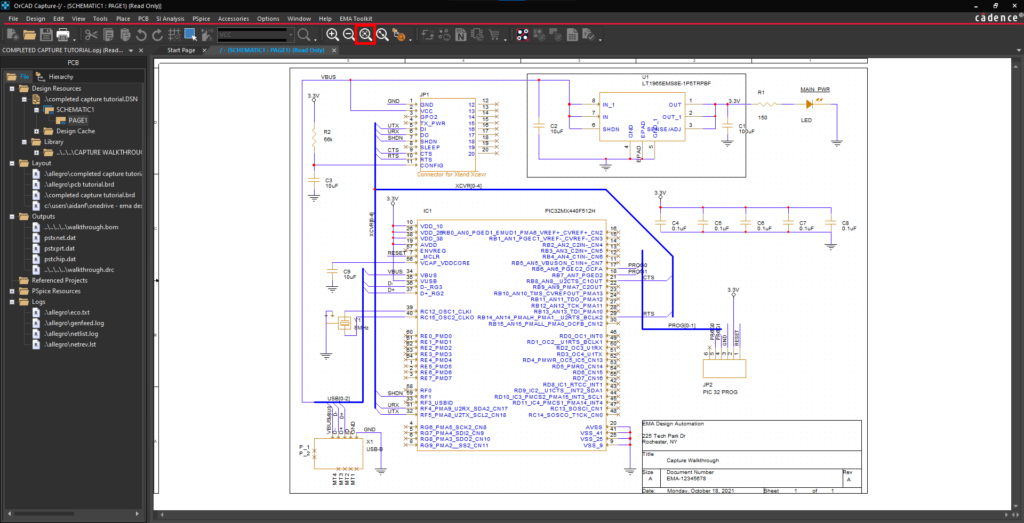
Step 11: To zoom to a specific region on the canvas, select the Zoom to Region icon from the toolbar.
Note: Other Zoom options include:
- Zoom In: Hold CTRL on the keyboard and scroll up to zoom in.
- Zoom Out: Hold CTRL on the keyboard and scroll down to zoom out.
- Zoom Fit: Zooms to the extents of the board.
Step 12: Click and drag to draw a rectangle around the desired region. The zoom pan will automatically adjust to this region. Right-click and select End Mode.
Highlighting Parts
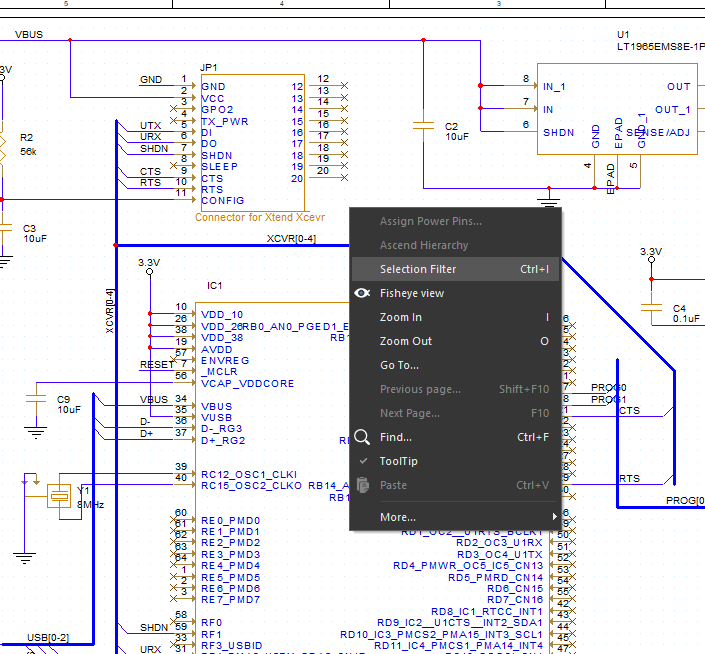
Step 13: Parts, nets, and labels can be selected and highlighted for a detailed view. To control which objects to select, right-click and select Selection Filter or press CTRL-I on the keyboard.
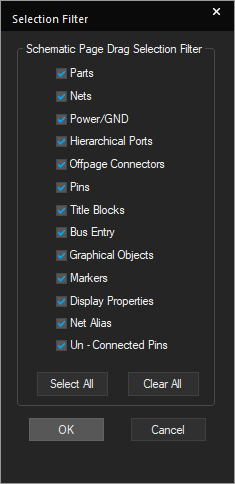
Step 14: In the selection filter window, choose which object(s) will be selected in the schematic canvas.
Note: Use the Select All and Clear All buttons to select or deselect all options.
Step 15: Click OK.
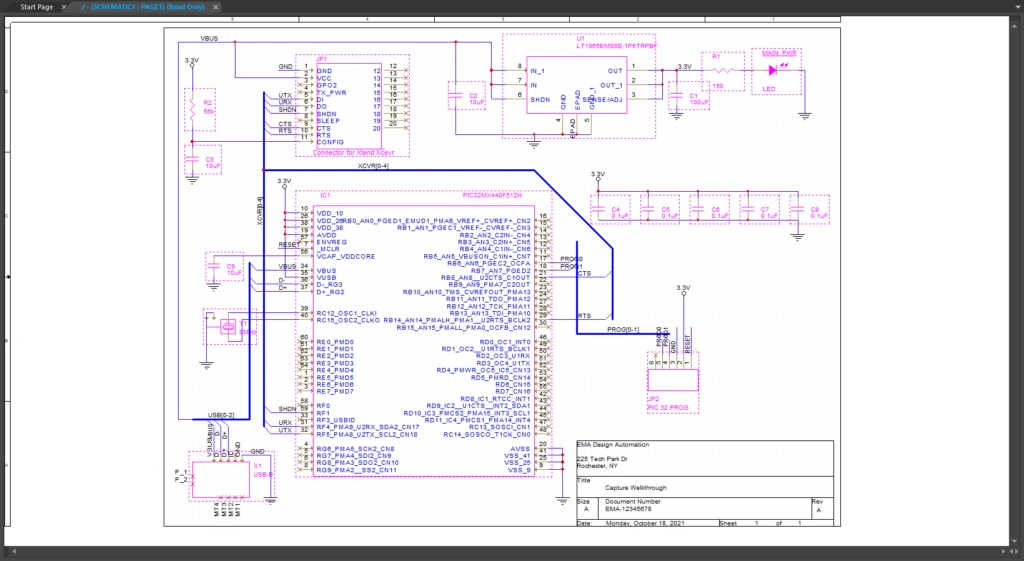
Step 16: Click and drag to select the entire design. Only the objects defined in the Selection Filter are selected. In this case, only components are selected.
Step 17: For more detailed review, right-click one of the selected parts and select Edit Properties.
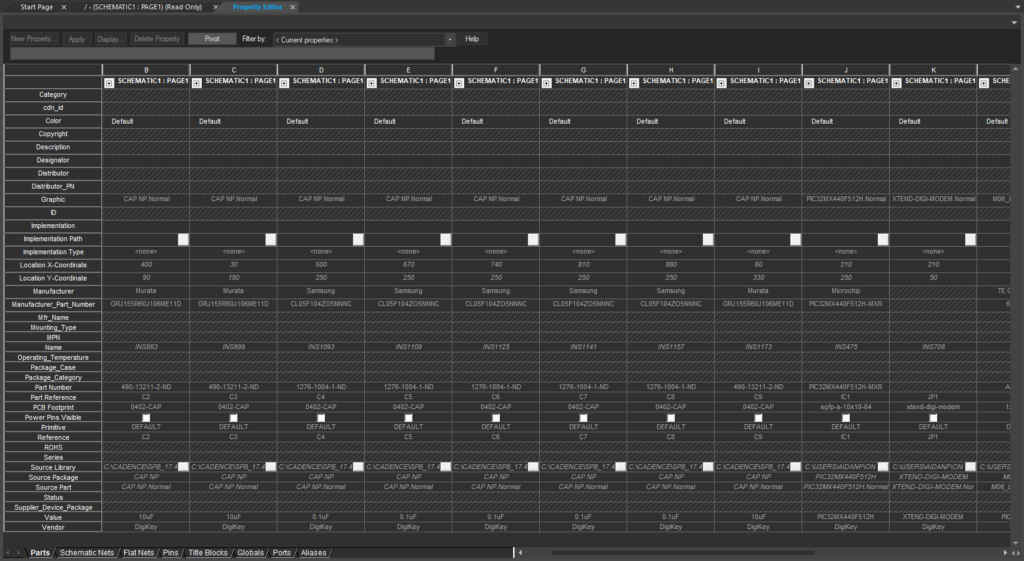
Step 18: The Property Editor tab opens with a list of read-only properties for each selected part including:
- PCB Footprint
- Manufacturer Name
- Manufacturer Part Number
- Company Part Number
- Source Library and Part
- Component Reference Designators
Note: If the axes are swapped such that each part is in its own row instead of column, select Pivot.
Highlighting a Net
Step 19: Back in the canvas, click to select a net with an alias.
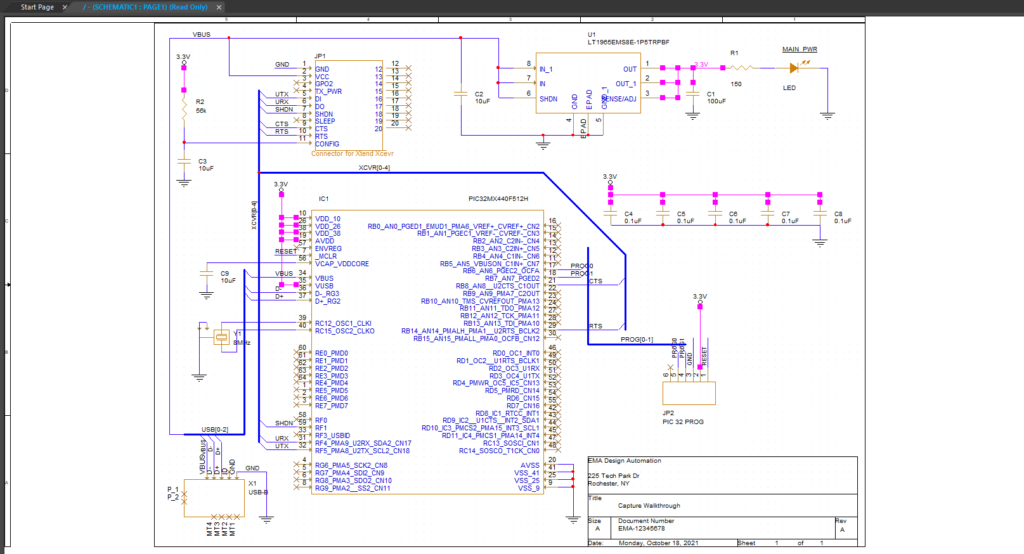
Step 20: Right-click and select Select Entire Net. All wires that connect to the net are shown.
Printing the Design
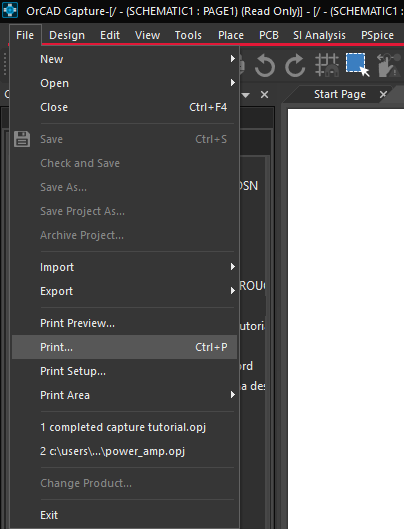
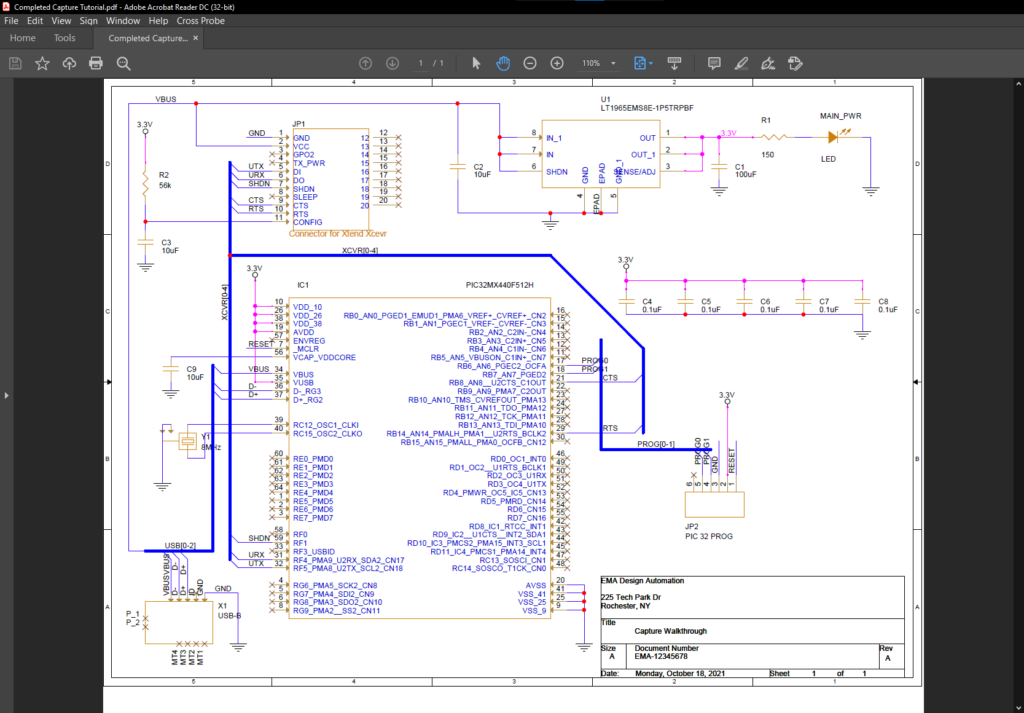
Step 21: The design can be printed to paper or a PDF file from the OrCAD Capture Free Viewer. Select File > Print from the menu.
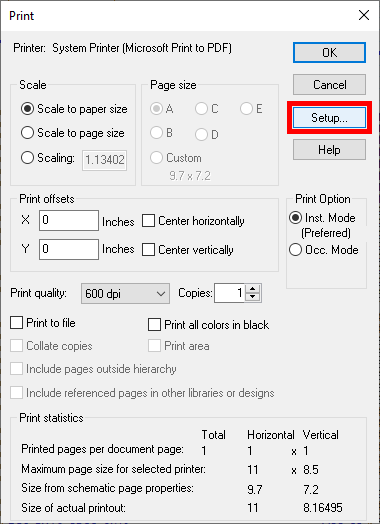
Step 22: The Print dialog window opens. Select Setup.
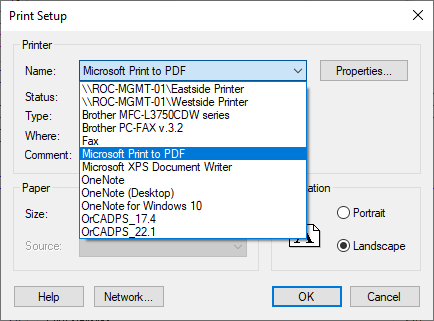
Step 23: Under Printer, select the desired printer from the drop-down menu. To create a PDF, select Microsoft Print to PDF and click OK.
Step 24: Click OK in the print dialog.
Step 25: If saving a PDF, browse for a location to save the file. Name the file and click Save.
Viewing Reports
Note: In order to view these reports, they must have been generated during schematic creation in the full version of OrCAD Capture.
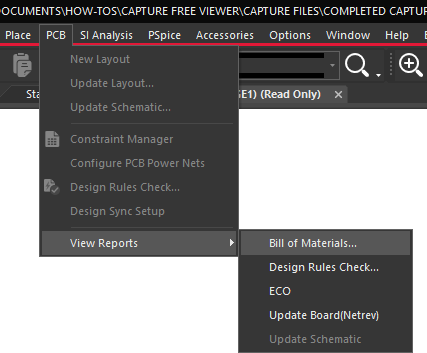
Step 26: Select PCB > View Reports > Bill of Materials from the menu.
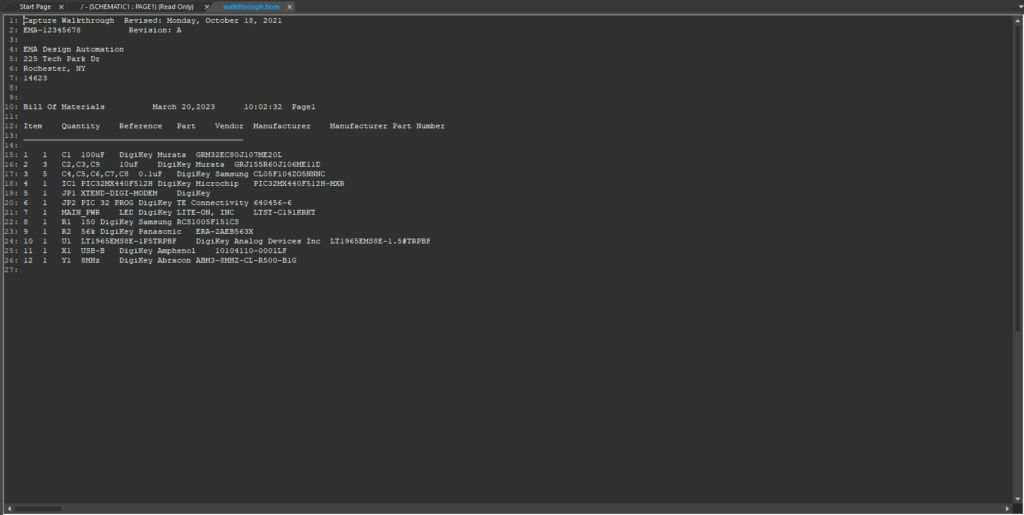
Step 27: The bill of materials will open in a new tab. Review and close the report.
Step 28: Select PCB > View Reports > Design Rules Check from the menu.
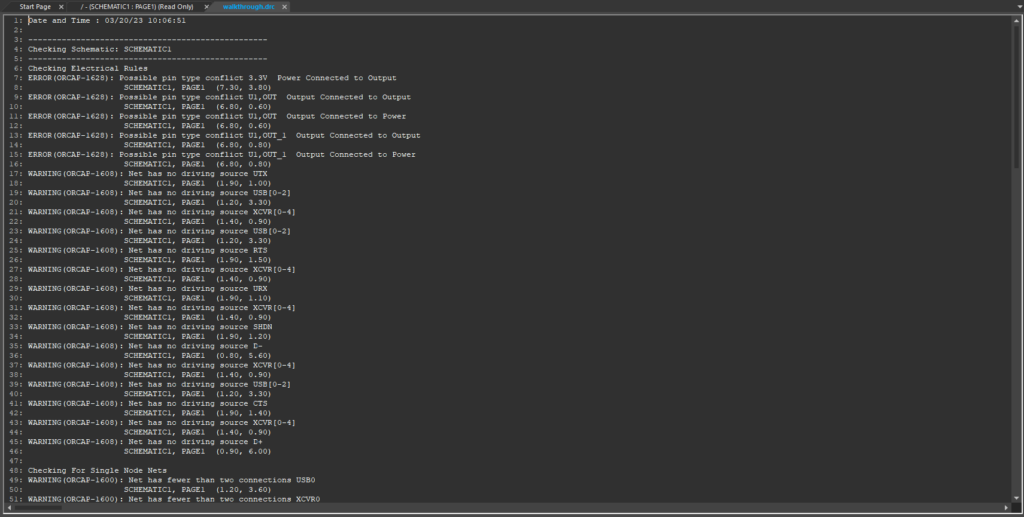
Step 29: The Design Rule Check results will open in a new tab. Review and close the report.
Wrap Up & Next Steps
Intelligently review schematic designs and access the design database without using a license with the OrCAD Capture Free Viewer. Get the OrCAD Capture Free Viewer here and access the full capabilities of OrCAD to streamline the design process further with a free trial.

