With design complexity increasing, signal integrity must be analyzed throughout the PCB design to improve signal quality and guarantee proper functionality. Both OrCAD PCB Designer Professional and Allegro PCB Designer include in-design analysis, allowing electrical engineers and PCB designers to analyze impedance and coupling directly on the PCB canvas. With visual overlays as well as tabular results, users can easily:
- Analyze the signal integrity of a PCB design
- Identify impedance discontinuities
- Identify unwanted coupling
- Adjust the PCB layout to improve signal quality
- Find and fix errors during the design when change is easiest
To utilize the in-design analysis functionality, additional setup and configuration is required. This quick how-to will provide step-by-step instructions on how to activate in-design analysis included with OrCAD PCB Designer Professional and Allegro PCB Designer.
Downloading the Required Software
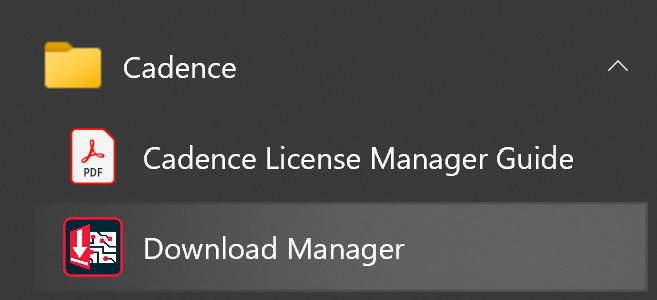
Step 1: From the start menu, navigate to the Cadence folder and select the Download Manager.
Note: If permission is required for the app to make changes, select Yes. Software can also be downloaded directly from support.cadence.com. A cadence online support login is required for both the download manager and the support website. If the login is unknown, request information here.
Step 2: Scroll down to the available products and locate Sigrity.

Step 3: Select the desired version from the drop-down menu.
Note: To be compatible and run in-design analysis, the version of Sigrity needs to match the version of OrCAD or Allegro:
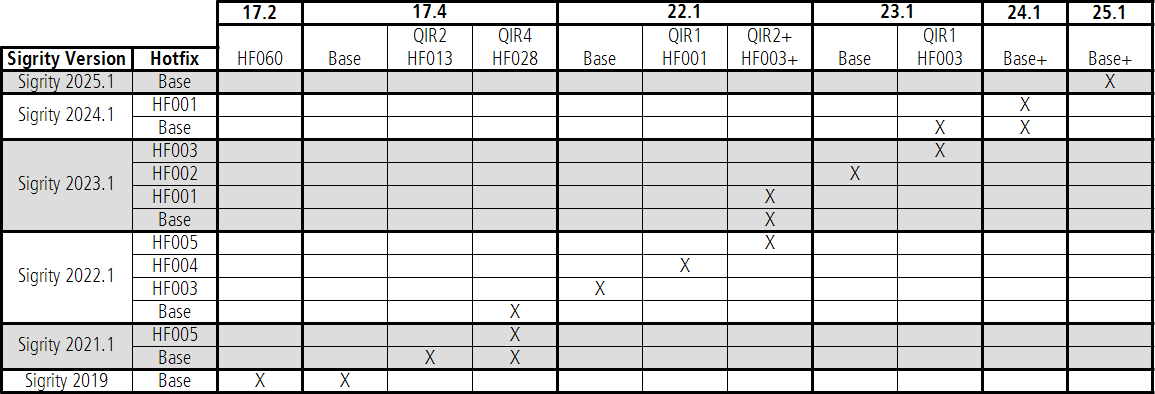
- For OrCAD/Allegro 24.1, select Sigrity 2025.1
- For OrCAD/Allegro 24.1, select Sigrity 2024.1
- For OrCAD/Allegro 23.1 QIR1 (Hotfix 003), select Sigrity 2023.1 (Hotfix 003) or Sigrity 2024.0
- For OrCAD/Allegro 22.1 QIR2 (Hotfix 003), select Sigrity 2022.1 (Hotfix 005) or Sigrity 2023.1 (Hotfix 001)
- For OrCAD/Allegro 17.4 QIR4 (Hotfix 028), select Sigrity 2022.1, Sigrity 2021.1 (Hotfix 005), or Sigrity 2021.1 (base release)
- For OrCAD/Allegro 17.4 QIR2 (Hotfix 013), select Sigrity 2021.1 (base release)
- For OrCAD/Allegro 17.4 (base release), select Sigrity 2019.
- For OrCAD/Allegro 17.2 (Hotfix 60), select Sigrity 2019.
Step 4: Select Install.
Step 5: Once download is complete, open the installation wizard. Select Next to continue with the installation.
Step 6: Select to accept the terms of the license agreement and click Next.
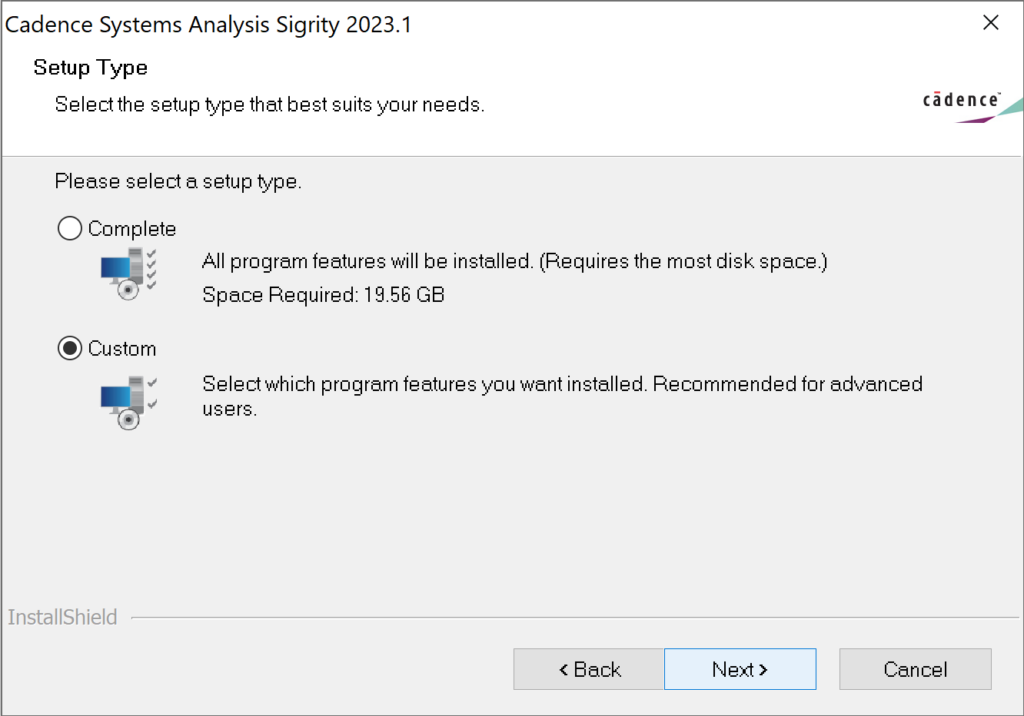
Step 7: Under Setup Type, select Custom and Next.
Note: The installation size and space required will be smaller when selecting a custom installation.
Step 8: Select Next to skip the control file.
Step 9: Configure the destination location and license path and click Next.
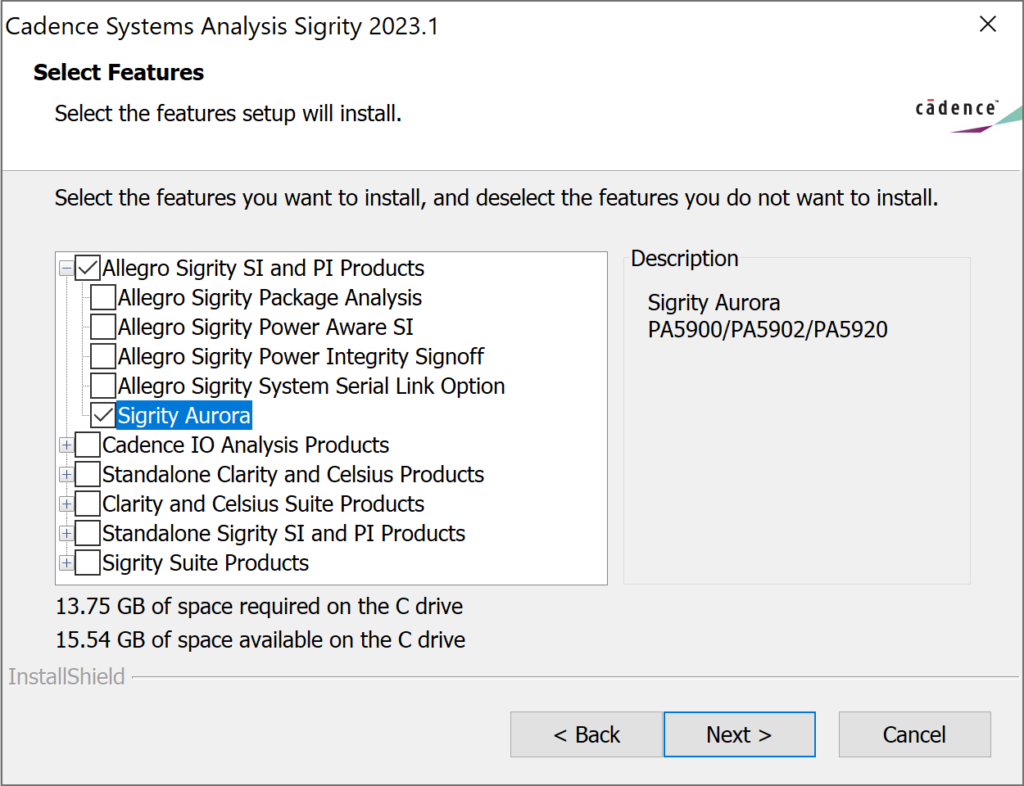
Step 10: Expand Allegro Sigrity SI and PI Products and select Allegro Sigrity Aurora. Click Next.
Step 11: Click Install to complete the remainder of the installation process for Sigrity Aurora.
Note: It is recommended to restart your computer after installation is completed.
Launching PCB Editor
Step 12: From the start menu, select Cadence OrCAD X and Allegro X > PCB Editor.
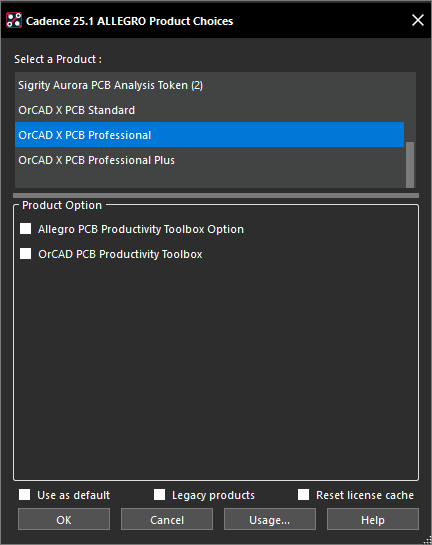
Step 13: If prompted, select OrCAD X PCB Professional from the product choices.
Note: To launch Allegro X PCB Designer 25.1, select Cadence OrCAD X and Allegro X 25.1 > PCB Editor 25.1 from the start menu. In the software product choices selection, choose Allegro X Designer. If OrCAD was opened with a different product, this can be changed by selecting File > Change Editor from the menu.
Accessing In-Design Analysis
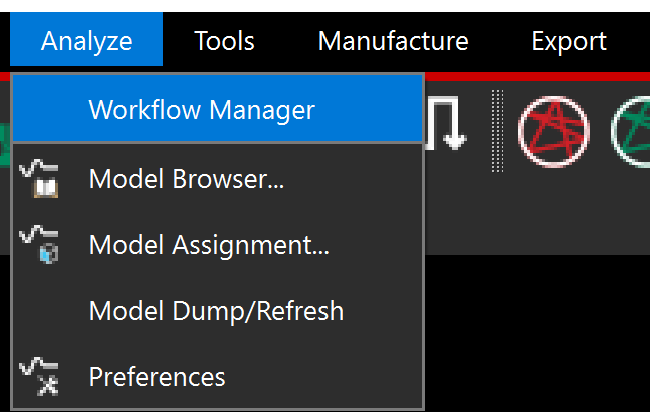
Step 14: Select Analyze > Workflow Manager from the menu.
Note: The Analysis Workflows window appears as a docked tab, similar to the Find, Visibility, and Options tab.
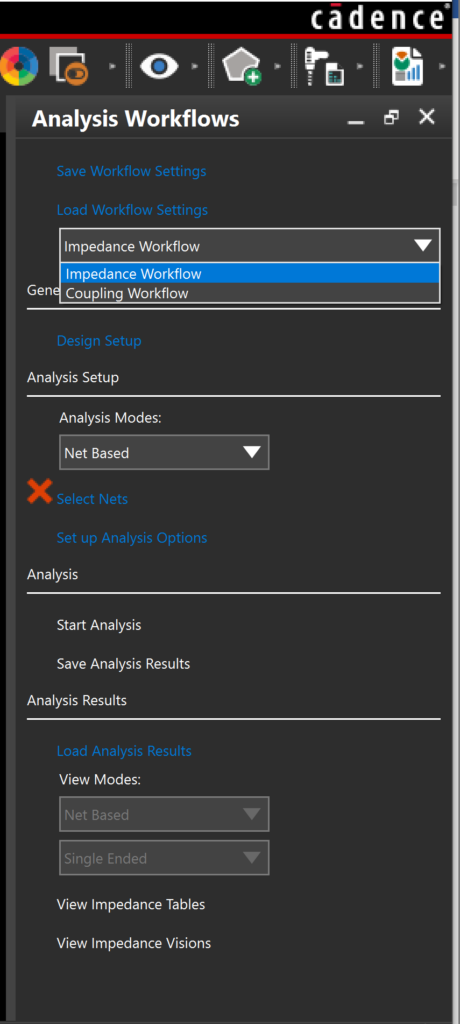
Step 15: Select the analysis drop-down menu to choose the desired workflow.
Note: OrCAD PCB Designer Professional includes impedance and coupling workflows. Allegro PCB Designer includes workflows for impedance, coupling design setup, topology extraction, and interconnect model extraction. If additional analysis capabilities are required, Sigrity Aurora provides in-design analysis directly in the PCB canvas for crosstalk, reflection, IR drop, return path, and power inductance.
Step 16: Follow the workflow to perform signal integrity analysis on the PCB.
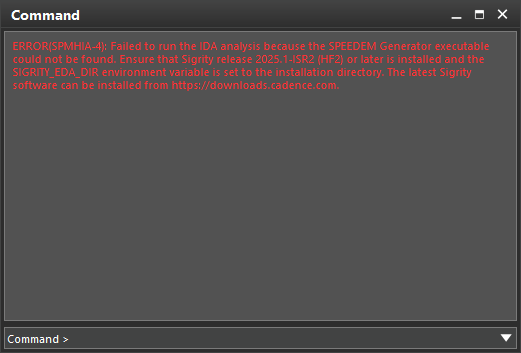
Note: After selecting Run in the analysis workflow you may receive the following error in the Command window:
“Failed to run the IDA analysis because the SPEEDEM Generator executable could not be found. Ensure the Sigrity release 2025.1-ISR2 (HF2) or later is installed and the SIGRITY_EDA_DIR environment variable is set to the installation directory. The latest Sigrity software can be installed from http://downloads.cadence.com. “
If you receive the above error, the correct Sigrity software is not installed or the environmental variable is not configured correctly. Verify the Sigrity version installed and ensure the environmental variable is set to the installation directory.
Wrap Up & Next Steps
Activate in-design analysis in OrCAD PCB Designer Professional and Allegro PCB Designer to easily analyze impedance and coupling directly in the PCB canvas and improve signal integrity. Learn how to use the impedance and coupling workflows with our how-to and quick tutorial. If additional analysis capabilities are required, Sigrity Aurora provides in-design analysis directly in the PCB canvas for crosstalk, reflection, IR drop, return path, and power inductance.

