During the design process, the schematic will go through multiple revisions to accommodate:
- Component changes to reduce costs and improve profits
- Replacement of obsolete or unavailable components
- Design reviews
- Reuse of IP for new product iterations
Keeping track of these changes is critical; however, relying on notes and manual methods for change identification and tracking is error-prone and timely. OrCAD X Capture allows you to quickly compare schematic designs and find differences between revisions with Design Compare functionality.
This quick how-to will provide step-by-step instructions on how to compare schematic designs in OrCAD X Capture.
To follow along, download the provided files above the table of contents.
To learn how to compare PCB designs with the OrCAD Productivity Toolbox, see our how-to here.
How-To Video
 Open in New Window
Defining a Comparison
Step 1: Open OrCAD X Capture.
Step 2: Select Tools > Compare Designs from the menu.
Step 3: The Design Difference window opens. Here you can specify the designs to compare and the type of output. Select the ellipsis for Design 1 to choose the first design.
Note: If you have a design loaded in the schematic canvas when you activate the Design Difference window, the loaded design is automatically chosen as Design 1.
Step 4: Browse to the provided HDMI_DAC_V1.DSN file, select the file, and click Open.
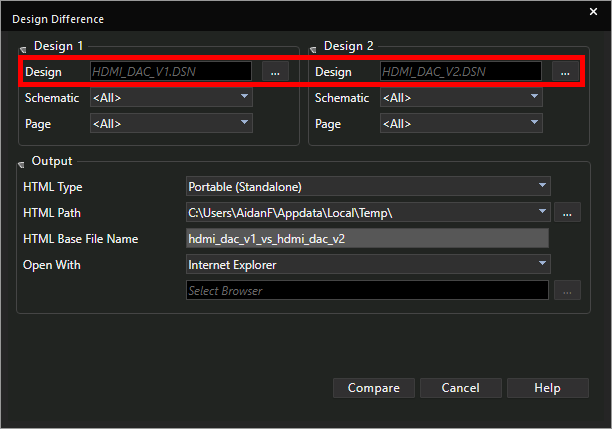
Step 5: Select the ellipsis for Design 2. Browse to the provided HDMI_DAC_V2.DSN file, select it, and click Open.
Defining the Comparison Output
Step 6: The comparison is output as a local HTML file. For the HTML Type, select Portable (standalone).
Note: This will output a portable HTML file which can be launched from any machine. The lightweight HTML requires the Cadence hierarchy on the machine it is loaded on but takes up less space.
Step 7: Select the ellipsis for HTML Path. Browse to the working directory and click Select Folder.
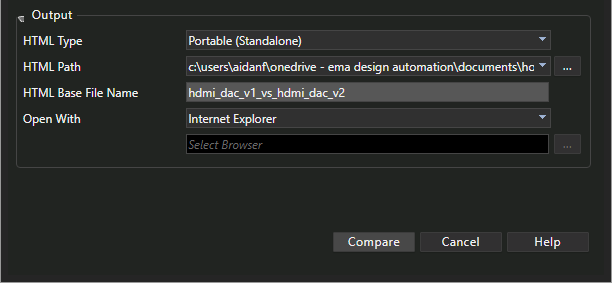
Step 8: The browser to open the HTML with and the file name can also be defined here. Leave those settings as the defaults and click Compare to generate the file.
Compare Schematic Designs in OrCAD X

Step 9: The Design Difference Summary window opens. The differences are divided into:
- Logical differences, including components and nets
- All differences, showing the total number of design differences
The bottom of the window shows general information such as the design file paths, the schematics and pages compared, and the output type.
Click Show Details under All Differences to view the details in a Web browser.
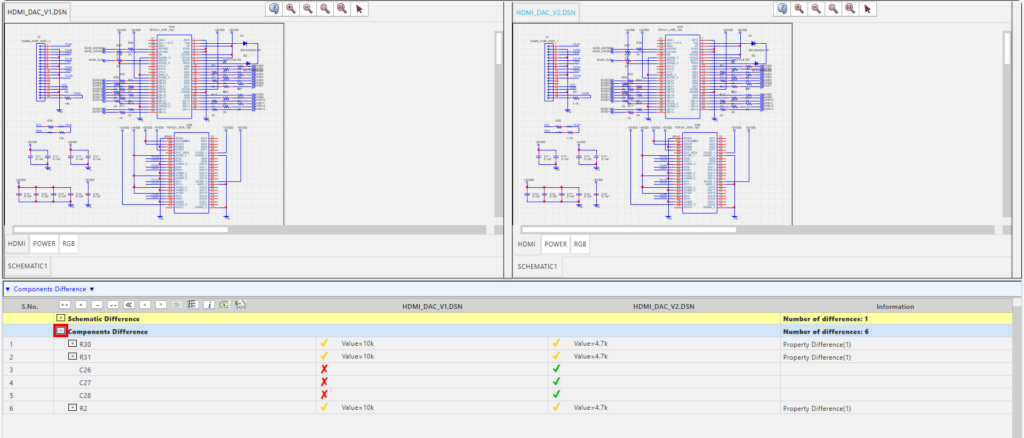
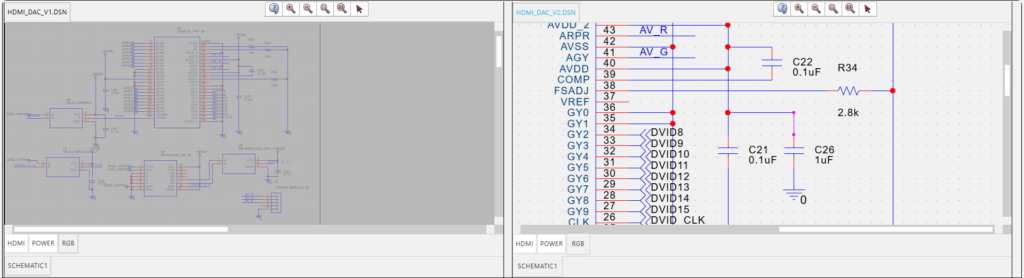
Step 10: A Web browser opens to show both versions of the design with V1 on the left and V2 on the right. Expand the Components Difference table below the schematics to view specific differences.

Step 11: View the Components Difference table. The table shows that the values of three resistors were changed and three capacitors were added to the design.
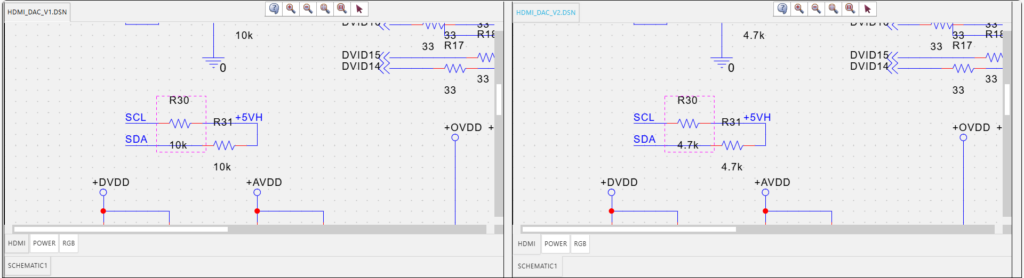
Step 12: Double-click one of the resistors. Both schematic views pan to the resistor, which is highlighted. Note the different value between V1 and V2.
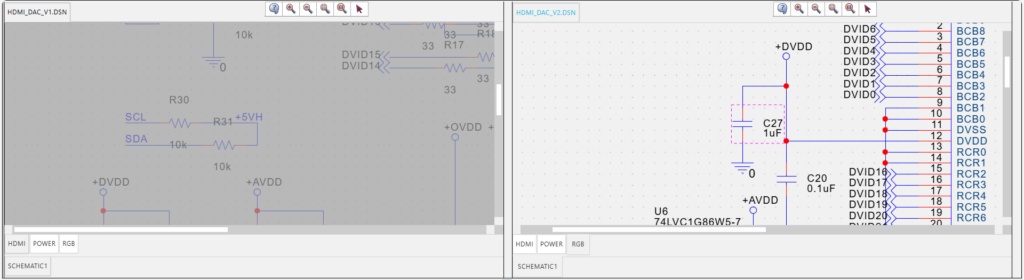
Step 13: Double-click one of the capacitors. Schematic view V2 pans to the location of the component, but not V1, as the component does not exist in V1. The window for V1 is grayed out.
Step 14: Expand Schematic Differences > SCHEMATIC1 > Page Difference in the table.
Step 15: Expand RGB > Wires Difference to view wiring differences between the two schematics.
Step 16: View the difference list. Wires were added to the +AVDD, +DVDD, and ground (0) nets.
Step 17: Double-click a wire to be brought to its location on the schematic canvas. As before, the difference only shows in the V2 schematic on the right.
Exporting the Comparison Table

Step 18: The comparison table can be exported as an HTML document or Excel spreadsheet. To export an Excel spreadsheet, select Export to Excel at the top of the table.
Step 19: Browse to a location to save the spreadsheet file and click Save.
Note: Download procedure will vary by browser.
Step 20: Open File Explorer and browse to the saved Excel file.
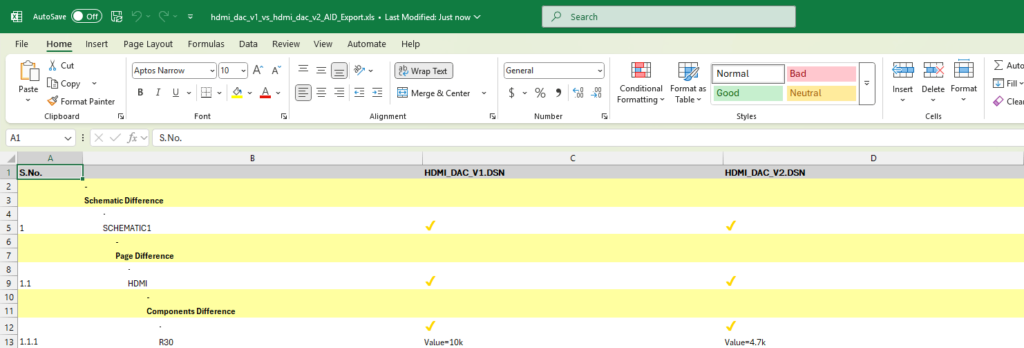
Step 21: Open the file in Microsoft Excel. The difference table is shown as a local spreadsheet file.
Wrap Up & Next Steps
Quickly and easily compare schematic designs to ensure quickly identify design changes, accelerate the design review process, and track schematic modifications with Design Compare in OrCAD X Capture. Test out this feature and more with a free trial of OrCAD. Want to learn more about Capture? Get access to free how-tos, courses, and walk-throughs at EMA Academy.

