While the number of design translations should be mitigated due to the possibility of errors, sometimes it is unavoidable if:
- Collaborating with team members and contract manufacturers
- Migrating design tools
- Utilizing reference designs
- Leveraging previously developed intellectual property (IP)
Easily import an Altium schematic into OrCAD X Capture to reuse existing data and accelerate your schematic design with the included import wizard.
This quick how-to will provide step-by-step instructions on how to import an Altium schematic into OrCAD with the Altium translator in OrCAD X Capture.
To learn how to import an Altium PCB file into OrCAD X Presto, see our how-to here.
To follow along, download the provided files above the table of contents.
How-To Video
 Open in New Window
Import an Altium Schematic into OrCAD X Capture
Step 1: Open OrCAD X Capture.
Step 2: Select File > Import > Altium Schematic Translator from the menu.
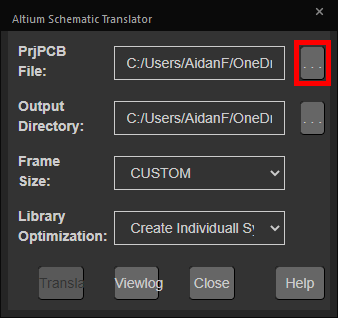
Step 3: The Altium Schematic Translator window opens. Here you can define the Altium project to open, the output directory, the frame size, and how to handle the library. Select the ellipsis for PrjPCB File to define the Altium file.
Step 4: Browse to the provided ADC16V130EB.PrjPcb file, select the file, and click Open.
Step 5: Select the ellipsis for Output Directory.
Step 6: Browse to the working directory. Select the folder and choose Select Folder.
Step 7: Leave the other settings as the defaults and click Translate to start the translation.

Step 8: When translation finishes, a prompt appears, stating where the design file was saved. Click OK.
Step 9: Select Viewlog in the Altium Schematic Translator to view the log file.

Step 10: The log file opens in the default text editor. If any errors occurred during the import, they will be listed here. Close the log file.
Step 11: Click Close to close the translator.
Creating a Project File
Step 12: The Altium Schematic Translator creates a DSN file, the OPJ project file must be created separately. Select File > Open > Design from the menu.
Step 13: Browse to the generated design file. Select the file and click Open.
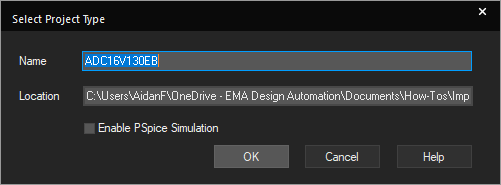
Step 14: A window opens to define the project location and name. By default, the project takes the same name and location as the design file. Click OK to generate and open the project file.
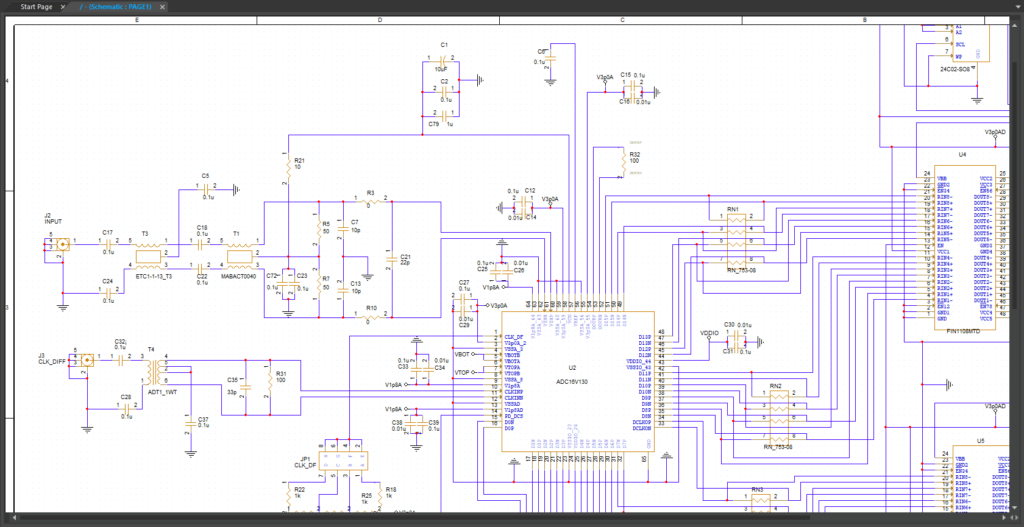
Step 15: Double-click PAGE1 under Schematic in the project manager to open the schematic. The Altium file has been translated and imported.
Wrap Up & Next Steps
Quickly and easily import an Altium schematic into OrCAD X Capture with the Altium translator to accelerate design migrations. Test out this feature and more with a free trial of OrCAD. Want to learn more about Capture? Get access to free how-tos, courses, and walk-throughs at EMA Academy.

